Niña
​nin-ya
  • About Me
    • Contact Me
    • Tourettes
    • Geeeetar Playin'
  • My Life
  • Travel Bug-a-boo
  • Fave Recipes
    • Photo Gallery
  • Picture the Taste
  • Bright Ideas
  • Reviews
  • About Me
    • Contact Me
    • Tourettes
    • Geeeetar Playin'
  • My Life
  • Travel Bug-a-boo
  • Fave Recipes
    • Photo Gallery
  • Picture the Taste
  • Bright Ideas
  • Reviews
Niña
​nin-ya

NIÑA ​ANINIAS

SHOP. COOK. EAT.
REPEAT.

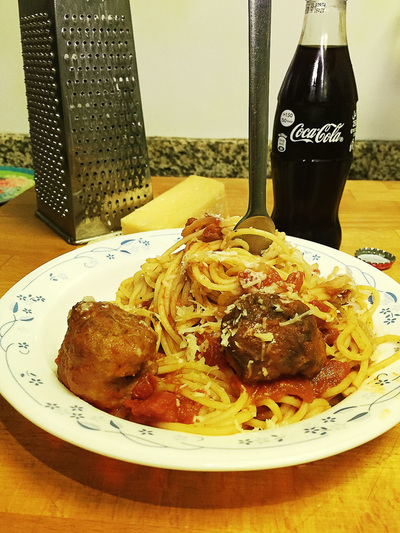
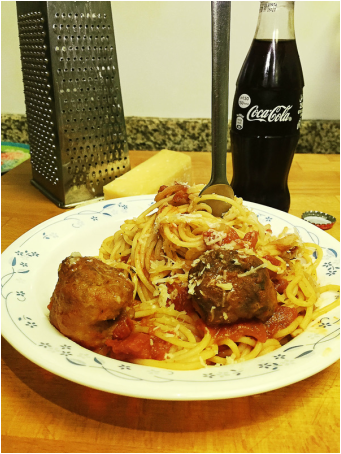
Spaghetti with Meatballs

2/20/2016

0 Comments

 
Picture
​Where should I start? Meatballs, as simple as it is, it's one of those dishes that I have a love-hate relationship with. 

I tried to make meatballs possibly two times and both were not good ones. Consistency was good but the seasoning part is where I always make a mistake. Unfortunately, meatballs, like burger patties, you won't really know if you did the seasoning right, until it's cooked. I guess you can still salvaged it but for avid cooks like me, that's just masking the error. At the end of the day, it still means the seasoning was not done right.

This time around, I was able to do it right, well at least half way. I tell you why it was half way. I bought a ready-to-cook Italian sausage. Just because in Dubai, Italian ground sausage somehow is not easy to find. I had to improvised. That being said, it still means I had to play around with the seasoning because the Italian sausage that I got is already seasoned and I have to mix it with an unseasoned ground beef. So it was still a success, albeit half way.

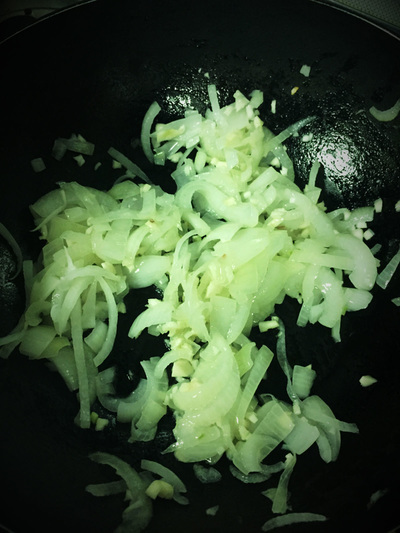
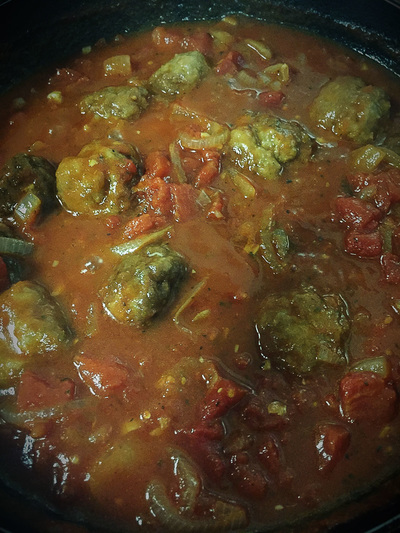
Tip 1: This is exactly how my meaty meat sauce was done, without the meat since this has meatballs
Tip 2: If you have a sauce that your family particularly like, you can just add the meatballs part to up the ante
Tip 3: Get your kiddos involved. Sure there will be funny shapes, it won't be uniform but you and they will have fun.

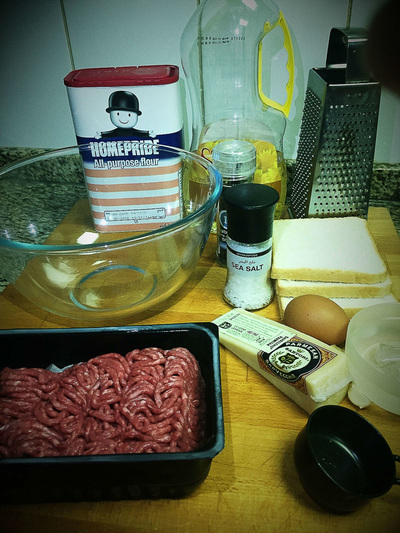
Ingredients for the meatballs:
3 slices white bread, crusts removed and diced
2/3 cup cold water
1 lb ground beef
1 lb ready to cook Spicy Italian Sausage (taken out from casings)
1/4 cup grated parmegiano regiano
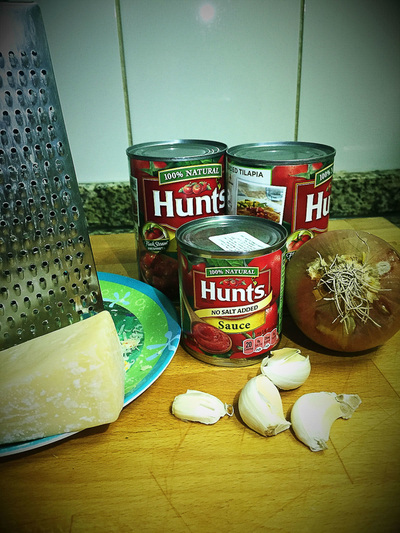
6 cloves garlic, minced finely
1 teaspoon sea salt
1/2 teaspoon black pepper
1-2 tablespoons white sugar (depending on your preference)
1 large egg
3/4 cup all-purpose flour to dredge meatballs
Light olive oil to saute

Ingredients for the sauce
2 tbsp butter
2 tbsp cooking oil
1 large onion, diced
5 cloves garlic, minced
1 medium green capsicum, diced
2 (6-ounce) cans tomato paste
2 (8-ounce) cans tomato sauce
1 (14 1/2 ounce) can stewed tomatoes
​1 tbsp Italian Seasoning (ready made or make your own)
1 tbsp Worcestershire sauce
1 tbsp sugar (to cut the acidity, especially good with young eaters, but if they are very much into the authentic Italian sauce, no need to add sugar)
1 teaspoon salt
1 cup water

Instruction for the meatballs:
​1. Place bread pieces in a small bowl, add cold water and soak for at least 5 minutes then mashed with fork
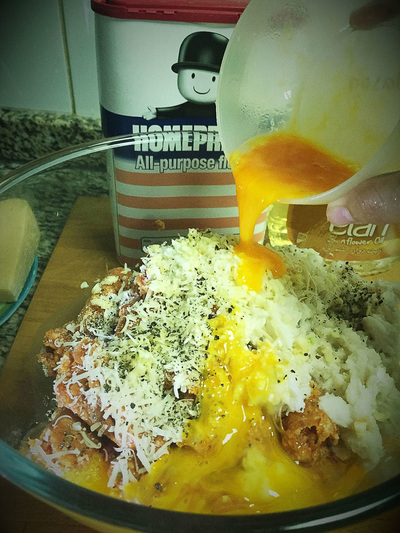
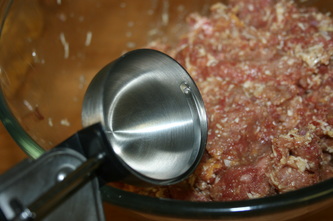
2. In large mixing bowl, add beef, pork sausage, parmegiano regiano, garlic, salt, pepper, sugar, egg and mashed bread. Mix until well combined.
3. Form into 1 inch meatballs (about half a scoop of ice cream), but if you want big meatballs, oh please go big by all means!
4. Dredge/roll meatballs in flour, dust off excess flour
5. Heat a large skillet over medium heat with 3-4 tablespoons olive oil.
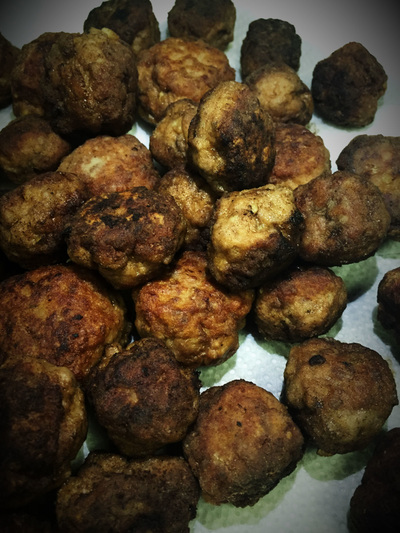
6. Add meatballs in batches without crowding the pan. Saute until brown on all sides (turn every minute). Don't worry about not cooking the them through, it will be cooked fully when it's added to the sauce.
7. Set aside

At this point, if you followed the size of my meatballs, it should actually be cooked through by this time. The one you should worry about are your kids stealing them before you are able to make the sauce. 

Instruction for the sauce:
1. In the same pan, saute onion and capsicum in butter and oil, until onion is tender, about 5 minutes. Add garlic and saute 30 more seconds.
3. Add tomato paste, sauce and stewed tomatoes, seasonings and water.
4. Simmer for 15 minutes. 
5. Add the meatballs
6. ​Simmer for another 15 minutes.


I have to confess, because I made small meatballs, I did not add them all into the sauce (thinking I will make more sauce later on). The problem with that was, my kids ate the ones not in the sauce when I went to work. Apparently, according to my nanny, they ate it with rice and were even fighting over it. 

That for me is a clear translation of success.

Happy Eating!!!
0 Comments

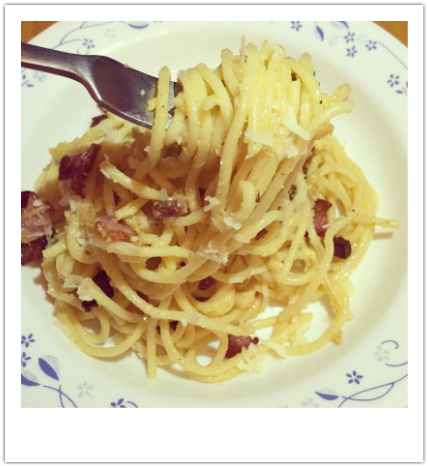
Carbonara 1-2-3-4-5

1/25/2016

0 Comments

 
Picture
I'm not kidding, it is as easy as counting up to 5!

Tip 1: I love panchetta and I usually add them to any dish that calls for bacon, or just to up the ante for any stir fry veggie
Tip 2: Please only use the real deal parmigiano reggiano. I will not recommend using a substitute or the powdered in a bottle one. I have made a mistake of buying one before, never again.
Tip 3: Have everything ready. Mis-en-place you all! I might be an organised chaos lady but I usually have my ingredients arranged according to its order of use.
Tip 4: Cut the ingredients in half if there's only 4 of you. We're only 5 but my Jason eats for 3. No lying, he ate 3 plateful of this for dinner and even had the left over for lunch the next day.

Ingredients: 
500 grams spaghetti
4 eggs
1 1/2 cups grated Parmigiano Reggiano
4 slices of streaky bacon, diced
154 grams of panchetta (small pack)
8 garlic cloves
Freshly ground black pepper
​Salt

Serves 8


Instructions:
Cook pasta as per package instructions. Drain and reserve a cup of pasta water.

In a medium size bowl, whisk eggs. Once done, add grated Parmegiano and combine with fork. 

Slowly add a tablespoon of pasta water into the egg and cheese mixture, one at a time.  2-3 tablespoons is a good ratio to bring the temperature up. This is to temper the egg and ensure it does not cook as scrambled egg later on. 

In a frying pan, fry your bacon and panchetta on its own fat. If you only have bacon, just double the amount and you are good to go. Once it's brown, depending on how cook you like your bacon bits. Fish it out of the pan and set aside.

Use the fat in the pan to fry the minced garlic. Once it becomes fragrant, add pasta.

Switch the flame off and move the pan to the unused stove top. You will finish cooking your carbonara using the residual heat. This will also ensure your egg does not get scrambled.

Slowly add the egg mixture and quickly toss pasta and egg continuously until pasta is well coated. 

Add more pasta water to achieve the sauce consistency you prefer.

Add the bacon and panchetta bits, pepper and a little bit of salt. I use my Himalayan salt to complete this dish, not too much though because panchetta is salty enough. Serve hot! 

You can add parsley, or other type of herb you feel like having.

Happy Eating!
0 Comments

Kiwi Cream Puffs or Petits Choux à la Kiwi Crème

10/9/2012

2 Comments

 
Picture
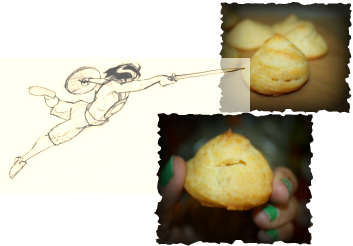
Halloween is just around the corner and this recipe is perfect!

I have made petits choux before but not this traditional one, it was an updated one with AcousticChef stamped all over it. A combination of hot and cold filling with a crunchy casing.

BUT of course this traditional recipe is a right of passage and to be honest, it tasted equally great as my experiment.

Tip 1: Practice makes perfect, once you find the right piping tip and the right size of piping, it'll be so easy the next time around.
Tip 2: You can use your hand mixer and bowl if stand alone is not available. If that's not available too, a wooden spoon will also do the trick though for sure you'll have bigger biceps after :)
Tip 3: If you have no piping bag and tip, use a ziploc bag and cut the tip or plop a heap of batter using a teaspoon.
Tip 4: You can make your puffs as small or as big as you want but the bigger the size, the longer it will take to bake.
Tip 5: Don't go greedy and eat all the pastry before it's filled!

Pastry Ingredients:

2 cups water
1 cup unsalted butter
2 cup all purpose flour
1/2 teaspoon salt
8 large eggs

Kiwi Cream Filling Ingredients
1 cup sugar
1/2 cup flour
1/4 teaspoon salt
2 cups milk
2 pureed Zespiri Kiwi
4 egg yolks
1 greed Wilton food colouring (no taste)
3 tablespoons unsalted butter
1 teaspoon vanilla or in my case, pinch of vanilla powder

Makes 72 decent sized petits choux

Preheat the oven to 400F and line your baking sheets with parchment paper.

To make the creme:

Combine pureed kiwi and milk. Set aside.

In a decent size saucepan, over medium heat, combine sugar, flour and salt. Pour milk mixture in a slow stream while continuously stirring the flour. Mixture will become thick.

Turn the heat down, stir for another 3 minutes then remove from heat. In a mixing bowl, place the egg yolks and slowly pour a slightly hot milk mixture while whisking continuously so that the egg doesn't scramble. Once fully combined, return the mixture to the pan.

Gently bring to a boil and let it bubble for 2 minutes. Add a tiny teeny drop of your green food colouring. Finish it off with butter and vanilla. 

Transfer the mixture to a shallow bowl to cool. To prevent a skin from forming, position your cling film or plastic wrap right on top of the cream. Refrigerate until cold.
To make pàte à choux or puffs
In a small bowl, combine flour and salt.

In a medium size saucepan, bring water to a boil. Add butter and let it melt. Add flour mixture and stir vigorously. Continue stirring until mixture forms a ball and no longer separate. Cool pan slightly off the heat.

Transfer the dough to your stand alone mixer's bowl (like KitchenAid). Using the paddle attachment, mix at slow speed. Add eggs one at a time, making sure it's blended well before adding another one. 

Transfer batter to pastry bag fitted with a medium size star tip. Pipe circles on the parchment papers, about 2-3 inches. Pipe outside in.

Leave good enough space in between piped doughs. You need that for even baking and proper air circulation. 

Bake for 20 minutes then cool them on cooling racks.
To assemble:
Picture

Cut a small slit through the puff using the tip of your knife ala samurai... hi-ya!

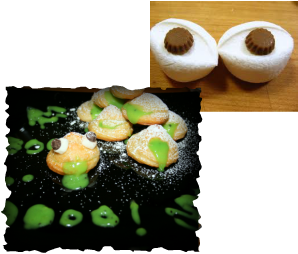
Using piping bag and star tip, or ziploc bag, transfer enough cream to the bag Squeeze enough creme inside the puffs opening until it overflows and looks like a gooey green blob is coming out of puff's mouth. 
Picture
Cut mini marshmallows in two, stick choco chip on it and position it on top of the puff. You then have an alien-looking puff drooling green blob... Dust the whole plate with icing sugar to finish it off.

Happy yummy Halloween!!!

For Yummy Creepy Crawlies Spider Cupcakes Recipe, click here.


-AcousticChef, cookin' one tune at a time!

Did you enjoy this recipe? 
Subscribe to Fave Recipes Page

Enter your email address:

Delivered by FeedBurner

2 Comments

Zespiri Kiwifruit-Glazed Meatballs

9/30/2012

2 Comments

 
Picture
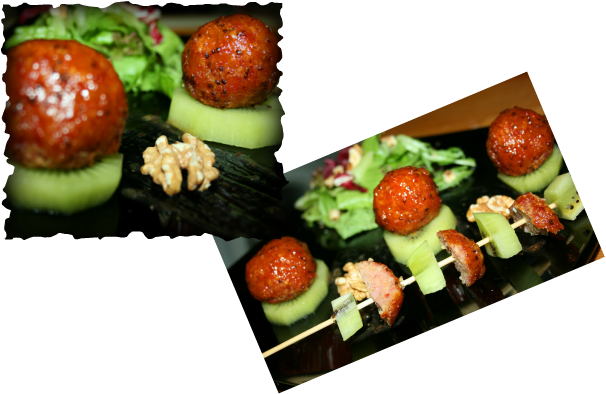
Meatballs are great on its own or as a complement to sauce but even meatballs need a little innovation from time to time.

In this dish, you can use the usual meatball recipe of ground beef, egg, bread crumbs, cheese (the same recipe as my Burger Queen) or you can do it my funky way.

Tip 1: Make sure the balls are bite size. This way, it's perfect size for salad or skewer it with kiwi ala summer kebab
Tip 2: Annatto powder is an organic red orange colouring. It doesn't affect the taste of any dish.
Tip 3: IF YOU ARE ANYTHING LIKE ME? double the glaze and serve your meatballs with a little sauceon the side.
Tip 4: Imagine how yum this glaze will taste on roasted whole chicken leg?
Tip 5: You need to balance your glaze's taste,,, it has to be sweet and sour. Kiwi doesn't come in 100% identical taste and so you need to train your taste buds to achieve that sweet and sour balance.

After making this dish again just for good measure, IT IS MY PERSONAL OPINION THAT THIS GLAZE WILL WORK BEST ON A LESS STRONG CHARACTERED MEAT LIKE A BLAND HAM OR THE USUAL MEATBALLS. Spam seemed a bit too seasoned for the glaze. When I tried it with just the glaze, it screamed for more, when I made it swim in a sauce, well, it drowned.  

So if you do make this dish, just serve it with an extra sauce on the side.


Meatball Ingredients:
1 Lite Spam (it's less sodium and less fat)
2 eggs, lightly beaten
1 cup bread crumbs
dash of pepper

Glaze Ingredients:
4 Zespiri Kiwifruit, pureed
3/4 cup brown sugar
1 teaspoon lemon juice
1 teaspoon vinegar
2 tablespoons water
1/8 teaspoon annatto powder dissolved in 2 tablespoon warm water
2 teaspoons cornstarch diluted in 4 tablespoons cold water
2 tablespoons water

Salad Ingredients:
1 Cucumber, sliced
2 cups mixed green salad
1/2 cup rocket leaves
1/2 cup to 1 cup roasted walnuts (depending on how much or how less you want it)

Glazed Direction:
Heat kiwi, sugar, lemon juice and annatto powder and water in a saucepan. Add cornstarch mixture, simmer until thick. Set aside.

Meatballs Direction:
Preheat oven to 350F.

Run spam through a food processor to resemble ground meat.

In a mixing bowl, combine spam, eggs, bread crumbs and pepper.

Line a baking sheet with aluminum foil. Form a ball by scooping 1 tablespoon of ground spam and rolling it gently through you hands. Place it on the baking sheet, giving enough space for air to move around.

Bake meatballs for 10 minutes, glaze. Do this process twice. Baking time a total of 30 minutes.

Assembling Direction:
Mix salad ingredients on a separate bowl. Place a cup of mix salad on the serving plate. Place Zespiri Kiwifruit slices on plate, top it with glaze meatballs. Brush plate with more glaze to up the ante or for additional sauce in case you want more than just a smudgeon. Serve immediately. 

You can be as creative as you want to be with this dish. Serve meatballs with the glaze as a side sauce and steam rice on the side. Serve meatballs with kiwi like a kebab, it's basically a dish that you can definitely play around.

*My kids preferred meatballs with an extra sauce on the side.
BeTcHa DiDn'T kNoW!
:) Zespiri Kiwifruit 
is an extremely rich source of Vitamin C. One Zespiri Kiwifruit a day can provide you with your daily dose of Vitamin C. It has two times the amount that oranges offer and five times nutrition than apples.
:) Zespiri Kiwifruit contains high level of Actinidin, an enzyme that helps with protein digestion
:) Zespri Kiwifruit is not just for garnishing, it is also a very good meat tenderizer so next time you  prepare beef? think kiwi.
Did you enjoy this recipe?
Subscribe to Fave Recipes Page

Enter your email address:

Delivered by FeedBurner

2 Comments

Zespiri Kiwifruit Seafood Salad with Kiwi Chili Mayo

9/30/2012

0 Comments

 
Picture
My children have a bad case of hay fever and it's definitely a condition any parent would rather wish their kids do not have especially in this place and climate. A twice a year flu season throws the whole school in chaos, I in definite panic. Most kids will recover after week with ample medicine and rest. My kids,,, not that easy.
Then I found out that kiwifruit is a rich source of Vitamin C (double the amount orange offers and 5 times the nutrition you'll get from an apple). One kiwifruit a day is enough to supplement your daily Vitamin C. Lucky for me, Zespiri kiwifruit in particular is on the sweeter side and so the possibilities are endless.

Tip 1: Re-use paperbag from fast food chains for breading. The best for coating, 100%. It absorbs extra moisture from meat which you do not want when deep frying. Leaves your to-be fried pieces perfectly coated all the time!
Tip 2: When deep frying breaded shrimp, you only need to deep fry for few seconds, once the oil bubbles starts to subside, it's time to fish them out. It will continue cooking while resting.
Tip 3:  Add more cayenne if you want your dressing spicier.
Kiwi Chili Mayo Ingredients:
1/3 cup pureed Zespiri kiwifruit
1 teaspoon soy sauce
1 1/2 tomato ketchup
1/2 tablespoon brown sugar
1/4 teaspoon cayenne pepper or 1/8 teaspoon crushed chilis
1/8 teaspoon anatto powder dissolved in 4 tablespoons WARM water
1 teaspoon cornstarch diluted in 4 teaspoons COLD water
1/2 to 1 cup mayonnaise

Salad Ingredients
4 Zespiri kiwifruit, peeled and sliced bite size (whichever you prefer)
500 grams medium sized shrimp, cleaned, deveined and cut into 3
2 eggs
1 1/2 cup bread crumbs
250 grams calamari
1/2 cup cornstarch
Dash of salt and pepper
Lettuce, shredded
Sesame seeds, toasted (for garnish)

Dressing Procedure:
Heat kiwifruit, soy sauce, ketchup, sugar, cayenne in a sauce pan. Add the anatto mixture and cornstarch mixture to the saucepan and simmer until thick. Take off from the heat and let it cool down. Add kiwifruit mixture to mayonnaise, mix thoroughly. Set aside.
Deep-fried  Seafood:
Dip shrimp pieces in egg then drop to bread crumbs. Deep fry for a few seconds, drain excess oil on kitchen towel, set aside.

Dry excess water on calamari rings. Add cornstarch, salt and pepper. Toss until well coated. Deep fry for a minute, drain excess oil on kitchen towel, set aside.
Assembling Procedure:

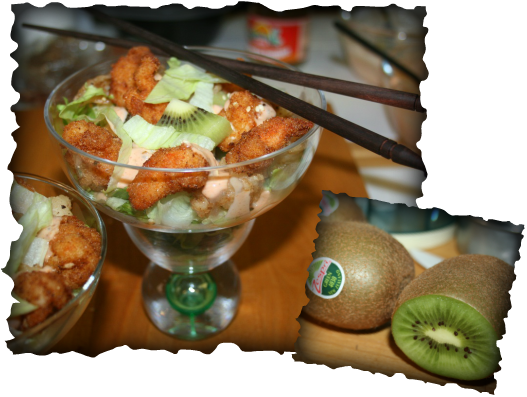
Add lettuce on serving bowl. Top with mixed calamari, shrimp and Zespiri Kiwifruit pieces. Drizzle with Kiwi Chili Mayo.

Serve immediately!

Happy Eating!!!
BETCHAdidn'tKNOW *Zespiri Kiwifruit also contains high levels of Actinidin, an enzyme that helps with protein digestion and aside from a steak garnish, kiwifruit can also be used as a natural meat tendrizer. :)
0 Comments

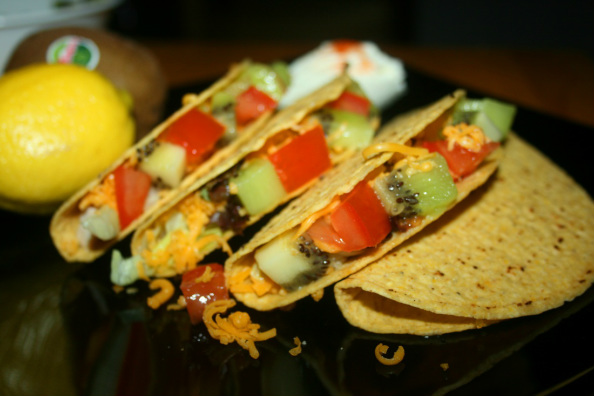
Leftover Chicken and Zespiri Kiwifruit Taco

9/29/2012

2 Comments

 
Picture
Taco is practically a mahoosive nachos with feast filling that is really up to you. I love it!

This is my version with Zespiri Kiwifruit flair. Perfect for that summer heat which is practically all year round where I am at :P

Ingredients:
1 cup leftover roasted chicken, sliced into strips
1 cup shredded lettuce
1 tomatoes, diced
1 Zespiri kiwifruit, diced
6 jalapeno slices, chopped
3 taco shells (heated as per box direction)
1/2 cup grated mozarella cheese

Directions:
Rain a little salt and pepper on chicken. Toss kiwifruit and tomatoes with 1 teaspoon lemon juice.

Arrange chicken at the bottom of each taco. Add shredded lettuce and few jalapeno pieces according to your taste.

Add cheddar then top it with combined kiwifruit and tomatoes.

Serve on a plate with a scoop of sour cream with a good dashing of cayenne pepper.

Happy Eating!
BeTcHa DiDn'T kNoW!
:) Zespiri Kiwifruit
is an extremely rich source of Vitamin C. One Zespiri Kiwifruit a day can provide you with your daily dose of Vitamin C. It has two times the amount that oranges offer and five times nutrition than apples.
:) Zespiri Kiwifruit contains high level of Actinidin, an enzyme thathelps with protein digestion
:) Zespri Kiwifruit is not just for garnishing, it is also a very good meat tenderizer so next time you  prepare beef? think kiwi
2 Comments

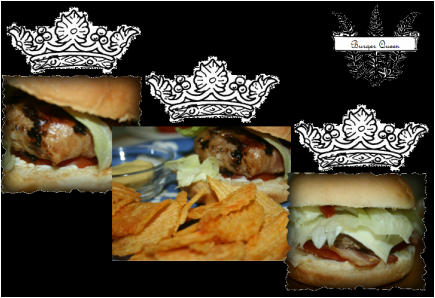
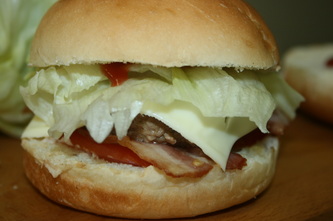
Burger Queen

8/28/2012

0 Comments

 
Picture
I love burgers... who doesn't right?

I'll eat any priced burger, from MickeyD's to gourmet... I love 'em. I mean yes, MickeyD's tastes like a monotonous cardboard paper but i still eat them as if it's the yummiest food of all and it's the end of the world tomorrow.

Don't be fooled though. I actually have a pretty good palate but there is something so addictive (at least to me) about junk food. Not sure if it's the french fries that comes with every meal that makes me come back at least once a month (I'm trying to be modest here... gimme a break!). Or, it's my kids' once a month treat to a happy meal (again, this is me finding an excuse for MickeyD's trip).

As you know, I'm also a huge fan of Shake Shack and their witchcraft brews. Dining there is an indulgence I really must have every so often.

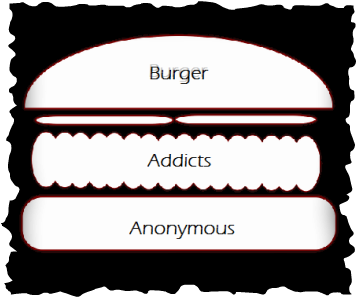
So you see, burgers is somewhat an addiction. I should probably come up with a group... I'm sure I'm not the only one.
Picture


I swear I've eaten burgers from different places, from the cheapest (talk about Burger Machine! that's to anyone who knows about it), to the random food chains that has response time like a 911 call to the really expensive ones and I mean expensive. I feel like, in addition to my quest to find the best joints for beef carpaccio...  the hunt for the juicy burgers in town is piggy-backing on my carpaccio journey. 

It's also just in the last five years that I began to understand that burgers or beef are best served medium rare (or if you can stomach it, rare!) The science behind the overheating of these precious jewels make muscles constrict, thereby makes them tougher. Oh boohoo! I won't bore you with the theoretical background of parts and cooking methods... let's go back to the essence of this whole musing, Burger at its best.

Well, fine, I'm sure I can still outdo myself... knowing my appetite for beating my own record. But for now, this recipe will give you a layer after layer of taste that is simply comforting without that big hoo-ha and sweat and not to mention the gajillions of ingredients that comfort mood normally requires.

So here it goes... get your pen and paper, boys and girls ... I can see you're not moving... yes... you can do that too... saving this page into your favourites for easy browsing.. of course that's a much better option,,, you tech-savvy-you!
Tip 1: If you want a full blown beef patty, of course be my guest. I made it a mix beef and pork just because pork sustains more moisture ... but if you don't want a hybrid, all beef patty is obviously another way to go.
Tip 2: Do not be cheese-happy. I got carried away the second time around that I think I added more cheese than what's required. It taste awesome but of course it was a pain cleaning the grill (not that I was the one who cleaned it up :) )


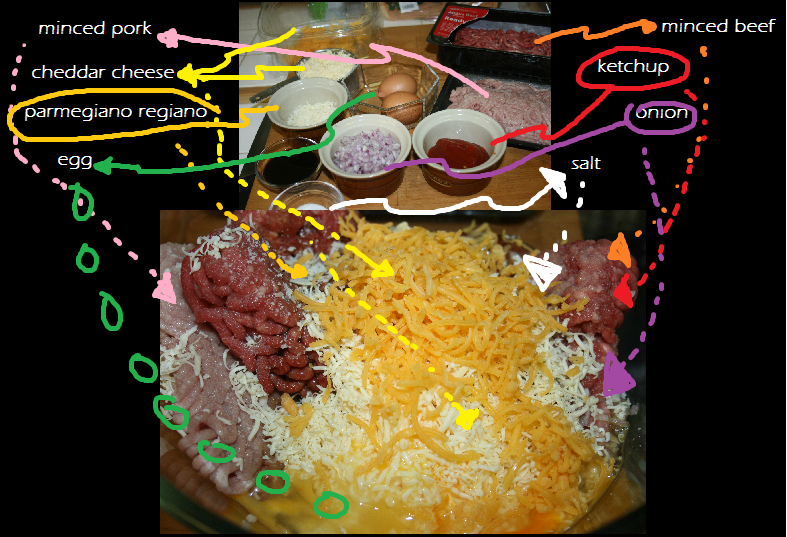
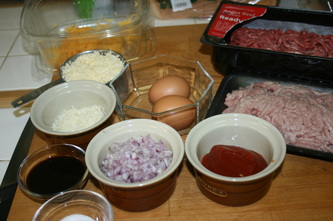
Ingredients for patties:

1 cup of cheddar cheese, shredded
2 tablespoons Parmegiano Regiano, grated
1 medium onion, minced
1 eggs
2 tablespoons ketchup
2 tablespoons Worcestershire sauce
1 teaspoon salt
1/4 teaspoon pepper
1/2 kilo beef, minced
1/2 kilo pork, minced

Additional Ingredients for assembling
12 Kraft Singles cheese
12 bacon slices
3 buffalo tomatoes, sliced
Lettuce leaves 
Sauteed mushroom slices (optional)
12 burger buns
 I have to warn you, the procedure is so complex that you're gonna need to be uber smart like me to make it... like seriously...
Picture
Picture
Picture
Procedure:
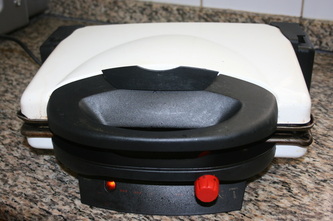
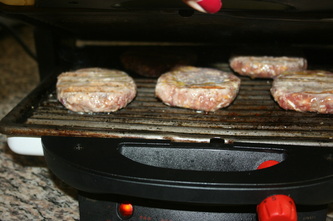
For Grill, pre-heat it to high heat.
For Pan fried, pre-heat it to high heat.

See at how difficult it is? :P

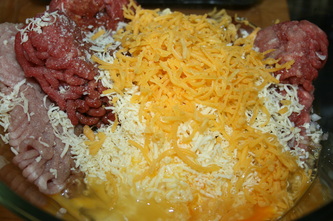
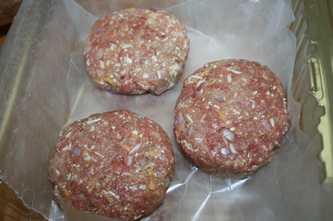
In a large bowl, mix all the ingredients for patties. I know right, really difficult.

Anywho. Let's go back. Using an ice cream scooper or a huge spoon, equally divide around 12 portions. 

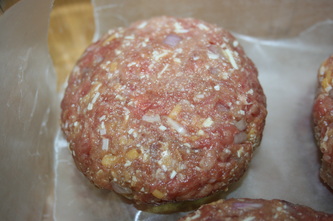
With your hands, form a ball then flatten them to make a decent thickness of patty.

Place patties on the grill or fry them in the pan. Cook for 5 minutes per side if you want it well done or less if you're like me. On the last few seconds of cooking on the other side of the patty, place a slice of cheese to melt. Take it off and rest patties on the side.

If you're using a grill then, cook your bacon alongside your patties. Obviously it cooks quicker than the patty so take off as soon as you got your preferred doneness or crispiness.

Heat your bun on the same grill. Then yes, take it off after a few seconds, otherwise it'll be burn baby burn and you don't want that.

To assemble:
Again, very hard.

Carefully spread mayonnaise on each side... oh don't listen to me... slather them up! Squirt a little tomato ketchup on the top bun, yes I did say squirt. It's more fun than spreading.

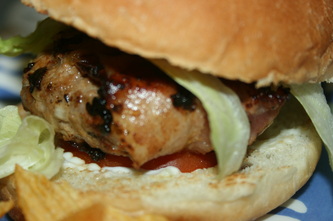
Place 2 slices of tomatoes on the bottom bun. Top it with your uber mouth watering patty with melted cheese on top. Place two bacon halves. Add lettuce leaves and few sauteed mushroom. For the grand finale, place the top bun, tomato ketchup side down and voila!

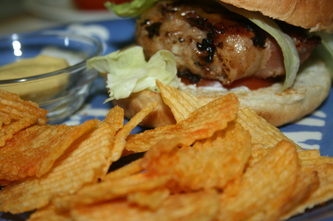
A delectable creation that will tantalize your taste buds. I like to serve it with mustard on the side and because I'm a glutton, I also like olives, artichokes, sundried tomatoes on the side... or chips... or crisps... or cornicorns... or, fine! anything on the side will do, utensils, chinaware, anything!

Eat this with a fizzy drink like a soda or an ice cold beer and I tell you... it'll be your go-to comfort food from time to time.

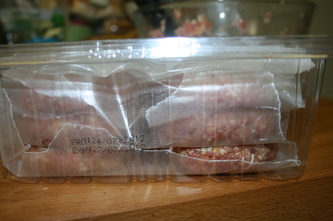
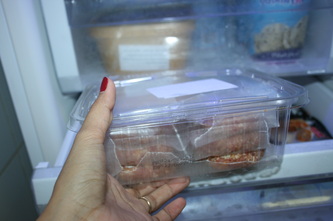
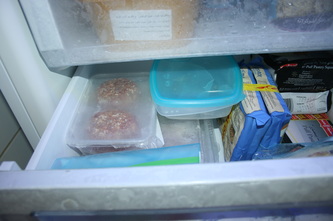
And if you have extras? keep them in a freezer in a sealed container... grill it next time.
0 Comments

Tender Stem Broccoli in Oyster Sauce

7/20/2012

0 Comments

 
Picture
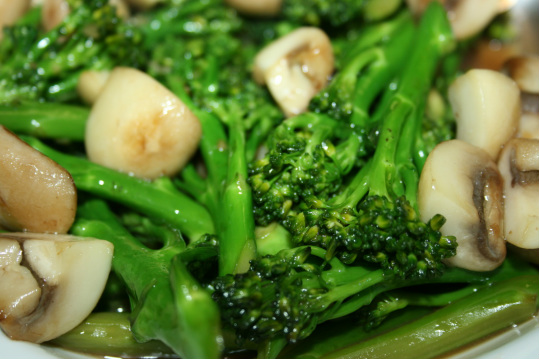
I have always been curious about tender stem broccoli. Always imagined how crispy and tasty it would be to cook it but at the same time have no clue how to go about it.

Of all the years (which is pretty short :) ) that I've been cooking, variations of stir fry has always been my go-to when I have no clue how to handle veggies.

So I thought, oyster sauce, garlic, hot wok... what could go wrong? Seems like nothing! :) It was delicious!

Yes it's not cheap. Definitely double than a full blown broccoli but it's worth it. Perfect side dish for most main.

Ingredients:
knob of butter
1 teaspoon olive oil
3 cloves of garlic, minced
2 packs of tender broccoli
1/2 cup oyster sauce
1 teaspoon sesame oil
sauteed button mushrooms (optional)

Procedure:

Cut off ends of tender stems and using a peeler, shave off tough parts of broccoli'

Chop florets and stems. Setting aside florets for the time being.

Heat olive oil for a few seconds and then add butter to melt.

Add garlic bits and fry until it's aromatic but not burnt.

Add chopped stems and stir fry for 3 minutes or just until it's almost half cooked. Add the florets and stir fry for another 3 minutes. Add oyster sauce and stir fry for another minutes.

Turn off the heat and add sesame oil. Leave broccoli on the pan to cook more in residual heat. Add sauteed mushrooms if you want.
0 Comments

Waffles

7/15/2012

0 Comments

 
Picture
This is not really a new recipe but a variety of my pancake heaven recipe.

Perfect for snacks or kid's (and adult's) lunch box.

Ingredients:
Pancake Heaven Recipe
Nutella
Hotdog slices

Procedure:
Mix pancake as per the recipe

Chocolate sandwich
Fill in half of the waffle crevices. Lift off cooked waffles. Generously spread nutella and place other half on top. Secure with toothpick.

Hotdog waffles
Place hotdog slice on crevice. Fill remaining space with pancake mixture. Lift carefully and voila, you have waffles with hotdog peeking out.

Enjoy!
0 Comments

Stuffed-crust Deep-dish Pizza

5/5/2012

0 Comments

 
Picture
Who doesn't love pizza? It's one of Italian's best gifts to humanity... it's soooo comforting, it's so delicious that it can make any day so much better after a slice or two. Have it with an ice cold beer, have it with wine, soda or just plain water... either way, you know you'll enjoy the meal.

I've been eating pizza for as long as I can remember. The first one being Shakey's, then some local company, then as Shakey's popularity faded out.. it's time to turn to Pizza Hut for much needed comfort. Every now and again, I crave for gourmet pizza where unique toppings are the star.. guess it won't be the case now... I can make my own gourmet pizza!

I always thought making pizza will be easy ... didn't think it'll be super easy.

This dough is sooo good that I plan to use it in sausage rolls, garlic breads and other goody adventures.

The only tip is: have fun and be as creative as your taste buds wish you to be!

Dough Ingredients:
2 1/4 teaspoon active dry yeast
3/4 cup warm water (blood temperature, perfect to cultivate the yeast, too hot or cold and yeast will die)
1 teaspoon sugar
1/4 cup vegetable oil
2 1/2 cups all purpose flour
1 1/2 teaspoons salt
1 teaspoon olive oil
+sausage or cheese strips for stuffing if you like stuffed crust

Toppings
Bottled Pizza Sauce
----or make your own if you really want to, 1 1/2 cups ground tomatoes, 1 tsp dried oregano, 1 tsp dried basil, and 2 tblspns grated Romano cheese, combine all ingredients
Mozarella Cheese, sliced thinly
Pepperoni
Canned artichokes
Sauteed mushroom
Sauteed minced beef
Pineapple bits
Sliced olives
Parmegiano Regiano
Pepper flakes
add whatever you feel like eating...
++if you are adding leaves like rocket or spinach, add it on top when the pizza is done. The oven heat will wilt it and will destroy the colour and taste.

Dough Directions:
In your mixing bowl, combine the first 3 ingredients and stir for a minute. Add the vegetable oil, all purpose flour and salt. Using a wooden spoon, stir until ingredients starts to bind.

If you have a mixer, attach the paddle and use it on medium speed for a minute. Replace with a dough hook attachment and on medium speed, knead for another 3 minutes. Turn your dough out on a lightly floured surface and manually knead using the heel of your hands for another 2 minutes until pliable.

If you want to do it manually, knead the mixture for 8 minutes.

In a separate bowl, pour the olive oil. Turn your dough ball twice on oil until all surface is coated. Cover your bowl with cling wrap and let it rest for 2 hours. If you will use the dough the following day, do the mixture at night, keep the bowl overnight in the fridge, it will rise slower. Take it out one hour before cooking.

Shaping Directions: +now is the perfect time to preheat your oven to 475F.
If you want to make a deep dish pizza, don't punch the air out. Place the dough on the deep-dish pan, press and stretch the dough until it reaches the side of the pan. When cooked, the middle section of the pizza will be almost as thick as the sides.

If you want to make a biscuit-thin crust pizza, turn your dough onto a lightly floured surface. Press your fingers all over the dough (resembling a massage move). Flour your wooden rolling pin and roll out on all sides, turning the dough couple of degrees to get the even thinness. It also helps to stretch your dough by hand on every turn. Sprinkle a little bit of cornmeal on your cookie sheet or baking pan before transfering the dough. Roll your pin a bit more if there is enough space for the dough to stretch to make it super thin.

If you want a stuffed-crust, turn your dough onto a lightly floured surface. Press your fingers all over the dough (resembling a massage move). Flour your wooden rolling pin and roll out on all sides, turning the dough couple of degrees every time while also stretching the dough's sides whenever you turn it. Stop at your preferred thickness. Place your stuffing on the edge of the dough, sausage or cheese or whatever stuffing you prefer. Roll the edge inside to secure the stuffing and also create a wall. Sprinkle a little bit of cornmeal on your cookie sheet or baking pan before transfering the dough.

Assembling Directions:
Lay the mozarella slices on the dough, overlapping them to make sure you cover the surface. Spread the pizza sauce on top of the cheese. Lay on the toppings you want to munch, pepperoni, minced beef, etc. The final touch is to generously sprinkle parmegiano regiano on top. 

If you are making a stuffed-crust pizza, brush the edge with melted butter (add garlic on your butter before melting if you want it garlicky). Sprinkle parmegiano over the butter.

Cook it in pre-heated oven (475F) for 20 minutes.

Take your pizza out and rest for 3-4 minutes before slicing.

Enjoy!!!!

-AcousticChef, cookin' one tune at a time!
0 Comments
<<Previous

    Fave Recipes

    I'm No Chef but I love food like it's no one's business.

    I didn't know anything about cooking... frying an egg used to be a nightmare.. until I was forced to learn more... I had my first born... that's when my gastronomic journey started...

    Join me in my food quest.
    Laugh at my embarrassing moments.
    Share my triumphs.

    And if you're brave enough ... cook with me (ooooh scary!), virtually that is, and have the most enjoyable time!

    Welcome aboard
    fellow foodies!

    Print Friendly and PDF

    Categories

    All
    Ac Spin
    Appetizer
    Baking
    Bbq
    Beef
    Bread
    Breakfast
    Butter
    Chicken
    Dairy
    Dessert
    Drink
    Entree
    Fave
    Fondant
    Gobbledtooquicklyphotosnexttime
    Halloween
    Icing And Frosting
    Lamb
    Main Course
    Marinade
    Nibbles
    Occasions
    Pasta
    Pastry
    Pork
    Poultry
    Rice
    Salad
    Sandwich
    Sauce
    Seafood
    Side Dish
    Slow Cooker
    Smoothie
    Snacks
    Soup
    Spaghetti Challenge
    Stew
    Stock
    Tapas
    Vegetables
    Workinprogress
    Zespiri Kiwifruit

    Archives

    February 2016
    January 2016
    January 2013
    November 2012
    October 2012
    September 2012
    August 2012
    July 2012
    June 2012
    May 2012
    April 2012
    March 2012
    February 2012
    September 2011
    August 2011
    July 2011
    June 2011
    May 2011
    April 2011
    February 2011
    January 2011
    December 2010
    November 2010
    October 2010
    September 2010
    August 2010

    RSS Feed

Powered by Create your own unique website with customizable templates.