Niña
​nin-ya
  • About Me
    • Contact Me
    • Tourettes
    • Geeeetar Playin'
  • My Life
  • Travel Bug-a-boo
  • Fave Recipes
    • Photo Gallery
  • Picture the Taste
  • Bright Ideas
  • Reviews
  • About Me
    • Contact Me
    • Tourettes
    • Geeeetar Playin'
  • My Life
  • Travel Bug-a-boo
  • Fave Recipes
    • Photo Gallery
  • Picture the Taste
  • Bright Ideas
  • Reviews
Niña
​nin-ya

NIÑA ​ANINIAS

SHOP. COOK. EAT.
REPEAT.

Decadent Croissant Pudding

1/6/2013

1 Comment

 
Picture
Croissants in our house do not really go stale because my boys are huge lovers of croissants. If I buy a box of it in the morning and do not tell the boys to calm down the munching a bit... it will be gone by sundown. It's that serious.

It's not that they'll lose appetite in main meals, they're growing boys, it's just that I'm all about moderation when it comes to their meals? (I'm not saying it applies to me and hubby alright?).

Trying to make this recipe made me buy 3 boxes of croissants because every single time I want to make it stale, the bloody bread just disappears into thin air!

In the end, I told the boys to leave me at least four and they can eat everything including the box. That solved it. :P
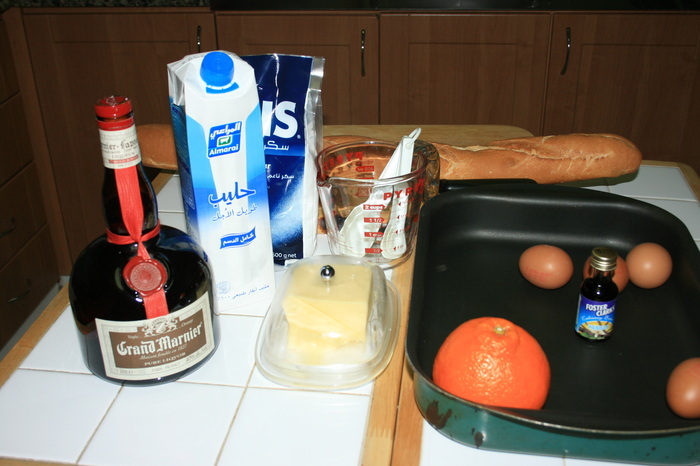
Ingredients:

4 stale croissants
1/2 cup sugar
2 tablespoons water
a drop of vinegar
1/2 cup heavy cream
2 tablespoons Bailey's Creme Caramel
1/2 cup whole milk
2 eggs, beaten

Serves 4-6 hungry diners

Preheat oven to 350F.

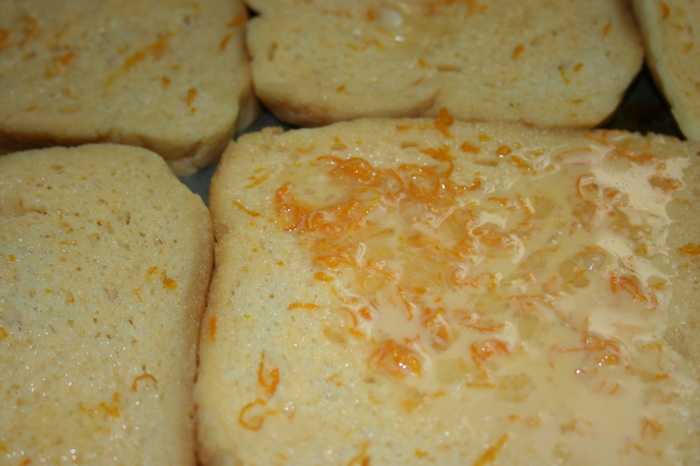
In a medium size baking dish, tear the croissants into pieces. Set aside.

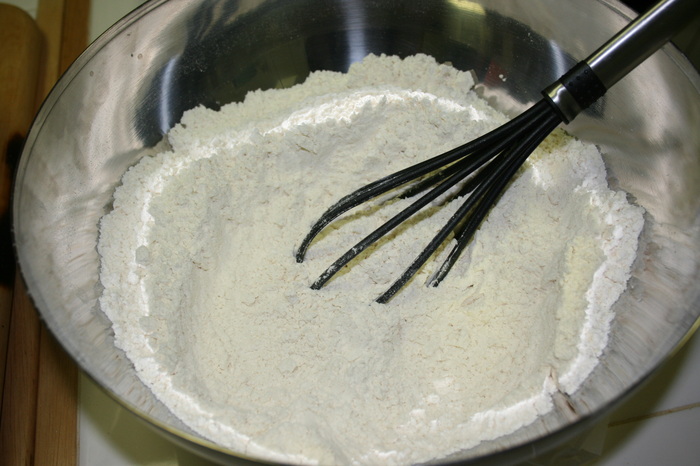
In a saucepan, put the sugar and water. Swirl the water around to wet the sugar. Place the pan in a medium high heat and let it bubble away. Add a drop of two of vinegar to avoid sugar from crystallizing. It will turn into a deep amber, about 5 minutes. DO NOT STIR and DO NOT WALK AWAY. Let the bubble caramelize on its own. 

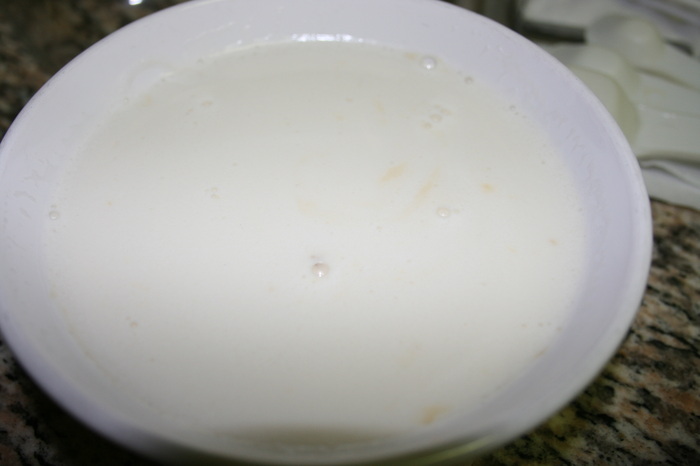
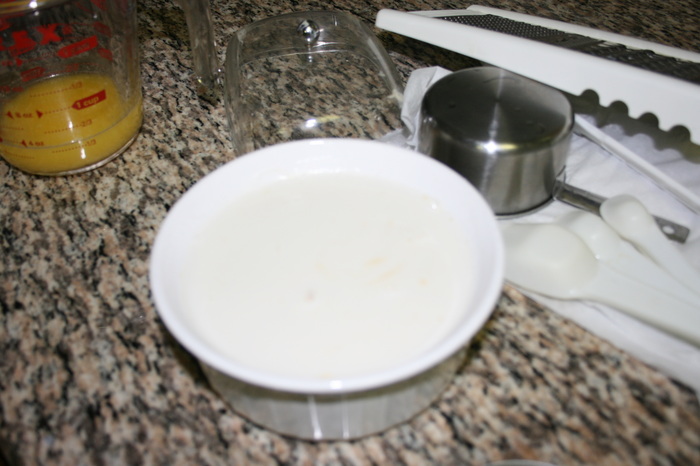
Once amber colour appears, take the pan off the heat. Whisking continuously  add the cream, Baileys, milk and beaten eggs, in that order. If the caramel seems to get stuck at the bottom of the pan, put the pan back to a low heat and continue stirring until it's fully dissolved.

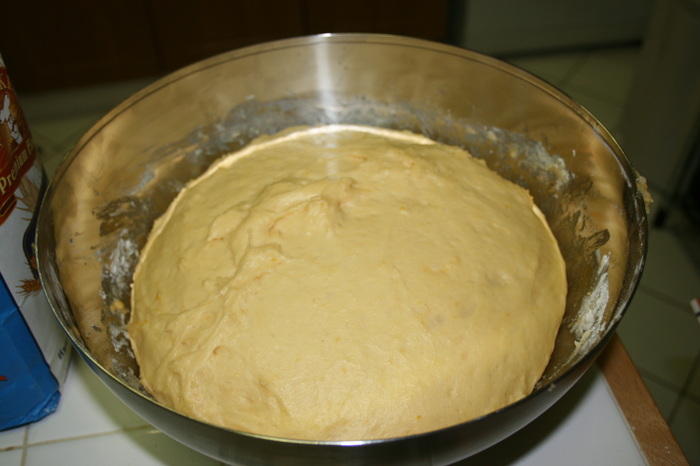
Pour the mixture all over the croissant pieces in the baking dish and leave it for 10 minutes to get absorbed.

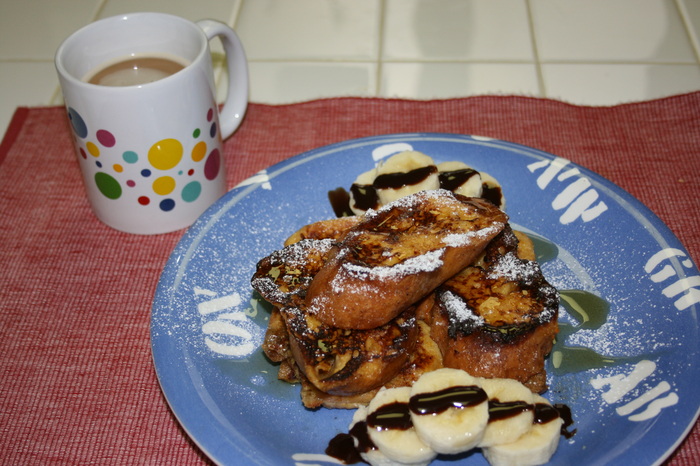
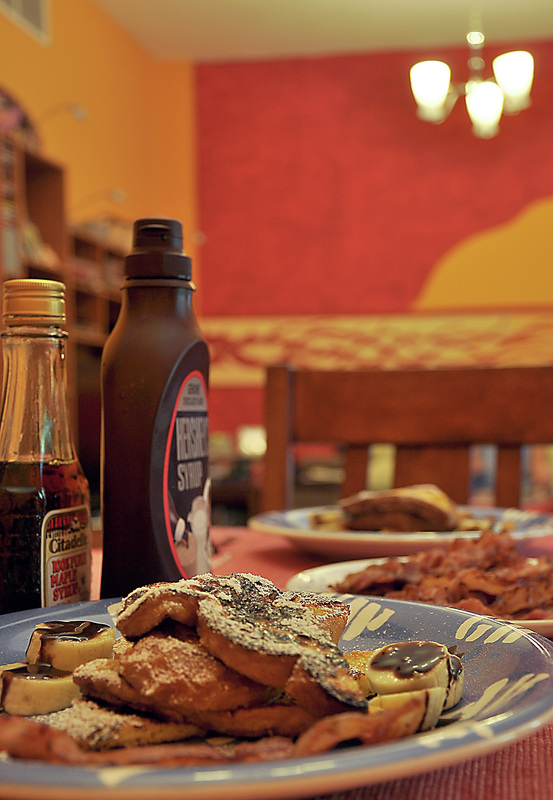
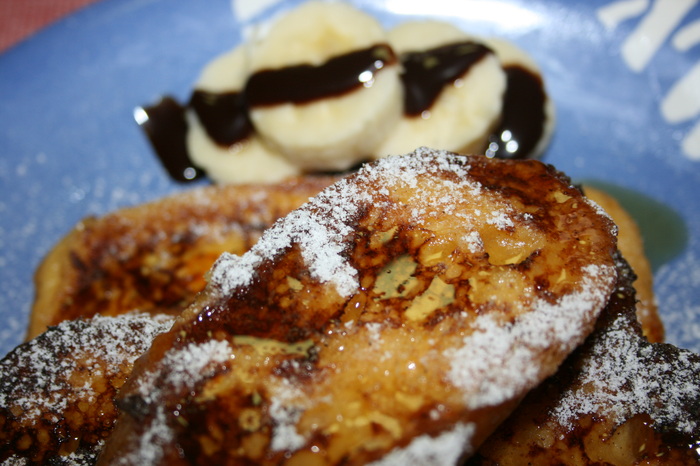
Bake for 20 minutes. Take a slice or two, add whipped cream or vanilla ice cream on the side and voila! Stale turned simply delicious.
1 Comment

Stuffed-crust Deep-dish Pizza

5/5/2012

0 Comments

 
Picture
Who doesn't love pizza? It's one of Italian's best gifts to humanity... it's soooo comforting, it's so delicious that it can make any day so much better after a slice or two. Have it with an ice cold beer, have it with wine, soda or just plain water... either way, you know you'll enjoy the meal.

I've been eating pizza for as long as I can remember. The first one being Shakey's, then some local company, then as Shakey's popularity faded out.. it's time to turn to Pizza Hut for much needed comfort. Every now and again, I crave for gourmet pizza where unique toppings are the star.. guess it won't be the case now... I can make my own gourmet pizza!

I always thought making pizza will be easy ... didn't think it'll be super easy.

This dough is sooo good that I plan to use it in sausage rolls, garlic breads and other goody adventures.

The only tip is: have fun and be as creative as your taste buds wish you to be!

Dough Ingredients:
2 1/4 teaspoon active dry yeast
3/4 cup warm water (blood temperature, perfect to cultivate the yeast, too hot or cold and yeast will die)
1 teaspoon sugar
1/4 cup vegetable oil
2 1/2 cups all purpose flour
1 1/2 teaspoons salt
1 teaspoon olive oil
+sausage or cheese strips for stuffing if you like stuffed crust

Toppings
Bottled Pizza Sauce
----or make your own if you really want to, 1 1/2 cups ground tomatoes, 1 tsp dried oregano, 1 tsp dried basil, and 2 tblspns grated Romano cheese, combine all ingredients
Mozarella Cheese, sliced thinly
Pepperoni
Canned artichokes
Sauteed mushroom
Sauteed minced beef
Pineapple bits
Sliced olives
Parmegiano Regiano
Pepper flakes
add whatever you feel like eating...
++if you are adding leaves like rocket or spinach, add it on top when the pizza is done. The oven heat will wilt it and will destroy the colour and taste.

Dough Directions:
In your mixing bowl, combine the first 3 ingredients and stir for a minute. Add the vegetable oil, all purpose flour and salt. Using a wooden spoon, stir until ingredients starts to bind.

If you have a mixer, attach the paddle and use it on medium speed for a minute. Replace with a dough hook attachment and on medium speed, knead for another 3 minutes. Turn your dough out on a lightly floured surface and manually knead using the heel of your hands for another 2 minutes until pliable.

If you want to do it manually, knead the mixture for 8 minutes.

In a separate bowl, pour the olive oil. Turn your dough ball twice on oil until all surface is coated. Cover your bowl with cling wrap and let it rest for 2 hours. If you will use the dough the following day, do the mixture at night, keep the bowl overnight in the fridge, it will rise slower. Take it out one hour before cooking.

Shaping Directions: +now is the perfect time to preheat your oven to 475F.
If you want to make a deep dish pizza, don't punch the air out. Place the dough on the deep-dish pan, press and stretch the dough until it reaches the side of the pan. When cooked, the middle section of the pizza will be almost as thick as the sides.

If you want to make a biscuit-thin crust pizza, turn your dough onto a lightly floured surface. Press your fingers all over the dough (resembling a massage move). Flour your wooden rolling pin and roll out on all sides, turning the dough couple of degrees to get the even thinness. It also helps to stretch your dough by hand on every turn. Sprinkle a little bit of cornmeal on your cookie sheet or baking pan before transfering the dough. Roll your pin a bit more if there is enough space for the dough to stretch to make it super thin.

If you want a stuffed-crust, turn your dough onto a lightly floured surface. Press your fingers all over the dough (resembling a massage move). Flour your wooden rolling pin and roll out on all sides, turning the dough couple of degrees every time while also stretching the dough's sides whenever you turn it. Stop at your preferred thickness. Place your stuffing on the edge of the dough, sausage or cheese or whatever stuffing you prefer. Roll the edge inside to secure the stuffing and also create a wall. Sprinkle a little bit of cornmeal on your cookie sheet or baking pan before transfering the dough.

Assembling Directions:
Lay the mozarella slices on the dough, overlapping them to make sure you cover the surface. Spread the pizza sauce on top of the cheese. Lay on the toppings you want to munch, pepperoni, minced beef, etc. The final touch is to generously sprinkle parmegiano regiano on top. 

If you are making a stuffed-crust pizza, brush the edge with melted butter (add garlic on your butter before melting if you want it garlicky). Sprinkle parmegiano over the butter.

Cook it in pre-heated oven (475F) for 20 minutes.

Take your pizza out and rest for 3-4 minutes before slicing.

Enjoy!!!!

-AcousticChef, cookin' one tune at a time!
0 Comments

Pan de Sal !!!

8/17/2011

4 Comments

 
Picture
Credits: Thanks Ate Mi for sharing this amazing recipe...

Pan de Sal is like dinner rolls but I'm biased so I'd say it's fluffier and tastier than your usual dinner rolls.

I grew up with Pan de Sal. I ate it almost every single time, definitely not as dinner rolls, mostly, at breakfast, afternoon snack, or just when I'm bored and wants to have a nibble.

We eat it different ways. Plain, with jams, with savoury stuffing in it, as an accompaniment to stir fry noodles, with bacon, egg or hotdogs, to eat left over food that has sauce to soak the bread with ... this bread is sooo versatile that the next time I make one, I'm literally going to stuff it.

Traditionally, it's baked in a stone oven... the proper horno. Pan de Sal baked from conventional oven tastes great but traditional oven is pleasantly unique. But, for the time being, my humble oven will do... hope it won't complain of over fatigue. Seems like this is going to be a family favourite... my youngest is already hooked on it.

It took me at least a year to muster the courage to bake pan de sal... no regrets... just happy I didn't jump the gun with some lame recipe... this one really works!

Tip 1: Be patient, your dough will come together
Tip 2: Make sure your yeast gets properly proofed. Your milk should not be too hot nor too cold. If you can't stick your finger in it, it means it's too hot. It should be blood temperature. 
Tip 3: Add a cup or more flour to help form the dough. You want your dough pliable... but not wet. You're going to go by touch, it can't be dry too.
Tip 4: Your pan de sal doesn't have to be all uniform.... it's home made! you want it to be as rustic as a home-made should look like... if you want it uniform... might as well buy it from the bakeshops.

Ingredients:
yeast mixture
1 cup lukewarm milk
1 tbsp sugar
1 tbsp active dry yeast

dry ingredients
5 cups bread flour
1 1/2 tsp salt
1 cup sugar

milk mixture
1 cup milk
1/2 stick butter or 60 grams, cut into small pieces
extra 1/2 cup milk 
1 egg

extra 1 - 1 1/2 cup bread flour

bread crumbs

Makes 20 pan de sals

Procedures:
Add 1 tbsp yeast and 1 tbsp sugar to the lukewarm milk. Stir and let it sit for 15 minutes. It should have a beer-foam appearance on top after the wait, if it doesn't then the yeast did not activate and you must re-do the mixture.

In a microwavable bowl, combine milk and butter pieces together. Heat for 1 1/2 minutes. Mix and make sure all the butter is melted. Add the remaining half cup milk and 1 egg, then beat a little.

Add your yeast mixture to the milk mixture, stir a little until just combined.

Add the liquid mixture to the dry ingredients.

Using a wooden spatula, start folding until dough starts to form. At some point, you'll be ditching the spatula and will start mixing with your hand for about 8 minutes or at least until the dough starts clearing the sides of your bowl by gradually adding additional 1 cup to 1 1/2 cup extra bread flour.

Transfer your dough to a lightly floured surface and knead the dough further. When it no longer clings to your fingers and becomes elastic, form a clean ball and return to your bowl. Cover with damp cheesecloth or towel and rest for one hour.

Transfer the dough again to a lightly floured surface and knead a little more to knock out the air. Rest for another 30 minutes (you can skip this middle resting if you want). Divide into 3 portions.

Work on each portion by flattening it to 1/2 inch thick and 11 inches wide rectangle.

Roll the wide side towards you, tucking the seams with your palms until you have a semi log.

Cut to 1 inch to 1 1/2 inches portion, making 6-7 individual rolls per big portion.

Roll your individual portions onto bread crumbs and place on your baking sheet with the cut sides on top and bottom.

Place them half inch apart so when it bakes, it will rise high enough and will be fluffier than if it's too far apart. Rest for another 1 hour to let the dough expand a little bit more.

Bake in a pre-heated oven on 350 degrees for 15 minutes or until your preferred colour, pale, golden brown, brown.

Fresh from the oven, open one and see how soft and fluffy your creation is! Enjoy your home made pan de sal that will beat any commercially made ones...!

Happy eating!

My first attempt on my beloved pan de sal... pretty much a disaster... as they say, practice makes perfect, so I'm practicing!

My second attempt, soooo much better... yipee!
4 Comments

Philly Steak Sandwich with a Twist

11/8/2010

0 Comments

 
Picture
FV32-05-1110

I was hungry, it's late and we don't have dinner yet... that's my concern one night. I already had the rib eye steak at room temperature but I didn't feel like having the usual rib eye steak with mushroom gravy. First, I was bored and second, I wasn't inspired enough to whip out a steak, my hubby was not around, steak is something he loves to chomp on.

Not really had any plans but in the end I thought of a great idea for the ingredients that I have... my inspiration? Guy Fieri's Diners, Drive-ins and Dives.. He goes to the most outrageous food joints in the US and it's amazing how hungry you'll be for those mouth-watering food.

Tip 1: Use meat tenderiser powder if you think you need it.
Tip 2: Use cling wrap on top of the steak before pounding your meat senseless so you'll have less mess after 

INGREDIENTS:
Kraft cheese, single/individual packet
2 portions of rib-eye (approx 500 grams)
1 box of button mushroom, sliced
1 1/2 medium sized red onion, sliced
1/2 cup pancetta
Mini - baguette

This took me 45 minutes

Rub your steak with meat tenderiser powder, then pound each part until they've thinned a little.

Leave the meat for 30 minutes on the side. 

In the meantime, prep the rest by sweating your pancetta to the point where its crispy enough. Drop in the mushroom and saute until it's cooked. Add the onion to the pan until it's cooked and translucent. Set aside.

On the same pan, pan sear the steak until cooked, a little pink on the inside.

Rest the steak for 5-10 minutes before slicing it.

Once rested, slice the steak against the grain and on 45-degree angle.

Return the steak and pancetta mixture to the pan and stir fry a little. If you like your meat a medium rare, then take it off the pan straight away. If you want it done, then take it off when the pink's gone.

Slice your baguette and pan-grill them, sliced side face down on the grill. Once you have good marks, spread one side with good mayonnaise, top with steak slices then finish off with a slice of cheese. Place the other half baquette on top and toast it panini style until the cheese begins to melt or put it in the oven to melt the cheese.

Serve your steak sandwiches with dijon mustard on the side. You can dip whatever steak that falls off your bread.

Serve this with fries or potato wedges or a green salad of your choice. An ice cold cola doesn't hurt either.

By the way, I ate left overs of these steak the following day and boy-oh-boy! It's as good as the night it's cooked. Yum-my!
Enjoyed this recipe? Subscribe to Fave Recipes for updates!

Enter your email address:

Delivered by FeedBurner

0 Comments

Garlic Bruschettas

11/5/2010

0 Comments

 
FV29-02-1110

This is a perfect partner to mushroom and bacon jam, pesto, slice meat, almost everything! Also great as an accompaniment to pastas.

INGREDIENTS
baby - french bread sticks or baguette
3 ounce butter
2 clove garlic

Serves 4
309 Calories per Serving


15 minutes, not another minute long

Preheat oven to 150 degrees celcius.

Cut frozen bread to thin slices 1/2 to 3/4 inch width.

Melt butter with crushed garlic over low heat, or microwave. Brush both sides of the bread with butter using a pastry brush.

Place on a baking tray, preferably pizza tray with holes.

Bake for 7-10 minutes until just golden, keep an eye because it burns quickly

Enjoyed this recipe? Subscribe to Fave Recipes for updates!

Enter your email address:

Delivered by FeedBurner

0 Comments

Home-baked Ensaymada

10/1/2010

0 Comments

 
Picture
FV014-01-1010

This bread was soooo controversial that I have to share the story. It is cringe-worthy... I gotta poke fun at myself from time to time.

I tried one test batch as a preparation for my birthday. The plan was, I'll make couple of improved versions and have hubby bring it to his department.

On my birthday, I woke up at 3AM to start the process. It is a long process indeed. I need enough time to bake the bread, prep to work and drop off Alex to school.

Surely enough, my hard labour paid, I was able to do everything that morning. Even managed to be creative enough and seal each bread into a hotdog sandwich pack heating the opening so it'll stick together.

On my way home after a really, really, really long, painful and toxic day at work,,, I called hubby to double check our schedule for the night,,, dinner with the kids at PF Changs new branch at Mall of the Emirates.

In our conversation, I checked on who got the ensaymadas and whether they re-heated it in the microwave to make sure it's hot and soft,,, to my horror! My loving hubby didn't mention it, didn't even remember that it should be done so.

Unfortunately, I was also PMS-ing. So you can imagine my emotional roller coaster in addition to work's emotional baggage which is not at all an exaggeration.

That minute error that hubby made was on that day, huge to me. Let just say, I cried my heart out to my sister. At the back of my head, I know it's not a big deal,,, but I just feel so embarrassed, hurt and all the weirdest feeling one can think of. I know that I was exaggerating and it's my hormones that's wreaking havoc to my mood but I just can't help it.

It also didn't help when he said, "I'm sorry. Don't cry,,, it's just bread and they love it even it's not hot" Whoa! Just bread! I worked hard for that "just bread" from 3 in the morning! The water works begun, stomping and really just the craziest reaction one might ever expect from anyone!

Now that things have calmed down, I look back at my birthday and cringe, but also smile because my hubby is really forgiving. I lashed at him until the morning after! Ignored his present. Scowl the whole time at dinner. I was just a horrible person. I don't think I'll even be able to stand "me" if I have another version of me then. Thank goodness God only create one of us each...

I told you, it's cringe worthy! You're probably thinking, what a loser :P

So going to the recipe, here it goes:
Tip 1: Patience is required, it is a long process
Tip 2: Spread just the right amount of sugar, butter and cheese as filling. Don't be tempted to go overboard, otherwise, you're filling will overflow, break the dough and ruin your creation.
Tip 3: Re-heat it before serving... (love you daddy!)

INGREDIENTS
5 cups all-purpose flour, sifted
¾ cup butter, melted
extra 1/2 cup melted butter
1 1/4 cup white sugar
1 tsp salt
1 cup grated cheddar cheese
3 pieces whole eggs
2 ¼ tsp active yeast
1 cup fresh milk, warm
3-4 single-pack slices of sandwich cheese (Kraft individual pack cheese is common)

Serves 20

Combine warm milk, yeast, and ½ cup sugar and stir until yeast and sugar dissolves in milk. Set aside to let yeast activate (approximately 10-15 minutes)

In a mixing bowl, combine all the dry ingredients starting from the flour, sugar, and salt then mix thoroughly.

Add the eggs, 1/2  cup butter, and activated yeast mixture to the mixed dry ingredients. Mix thoroughly until all ingredients are evenly distributed and a dough is formed. Use spatula to mix thoroughly then hands ones it's coming together.

Knead the dough on a flat surface until texture becomes fine. Maybe 5-10 but don't over knead it to avoid overworking the dough.

Put the dough back on the mixing bowl and cover the top with cloth. Allow the dough to rise for 2 hours.

Put the dough back on the flat surface and flatten. Punch the dough lightly to release the air inside.

Using a dough slicer, divide the dough into four pieces.

Roll each piece until shape becomes cylindrical.

Cut the cylindrical dough into individual serving pieces (1 serving piece should weigh at least 60 grams).

Put the sliced individual serving piece in a flat surface and flatten using a rolling pin.

Combine ¼ cup melted butter with ¼ cup white sugar. Using a brush, paint the mixture on the flattened dough. Make sure to paint only the center part of the flat dough.

Sprinkle some cheese over the painted area then seal the dough by folding opposite directions and rolling it until a long cylindrical shape is formed (about 12 inches in length).

Form the spiral Ensaymada shape by crossing the two opposite ends of the dough. The first end should be placed under dough while the other end should be inserted in the middle.

Place the dough in a baking tray with wax paper, apply melted butter on coil, cover with cloth and set aside to rise for another 45 minutes.

Pre-heat the oven at 350 degrees Fahrenheit for 10 minutes. Remove cloth on top of the tray and if you prefer, apply egg glaze before baking the dough for 15 minutes at 350 degrees Fahrenheit.

Remove the baked Ensaymada from the oven. Using the remaining melted butter and sugar mixture, apply on top of the baked ensaymada and sprinkle additional cheese or if you wish, criss cross thin strips of cheese on top. Put it back in the oven just to briefly melt the cheese on top. 

Serve hot. Share and Enjoy!

I'll post more pics soon, missed taking photos of the portioning and filling stage...
Did you enjoy this recipe?
Subscribe to Fave Recipes Page

Enter your email address:

Delivered by FeedBurner

0 Comments

Mega Cheat Burritos (Ala Fajita way)

9/21/2010

1 Comment

 
Picture
FV13-11-0910

I call this mega cheat burritos because everything is already been pre-packed for you. Well, majority of the stuffing anyways.

No tips because this is sooooo easy.

I did this in a jif!

Ingredients:
8-piece pack of Flour Tortillas
Burrito Mix
500 grams minced beef
100 ml water
I cup shredded iceberg Lettuce
1/2 cup chopped deseeded tomatoes
1/4 cup Jalapenos
Dollop of Sour Cream
Dollop Guacamole
1 cup grated cheddar cheese

Brown the minced beef. Mix Burrito powder with 100 ml water. Pour the mixture to the beef.

Shred Lettuce. Chop tomato. Put guacamole, sour cream, cheddar chhese and jalapenos onto separate bowls.

Warm the tortilla bread in the microwave for 10 seconds. Serve your seasoned beef next to filling choices and let your guests pick and choose.

Yes it's burritos and it should be as boring as one... BUT I refuse to conform,,, so eat burrito the fajita way! Try and you'll thank me for it!

Acoustic Chef, cookin’one tune at a time!
Enjoyed this post? Don’t miss out on Fave Recipes page updates

Enter your email address:

Delivered by FeedBurner

1 Comment

Authentic Spanish Empañadas

9/21/2010

0 Comments

 
Picture
FV12-10-0910

Original Recipe:
Gourmet | October 2004 & January 2005

Baking Empañada is like... baking lasagna for me... scary idea but I have to try...

While searching for a recipe, I found out that what we have back home is not the authentic Empañada, like everything else, it was modified through the years to suit our palate. It make sense, we have to adapt so it's not going to be so tedious for housewives to create. Moreso, we're not as globalized as we are today, malls weren't available and imported ingredients were,,, well... not that common.

Okay, it was my twin sister who made that analysis,,, she's boring. So now, this recipe is amazing.... and the result.... Oh... My... Gosh, Heaven!!! Okay, maybe not so much as heaven, if my mom reads this she'll be giving me a lecture on blasphemy... you get my drift though, right?

Tip 1: You can use whichever chicken part you prefer, though the ones closest to the bone are tastier
Tip 2: You can make the dough in advance, freeze it up to one week. Thaw it for few hours in the fridge, then bring it to room temperature before using it.
Tip 3: You can make the fillings 2 days in advance. Again, bring it to room temperature before using it.
Tip 4: Because this dough is soooo amazing, you can play with it. You can choose whatever filling you want. I think as simple as hotdog and cheese to as complex as fruit preserves.
Tip 5: If you can't find the linked chorizo, just the tapa-sliced-type will do, just follow the weight

Dough Ingredients
4 1/2 cups unbleached all-purpose flour
3 teaspoons salt
2 stick (1/2 cup) cold unsalted butter, cut into 1/2-inch cubes
2 large eggs + 1 for brushing crust
2/3 cup ice water
2 tablespoons distilled white vinegar

Filling Ingredients:
3 whole chicken legs, including thighs (2 to 2 1/4 pounds total)
1 teaspoon salt
1/4 teaspoon black pepper
4 1/2 tablespoons extra-virgin olive oil
2 large onions, halved lengthwise, then cut lengthwise into 1/4-inch-wide strips
2 large garlic cloves, minced
2 Turkish bay leaves or 1 California
1/3 cup finely diced Spanish chorizo (cured spiced pork sausage; 1 1/2 oz; casings discarded if desired)
1/2 teaspoon Spanish smoked paprika (not hot)
1/4 cup chopped pitted green olives
1/4 cup golden raisins
1/2 cup dry white wine
1/2 cup reduced-sodium chicken broth (1 Knorr chicken cube will do)

Serves 24

This took me 3.5 hours active time, yes that might be 2 or less hours for you.

To make the dough
Sift flour with salt into a large bowl and blend in butter with your fingertips or a pastry blender until mixture resembles coarse meal with some (roughly pea-size) butter lumps.

Beat together egg, water, and vinegar in a small bowl with a fork. Add to flour mixture, stirring with fork until just incorporated. (Mixture will look shaggy.)

Turn out mixture onto a lightly floured surface and gather together, then knead gently with heel of your hand once or twice, just enough to bring dough together. Form dough into a flat rectangle and chill, wrapped in plastic wrap, at least 1 hour.

To make the filling
Pat chicken dry and sprinkle with salt and pepper. Heat 2 tablespoons oil in a 12-inch heavy skillet over moderately high heat until hot but not smoking, then brown chicken, turning over once, about 6 minutes total, and transfer to a plate. Sauté onions, garlic, and bay leaves in fat remaining in skillet, stirring frequently, until onions are softened, 4 to 5 minutes. Add chorizo and paprika and cook, stirring, 1 minute. Add olives, raisins, wine, and broth and bring to a boil, stirring and scraping up any brown bits. Return chicken to skillet along with any juices accumulated on plate, then reduce heat to moderately low and simmer chicken, covered, turning over once, until tender, 25 to 30 minutes total.

Transfer chicken to a clean plate. (Sauce in skillet should be the consistency of heavy cream; if it's not, briskly simmer until slightly thickened, about 5 minutes.) When chicken is cool enough to handle, discard skin and bones and coarsely chop meat. Stir chicken into sauce and discard bay leaves. Season with salt and pepper, then cool filling, uncovered, about 30 minutes.

Forming and baking of empañada
Form dough into a ball, then wrap in oiled plastic wrap (oiled side in) and let stand at room temperature 30 minutes.

Put oven rack in middle position and preheat oven to 400°F. Grease 2 15x10-inch shallow baking pan (1 inch deep) with 1 tablespoon oil.

Form smaller balls roughly 2x2 inch. Spread a tablespoon or more of filling, evenly and leaving 1 inch border. Moisten border with water then fold to make a half moon shape. Press the edges together and sill. Roll the edges in and press to form a decorative rim. Roll out remaining dough in the same manner.

Bake empanada 15 minutes, then brush crust with the beaten egg. Bake until crust is golden brown, 20 to 25 minutes more. Remove from oven and brush empanada with remaining egg. Cool 10 minutes in pan on a rack, then slide empanada onto rack using a wide metal spatula and cool to warm.

I didn't think I'd ever say this,,, but this one made me realize... this is why I want to learn how to cook.... so I can eat good food like this one.

Impress your love ones, enjoy eating and most especially,,, happy cooking!

Acoustic Chef, cookin’one tune at a time!
Enjoyed this post? Don’t miss out on Fave Recipes page updates

Enter your email address:

Delivered by FeedBurner

0 Comments

Triple Decker Club Sandwich

9/7/2010

0 Comments

 
Picture
FV06-04-0910

Original Recipe:
Gourmet | July 2009
by Maggie Ruggiero

Club Sandwich has always been my ultimate saviour at times of confusion. I've always adored it but never thought of making one myself.

I thought restaurants have some secret dressing that makes it yummy. I was so wrong!

I'm so happy about this discovery, a dish so delicious that my son who's a picky eater actually loved it! 

Our nanny who doesn't eat after 6PM finished the whole thing! That must be a good sign.

Tip 1: For non-pork eaters, use beef bacon, turkey or chicken ham
Tip 2: Use any bread you feel like eating!
Tip 3: If you're using white bread, toast it so it doesn't sog. Plus it looks more appetizing with a bit of colour. Don't make it too brown though it'll be too hard to bite at and yes... take the edge off!
Tip 4: If you're serving as a main meal, add a good portion of french fries, potato wedges or just pop open a bag of crisps.

This took me an hour to make so yes, half an hour for you.

INGREDIENTS:
1 cup mayonnaise
2 tablespoons finely chopped chives
12 slices white bread, toasted
2 hard-boiled eggs, thinly sliced and seasons with salt
2 medium tomatoes, thinly sliced
150 g bacon or 4 good sized strips, halved and fried until crisp
4 slices of ham
1 cup of mixed herb leaves, flat parsley, basil, lettuce and cilantro or two herb leaves per sandwich
lettuce leaves

Makes 4 large sandwiches
or 8 servings of halved portion
or 12 hors d'oeuvres


Add chives to mayonnaise then season with a pinch of salt and pepper.

Spread mayonnaise mixture on 4 slices of toast. Top it with egg, tomato, bacon and herbs. Spread mayonnaise mixture on both sides of another 4 more slices of toast. Top it with ham and lettuce leaves. Lastly, spread the last 4 toast with remaining mayonnaise mixture, mayonnaise-side down.

Secure sandwiches with picks and cut into quarters.

Acoustic Chef, cookin’ one tune at a time!
Enjoyed this post? Don’t miss out on Fave Recipes page updates

Enter your email address:

Delivered by FeedBurner

0 Comments

Grand Marnier French Toast (My Version)

8/31/2010

0 Comments

 
Picture
FV02-02-0810

Original Recipe: Lorraine Vassalo
Ontario, Canada
Bon Appetit | Septemer 1995

I made two versions of this, one using french bread (the original version) and one using normal white bread (my version). So I served them both. My kids prefer the white bread though and they want the one without alcohol!

Tip 1: If you don't have half and half, make 1 cup by mixing 1 tablespoon melted butter and make up the remaining amount with milk.
Tip 2: The original version was double the amounts in this recipe, without bananas and chocolate syrup. Increase the ingredients as you require.
Tip 3: This is so easy to make that your kids will enjoy making this with you. My kids had a blast.

INGREDIENTS:
2 large eggs
6 tablespoons or 3/8 cup half and half
2 tablespoons or 1/8 cup Grand Marnier or other orange-flavoured liqueur or frozen orange juice concentrate, thawed
1 tablespoon sugar
1/2 tablespoon grated orange peel
1/4 teaspoon vanilla extract
9 3/4-in thick French Bread slices and 3 slices of White Bread

4 tablespoons (1/2 stick) butter
1/2 banana
Powdered sugar
Warm maple syrup
Serves 
3 decent-sized ones

This took me 30 minutes to make, so that's 15 minutes for you.

PROCEDURE:
Pre-heat oven to 350F. Place a baking sheet to warm up.

Whisk first 6 ingredients in a medium size bowl. Dip each bread slice into egg mixture and set aside. (Egg mixture can be prepared 1 day ahead). Pour remaining egg mixture on top of the bread and let it stand for 20 minutes. This will ensure you have a crispy outside and a pudding-like texture inside.
 
Melt 2 tablespoons butter in heavy large skillet over medium heat. Add bread slices to skillet and brown each side, about 2-3 minutes per side.

Transfer cooked toasts on the pan and keep it warm in the oven while you finish the next batch.

Repeat cooking with the remaining 2 tablespoons butter and bread slices.

Arrange toasts on plate one after another making a pyramid. Sift powdered sugar over it. Pour syrup and add sliced bananas on the side. Squeeze chocolate syrup on top of bananas and voila! You have a hill of yummy snow-covered breakfast with chocolate river on the side. :)

Acoustic Chef, cookin’ one tune at a time! 
Enjoyed this post? Don’t miss out on Fave Recipes page updates

Enter your email address:

Delivered by FeedBurner

0 Comments

    Fave Recipes

    I'm No Chef but I love food like it's no one's business.

    I didn't know anything about cooking... frying an egg used to be a nightmare.. until I was forced to learn more... I had my first born... that's when my gastronomic journey started...

    Join me in my food quest.
    Laugh at my embarrassing moments.
    Share my triumphs.

    And if you're brave enough ... cook with me (ooooh scary!), virtually that is, and have the most enjoyable time!

    Welcome aboard
    fellow foodies!

    Print Friendly and PDF

    Categories

    All
    Ac Spin
    Appetizer
    Baking
    Bbq
    Beef
    Bread
    Breakfast
    Butter
    Chicken
    Dairy
    Dessert
    Drink
    Entree
    Fave
    Fondant
    Gobbledtooquicklyphotosnexttime
    Halloween
    Icing And Frosting
    Lamb
    Main Course
    Marinade
    Nibbles
    Occasions
    Pasta
    Pastry
    Pork
    Poultry
    Rice
    Salad
    Sandwich
    Sauce
    Seafood
    Side Dish
    Slow Cooker
    Smoothie
    Snacks
    Soup
    Spaghetti Challenge
    Stew
    Stock
    Tapas
    Vegetables
    Workinprogress
    Zespiri Kiwifruit

    Archives

    February 2016
    January 2016
    January 2013
    November 2012
    October 2012
    September 2012
    August 2012
    July 2012
    June 2012
    May 2012
    April 2012
    March 2012
    February 2012
    September 2011
    August 2011
    July 2011
    June 2011
    May 2011
    April 2011
    February 2011
    January 2011
    December 2010
    November 2010
    October 2010
    September 2010
    August 2010

    RSS Feed

Powered by Create your own unique website with customizable templates.