Niña
​nin-ya
  • About Me
    • Contact Me
    • Tourettes
    • Geeeetar Playin'
  • My Life
  • Travel Bug-a-boo
  • Fave Recipes
    • Photo Gallery
  • Picture the Taste
  • Bright Ideas
  • Reviews
  • About Me
    • Contact Me
    • Tourettes
    • Geeeetar Playin'
  • My Life
  • Travel Bug-a-boo
  • Fave Recipes
    • Photo Gallery
  • Picture the Taste
  • Bright Ideas
  • Reviews
Niña
​nin-ya

NIÑA ​ANINIAS

SHOP. COOK. EAT.
REPEAT.

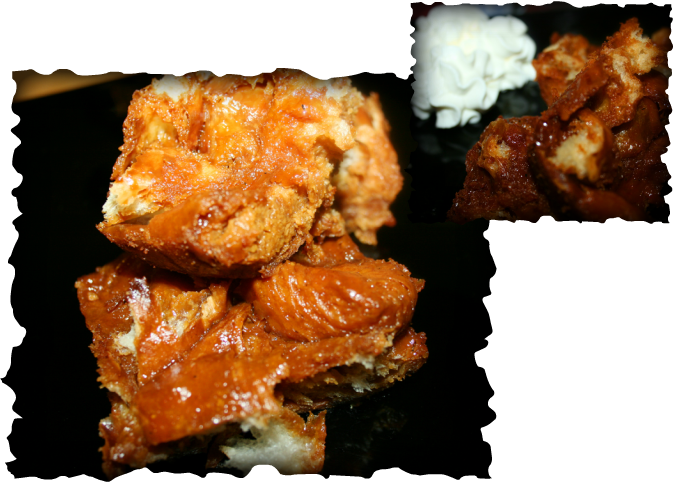
Decadent Croissant Pudding

1/6/2013

1 Comment

 
Picture
Croissants in our house do not really go stale because my boys are huge lovers of croissants. If I buy a box of it in the morning and do not tell the boys to calm down the munching a bit... it will be gone by sundown. It's that serious.

It's not that they'll lose appetite in main meals, they're growing boys, it's just that I'm all about moderation when it comes to their meals? (I'm not saying it applies to me and hubby alright?).

Trying to make this recipe made me buy 3 boxes of croissants because every single time I want to make it stale, the bloody bread just disappears into thin air!

In the end, I told the boys to leave me at least four and they can eat everything including the box. That solved it. :P

Ingredients:

4 stale croissants
1/2 cup sugar
2 tablespoons water
a drop of vinegar
1/2 cup heavy cream
2 tablespoons Bailey's Creme Caramel
1/2 cup whole milk
2 eggs, beaten

Serves 4-6 hungry diners

Preheat oven to 350F.

In a medium size baking dish, tear the croissants into pieces. Set aside.

In a saucepan, put the sugar and water. Swirl the water around to wet the sugar. Place the pan in a medium high heat and let it bubble away. Add a drop of two of vinegar to avoid sugar from crystallizing. It will turn into a deep amber, about 5 minutes. DO NOT STIR and DO NOT WALK AWAY. Let the bubble caramelize on its own. 

Once amber colour appears, take the pan off the heat. Whisking continuously  add the cream, Baileys, milk and beaten eggs, in that order. If the caramel seems to get stuck at the bottom of the pan, put the pan back to a low heat and continue stirring until it's fully dissolved.

Pour the mixture all over the croissant pieces in the baking dish and leave it for 10 minutes to get absorbed.

Bake for 20 minutes. Take a slice or two, add whipped cream or vanilla ice cream on the side and voila! Stale turned simply delicious.
1 Comment

Kiwi Cream Puffs or Petits Choux à la Kiwi Crème

10/9/2012

2 Comments

 
Picture
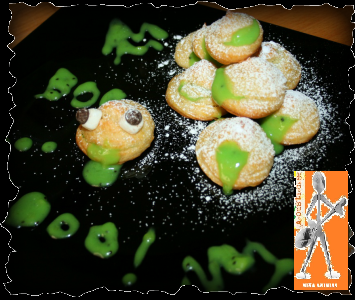
Halloween is just around the corner and this recipe is perfect!

I have made petits choux before but not this traditional one, it was an updated one with AcousticChef stamped all over it. A combination of hot and cold filling with a crunchy casing.

BUT of course this traditional recipe is a right of passage and to be honest, it tasted equally great as my experiment.

Tip 1: Practice makes perfect, once you find the right piping tip and the right size of piping, it'll be so easy the next time around.
Tip 2: You can use your hand mixer and bowl if stand alone is not available. If that's not available too, a wooden spoon will also do the trick though for sure you'll have bigger biceps after :)
Tip 3: If you have no piping bag and tip, use a ziploc bag and cut the tip or plop a heap of batter using a teaspoon.
Tip 4: You can make your puffs as small or as big as you want but the bigger the size, the longer it will take to bake.
Tip 5: Don't go greedy and eat all the pastry before it's filled!

Pastry Ingredients:

2 cups water
1 cup unsalted butter
2 cup all purpose flour
1/2 teaspoon salt
8 large eggs

Kiwi Cream Filling Ingredients
1 cup sugar
1/2 cup flour
1/4 teaspoon salt
2 cups milk
2 pureed Zespiri Kiwi
4 egg yolks
1 greed Wilton food colouring (no taste)
3 tablespoons unsalted butter
1 teaspoon vanilla or in my case, pinch of vanilla powder

Makes 72 decent sized petits choux

Preheat the oven to 400F and line your baking sheets with parchment paper.

To make the creme:

Combine pureed kiwi and milk. Set aside.

In a decent size saucepan, over medium heat, combine sugar, flour and salt. Pour milk mixture in a slow stream while continuously stirring the flour. Mixture will become thick.

Turn the heat down, stir for another 3 minutes then remove from heat. In a mixing bowl, place the egg yolks and slowly pour a slightly hot milk mixture while whisking continuously so that the egg doesn't scramble. Once fully combined, return the mixture to the pan.

Gently bring to a boil and let it bubble for 2 minutes. Add a tiny teeny drop of your green food colouring. Finish it off with butter and vanilla. 

Transfer the mixture to a shallow bowl to cool. To prevent a skin from forming, position your cling film or plastic wrap right on top of the cream. Refrigerate until cold.
To make pàte à choux or puffs
In a small bowl, combine flour and salt.

In a medium size saucepan, bring water to a boil. Add butter and let it melt. Add flour mixture and stir vigorously. Continue stirring until mixture forms a ball and no longer separate. Cool pan slightly off the heat.

Transfer the dough to your stand alone mixer's bowl (like KitchenAid). Using the paddle attachment, mix at slow speed. Add eggs one at a time, making sure it's blended well before adding another one. 

Transfer batter to pastry bag fitted with a medium size star tip. Pipe circles on the parchment papers, about 2-3 inches. Pipe outside in.

Leave good enough space in between piped doughs. You need that for even baking and proper air circulation. 

Bake for 20 minutes then cool them on cooling racks.
To assemble:
Picture

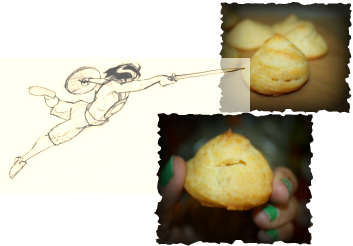
Cut a small slit through the puff using the tip of your knife ala samurai... hi-ya!

Using piping bag and star tip, or ziploc bag, transfer enough cream to the bag Squeeze enough creme inside the puffs opening until it overflows and looks like a gooey green blob is coming out of puff's mouth. 
Picture
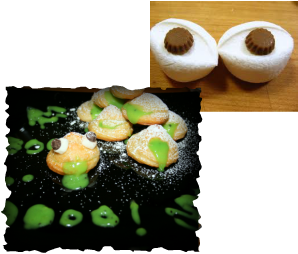
Cut mini marshmallows in two, stick choco chip on it and position it on top of the puff. You then have an alien-looking puff drooling green blob... Dust the whole plate with icing sugar to finish it off.

Happy yummy Halloween!!!

For Yummy Creepy Crawlies Spider Cupcakes Recipe, click here.


-AcousticChef, cookin' one tune at a time!

Did you enjoy this recipe? 
Subscribe to Fave Recipes Page

Enter your email address:

Delivered by FeedBurner

2 Comments

Cake Pops

6/13/2012

0 Comments

 
Picture
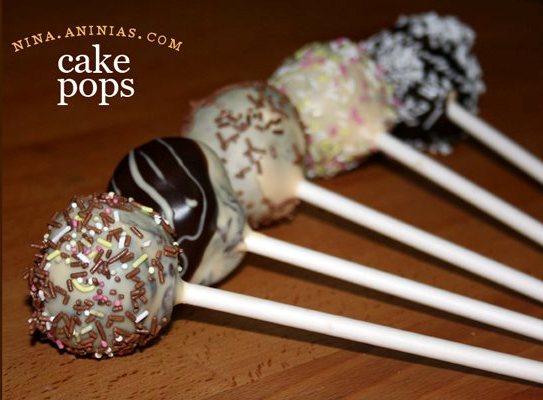
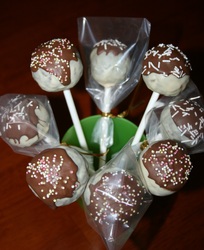
I was just gonna make this a Picture Recipe but decided against it. I have seen too many recipes and video how-tos that suggest using cake out of the box. I mean, yes it's not a bad idea but seriously? If you're not a child... out of the box cake is a let down of any adult's skills.

This foundation cake is not sweet at all, so perfect for decoration since we all know how sweet most icings are. This cake will complement your icing like burgers and french fries.

Ingredients:
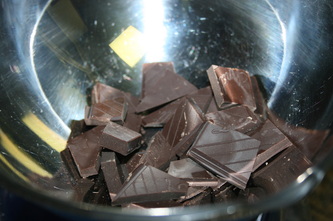
125 grams dark chocolate
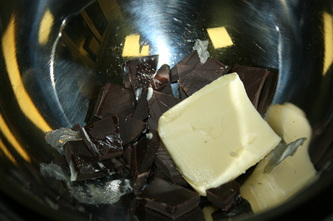
125 grams butter
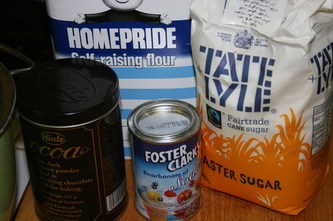
250 grams caster sugar
350 grams self-raising flour
1 tablespoon cocoa powder
1 teaspoon baking soda
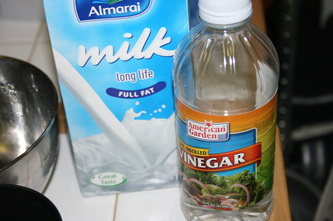
1 tablespoon white vinegar
250 ml milk
2 medium eggs

Directions To Bake:
Preheat the oven to 160C.

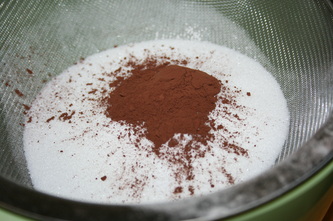
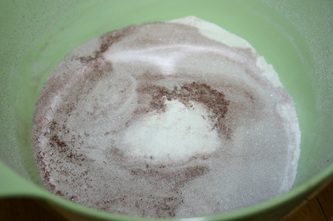
In a mixing bowl, sift, self-raising flour, sugar, cocoa powder, baking soda.

in a separate bowl, add vinegar into the milk, cultivate for 5 minutes. Add eggs and beat well.

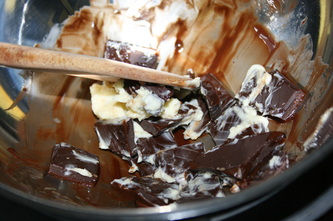
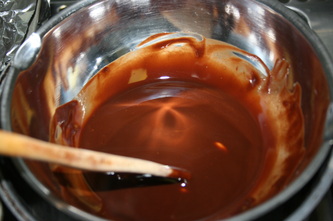
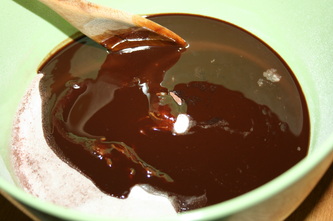
Break up the chocolate into a double boiler or a large bowl on top of a pan with simmering water. Help the melting process a little bit with a teaspoon butter. Once chocolate is melted, take it off the heat and add the rest of the butter to the chocolate. Stir until smooth. Cool for 5 minutes.

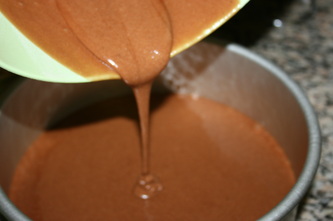
Add chocolate mixture into the dry sifted ingredients (flour, sugar, cocoa and baking soda). Add milk and vinegar concoction and beat until it's smooth.

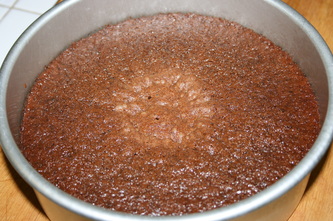
Divide the batter into the pan and bake for 1 hour and 15 minutes or until inserted skewer comes out clean. Start checking after 1 hour.

Cool in the pan for 10 minutes then turn out on a wire rack to cool completely.

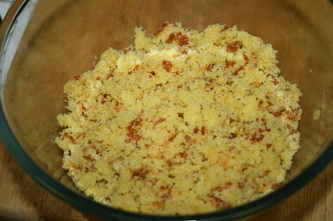
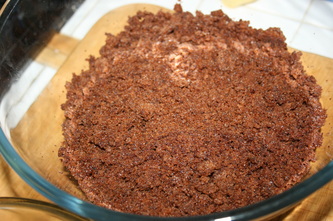
Cut it into 4 portions. Over a big bowl, rub 2 portions against each other to create small and even crumbs. If some big chunks come off your cake, just use your fingers to crumb them smaller.

To Mold:
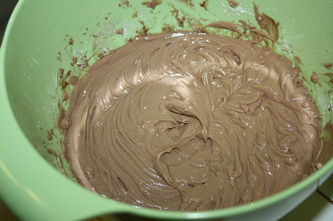
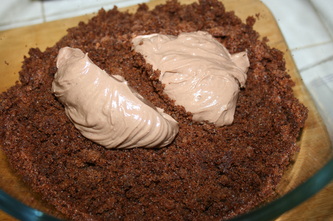
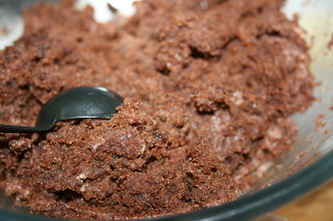
Using icing of your choice, add some blob of it to the crumbs until it starts binding. I'll leave the amount to your judgment because different icings have different consistencies. Let's just say not too saggy wet that it will fall apart and not to dry else it'll crack when you coat it... should be just the right consistency that you can form a ball. Mold one, if you're happy with it and you think it'll hold then that's it... if it's either way then modify until you get the right texture.

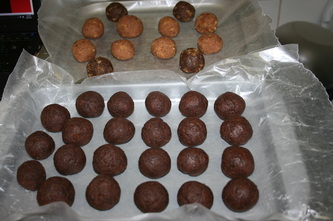
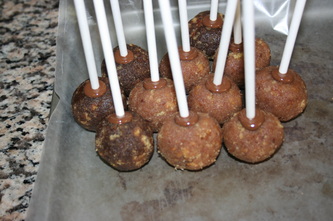
Use two tablesppons of cake crumbs to make a decent size cake balls. Roll it on your hands until the sides are smooth. Line a shallow cake pan with wax paper. Rest your cake balls on it. Put the pan in the fridge to toughen the balls a little bit. Some keeps them in freezers but I personally prefer just the fridge especially if I can coat it as soon as it hardens a bit.

To Coat:
Take the cake balls out of the fridge.

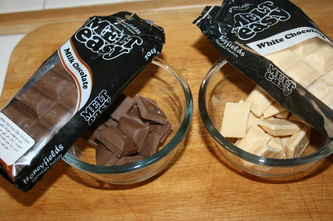
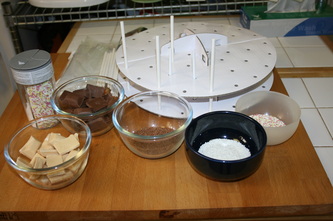
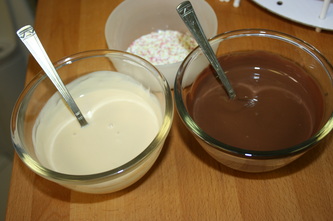
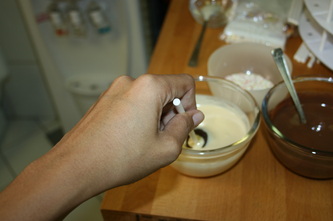
Place chocolate melts in a microwaveable dish and power it up for 1 - 2 minutes. Stir after a minute to make sure it is melting evenly.

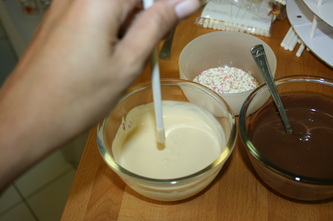
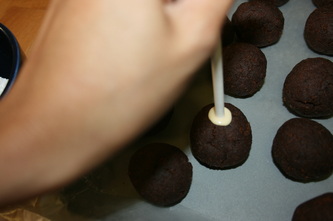
Dip your stick 2 inches into the melted chocolates. This will serve as a glue. Insert the dipped stick into the center of the ball, just before you hit the center of the ball. Pushing it farther will break the top of the ball and you dont want that

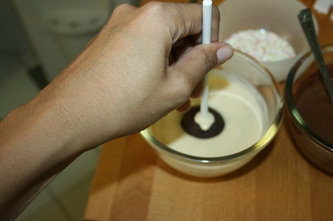
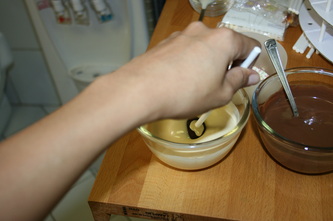
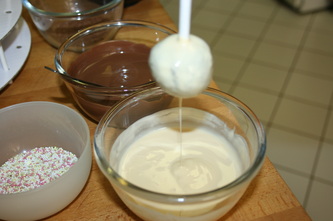
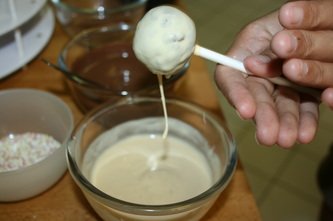
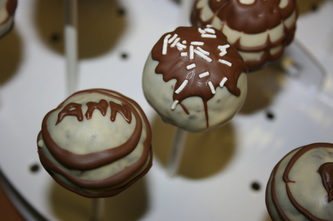
Holding the stick 180 degrees. Dip the ball ensuring it's fully covered with chocolate melts. Either by using a teaspoon to assist with the coating or by gently rocking the balls on each side. Don't stir the melt with the ball because it will loosen the stick in the center... you sould just rock it gently. Lift the ball straight, dripping excess chocolate melts on top. If you think the coating is still a bit thick on the sides, hold the stick approximately 80 degrees, while slowly rotating the stick, tap the holding palm of your hand with the other hand gently. The excess will drip on the sides. 

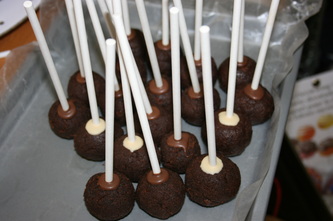
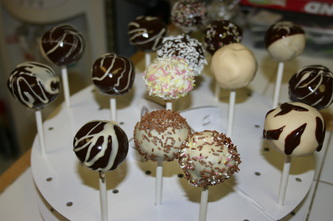
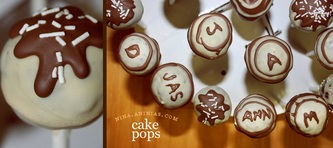
Before the melts hardens, you can decorate with confetti of sprinkles or a dripping of contrasting colours.

Perching the sticks on a styrofoam will keep it secure and dry. 
0 Comments

Victoria Sponge Cake

6/8/2012

1 Comment

 
Picture
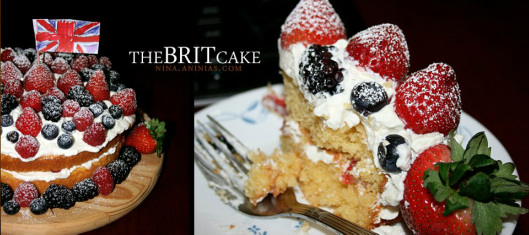
Last week was the Diamond Jubilee Celebration for the Queen of England... oh no... I'm definitely not British now am I living anywhere close... but... The Queen of England is not just any Queen in this lifetime and it must be commemmorated in some way... and so I baked a cake that screams Brittania.

Divine way to use fresh berries I tell you. This is not really a kids' cake with all the tartness it offers... it's cake for the big boys and girls. Tart and Sweet, Creamy and Spongy... definitely healthier than most chocolate cakes I've made.

Every bite is a burst of flavour. It is freshness at its best... crisp and unadulterated.

Ingredients:
175 grams butter, softened
175 grams caster sugar
3 eggs, beaten
175 grams self-raising flour, sifted
1 cup whipping cream
1 tablespoon icing sugar

Procedures - Baking:
Heat the oven to 180C. Grease two 20cm baking tins and line with greaseproof paper.

Beat together butter and sugar until the mixture looks pale and fluffy. Gradually add in beaten eggs, beating well between each addition. Then, fold the flour.

Divide the mixture between the two tins and bake for 20 minutes or until firm to the touch. Cool in tins for two minutes, then remove and cool completely on a wire rack.

Procedures - Whipped Cream:
Beat whipping cream and icing sugar until fluffy but not stiff.

Procedures - Assembling:
Once the cakes are cool, spread the flat side of cake with freshly whipped cream. Top with slices of strawberries and whole blueberries.

Gently pressed down with the other layer of cake. Spread with some more whipped cream and finished off with berries of your choice. I love them all and so I put as many strawberries, blueberries, blackberries, and most especially, the yummiest of them all... raspberries.

Tried to copy Union Jack... it was close.. so I'm pretty happy with it.

Tuck in!

-AcousticChef, cookin one tune at a time
1 Comment

Cookie Mania - Going Back to Basics

3/24/2012

0 Comments

 
Picture
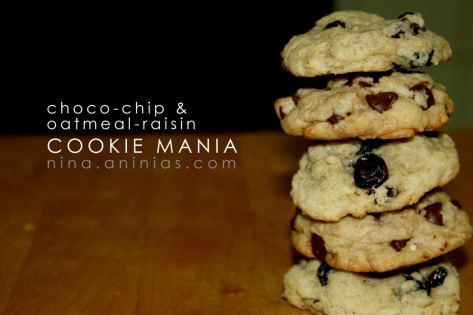
I'm mostly amazed at how easy it is for my kids to understand recipes. It took me more than two decades, hundreds of BBCfood and Food Network shows, dozens of recipe books, not to mention thousands of google research, almost to the point of hypnotherapy for any recipe to make sense. 

Since my 5-year old can't read long sentences yet, my 9-year old reads the instructions for him at the beginning. As expected Alex (the 9-year old) gets bored with the process which he considers tedious and disappears after a few minutes. He will only resurrect when food's done... he does the taste test... Alex has an amazing taste buds. So amazing that if I have to bring someone with me in one of my resto adventures, I'd bring him.

Going back to cookie mania, this is such a basic recipe that I have no second thoughts in leaving Jason (the 5-year old) to the "doing" part while I get busy with handling shutters. I have no doubts that Alex can cook or bake if he wants to ... Jason however is a natural in the kitchen. Always's been intrigued with kitchen tools, the proccess of preparing food seems so exciting to him more than anything.  

This is the first time I let him do anything from start to finish so this is Jason's coming of age in the kitchen. A milestone if you may.

Tip 1: 2 cups of flavour is up to you. It could be 2 cups of choc chips, or mixture of choc chips and nuts, oatmeal and raisins, whatever you fancy.
Tip 2: It's a "drop" cookie dough, not "rolled". So we didn't chill the dough at all, we just literally dropped the dough on the sheet, did not press it at all and let the heat melt the dough on its own. 
Tip 3: Don't doubt the timing. When you take out the cookie from the oven, it'll still be cooking for the next 2 or so minutes on the sheet. Transfer it on the cooling rack after 2-3 minutes of cooling from the sheet.

Ingredients:
1/2 cup butter, softened
1/2 cup shortening
1/4 cup white sugar
3/4 cup brown sugar
2 eggs
2 tspoons vanilla
2 1/4 cups unsifted flour
1 tspoon baking soda
1 tspoon salt
1 1/2 cups semi-sweet chocolate chips (or 2 cups mixed oatmeal and raisins or nuts)

Makes 2 dozens

Directions:
Pre-heat oven to 375F

Stir the flour, baking soda and salt, then set aside.

In a large mixing bowl, cream butter, shortening and sugar. Add eggs and vanilla.

Blend the dry mixture to the wet mixture.

Stir in the chocolate chips (or oatmeal and raisins or nuts) 

Drop by 1 1/2 tablespoon onto a parchment on a cookie sheet.

Bake for 9 to 11 minutes or until golden brown. 
0 Comments

Cream Cheese Icing - 2

3/10/2012

0 Comments

 
Picture
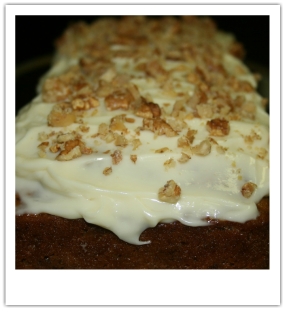
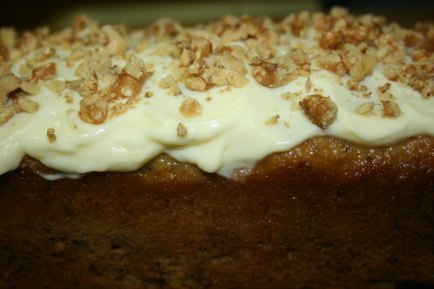
This is my recent discovery and I'm very happy with it, is an understatement.

I found a recipe for banana cake that has cream cheese frosting on it. It's very simple but tastes really good. Just a proof that it doesn't have to be complicated to be delicious.
Ingredients:
1/2 cup butter, softened
226 grams or 8 oz cream cheese, softened
1 teaspoon vanilla
1 cup icing sugar

Directions:
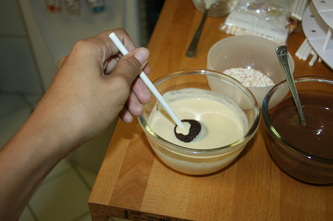
Cream butter and cream cheese until smooth.

Beat in 1 teaspoon vanilla.

Add icing sugar and beat in low until well combined. Then on high speed until smooth.

Spread on your cupcakes or cakes and enjoy the creamy cheesy goodness!

-AcousticChef - cookin' one tune at a time!
0 Comments

Super Moist Banana Cake

3/10/2012

0 Comments

 
Picture
J's favourite pudding is not chocolate, not caramel, not cheese inspired... he loves banana cake. He'll eat any sweets but whenever he sees me baking, that's the first thing he'll ask me.

I don't bake banana cake often not because I don't like it ... but my boys are like monkeys... I need overripe bananas to bake a cake and I'd be lucky to find one banana after 2 days of buying a bunch.

I practically hid 5 bananas inside the cupboard to speed up the ripening process as well as avoid my boys' prying eyes. Once it started having dark spots on the skin, I took it out for further ripening.
My boys don't like bananas that have spots. For them it's bruised. My sis also thinks it's the start of the rotting process. WRONG. It's actually the starch turning into sugar and that's what we need for baking banana cakes. The darker it is, the better, at least for me. 

Tip 1: if you don't have buttermilk, you may put 1 1/2 tablespoons of vinegar in a measuring cup and pour milk until it reaches 1 1/2 cups. Let it cultivate for 10 minutes before using.

Ingredients:
1 1/2 cups overripe banana, mashed
2 teaspoons lemon juice
3 cups flour
1 1/2 teaspoons baking soda
1/4 teaspoon salt
3/4 cup butter, softened
1 3/4 cup sugar
3 large eggs
2 teaspoons vanilla
1 1/2 cups buttermilk

Makes 2 loaves or 1 square pan

Directions:
Preheat your oven to 275F.

Spray your pans with quick release spray or line them up with baking paper or grease and flour it, whichever you prefer.

Add the lemon juice to the mashed banana and set aside.

Combine flour, baking soda and salt in a bowl and set aside.

Cream butter and sugar in another bowl until light and fluffy. Add one egg at a time, beating thoroughly before adding another egg. Add vanilla.

Alternately mix flour and buttermilk to your butter mixture. Always start with the dry ingredients and in equal parts of liquid. It's always a good idea to divide each into three parts. It doesn't have to be exact. A rough estimate of each transfer is good enough. dry-wet-dry-wet-dry-wet.

Stir in the mash bananas completely.

Divide the batter to two loaf pans or one square cake pan and fill it up to 3/4 of the pan.

Bake for 1 to 1 1/2 hours. Start testing with skewer when you reach 1 hour. It's baked if the skewer or toothpick comes out clean after the test.

From the oven, keep your cake straight to the freezer for 45 minutes to ensure it's moist is locked in.

Bring it out, let it warm up to room temperature. Either spread the frosting or enjoy it on it's own. Have tea and milk to go with your cake and voila! You're one happy camper! 

Happy Eating!

-AcousticChef - cookin' one tune at a time!
0 Comments

Strawberry Swirl Cupcakes

2/19/2012

0 Comments

 
Picture
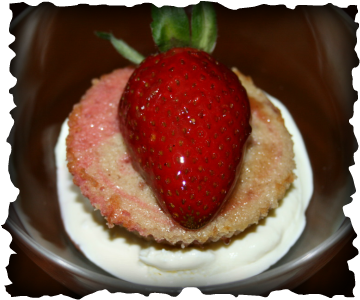
Perfect for Valentines, Date Nights, Anniversaries and all lovely celebrations with your special someone... dainty and fun to decorate and play around with.

Tip 1: lessen the colouring if you want a less intense colour
Tip 2: if you don't like ice creams, pink whipped cream will taste great too! 

Ingredients:
185 grams unsalted butter
170 grams caster sugar
3 eggs
125 grams self-raising flour
30 grams plain flour
125 ml milk
1/2 teaspoon pink food colouring
1/4 cup fresh minced strawberries (more if you want to, just make sure the batter is not too thin)

Serving touches:
Scoops of strawberry ice cream
Syruped strawberries (click here for recipe)

Directions:
Preheat the oven to 350 F.

Line your cup cake pan with cases.

Cream the butter and sugar in a bowl. Add eggs one at a time beating carefully after each addition.

Sift the flours together and fold alternately with milk. Add the fresh minced strawberries.

Divide the batter equally. Add colouring in one.

Scoop both mixture into each cases up to 3/4 of each cases. Using a toothpick, swirl the mixture to create a marble effect.

Bake for 15 minutes or until a toothpick or skewer comes out clean when inserted in the cupcake.

Cool cupcakes in a wire rack.

Assembling:
At the bottom of your serving glass, place a tablespoon of syruped strawberries. Scoop your strawberry ice cream on it. Place your strawberry swirl cupcake on top and garnish more syruped strawberries on the side for a more pronounced flavour. Add almond slivers if you want.

Enjoy and have fun!
0 Comments

Niña's Jewel Dessert

9/1/2011

0 Comments

 
Picture
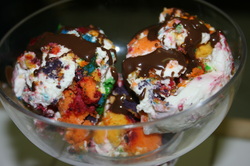
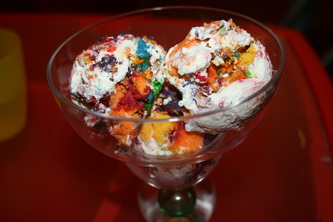
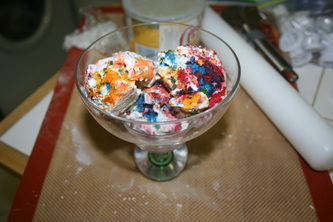
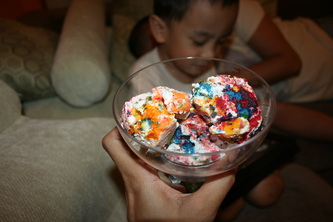
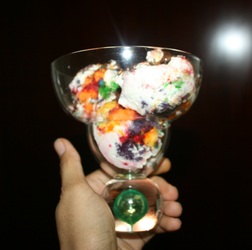
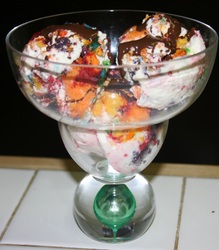
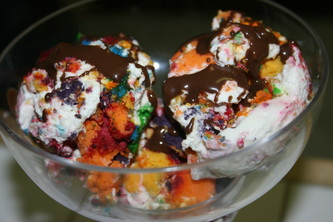
Dessert I came up with because I don't like throwing away food .... it tastes as vibrant as it looks... take my word for it! It's creamy, it's cold, it's cakey... add fresh slices of fruit and a sprig of mint and I say you'll have a party pleaser!

I think my persistence and bravery towards my biggest fear growing up (which is anything and everything to do with the kitchen) is being rewarded... I'd love to think that my cooking and baking instinct is slowly inching out of the novice scale... though miles and miles away from being an expert... there is hope that one day... I'll be...

Today I discovered a jewel... a treasure island must be in the horizon...
0 Comments

Hawaiian Birthday Cake... Aloha!

8/28/2011

0 Comments

 
Picture
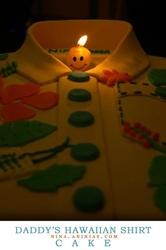
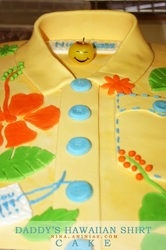
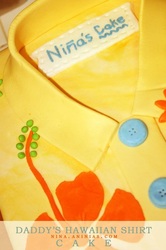
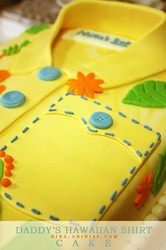
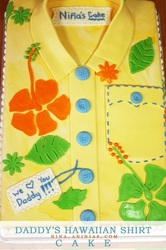
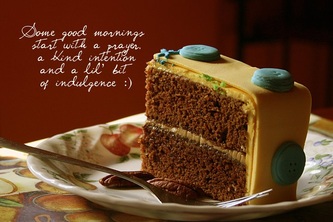
Hawaiian Shirt Birthday Cake for my hubby. Moist Rich Chocolate Cake with coffee buttercream and slivers and slivers of almond.

Recipes used:
Moist Rich Chocolate Cake
Coffee Buttercream
Rolled Fondant Icing
0 Comments
<<Previous

    Fave Recipes

    I'm No Chef but I love food like it's no one's business.

    I didn't know anything about cooking... frying an egg used to be a nightmare.. until I was forced to learn more... I had my first born... that's when my gastronomic journey started...

    Join me in my food quest.
    Laugh at my embarrassing moments.
    Share my triumphs.

    And if you're brave enough ... cook with me (ooooh scary!), virtually that is, and have the most enjoyable time!

    Welcome aboard
    fellow foodies!

    Print Friendly and PDF

    Categories

    All
    Ac Spin
    Appetizer
    Baking
    Bbq
    Beef
    Bread
    Breakfast
    Butter
    Chicken
    Dairy
    Dessert
    Drink
    Entree
    Fave
    Fondant
    Gobbledtooquicklyphotosnexttime
    Halloween
    Icing And Frosting
    Lamb
    Main Course
    Marinade
    Nibbles
    Occasions
    Pasta
    Pastry
    Pork
    Poultry
    Rice
    Salad
    Sandwich
    Sauce
    Seafood
    Side Dish
    Slow Cooker
    Smoothie
    Snacks
    Soup
    Spaghetti Challenge
    Stew
    Stock
    Tapas
    Vegetables
    Workinprogress
    Zespiri Kiwifruit

    Archives

    February 2016
    January 2016
    January 2013
    November 2012
    October 2012
    September 2012
    August 2012
    July 2012
    June 2012
    May 2012
    April 2012
    March 2012
    February 2012
    September 2011
    August 2011
    July 2011
    June 2011
    May 2011
    April 2011
    February 2011
    January 2011
    December 2010
    November 2010
    October 2010
    September 2010
    August 2010

    RSS Feed

Powered by Create your own unique website with customizable templates.