Niña
​nin-ya
  • About Me
    • Contact Me
    • Tourettes
    • Geeeetar Playin'
  • My Life
  • Travel Bug-a-boo
  • Fave Recipes
    • Photo Gallery
  • Picture the Taste
  • Bright Ideas
  • Reviews
  • About Me
    • Contact Me
    • Tourettes
    • Geeeetar Playin'
  • My Life
  • Travel Bug-a-boo
  • Fave Recipes
    • Photo Gallery
  • Picture the Taste
  • Bright Ideas
  • Reviews
Niña
​nin-ya

NIÑA ​ANINIAS

SHOP. COOK. EAT.
REPEAT.

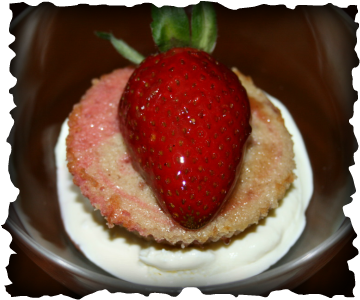
Strawberry Swirl Cupcakes

2/19/2012

0 Comments

 
Picture
Perfect for Valentines, Date Nights, Anniversaries and all lovely celebrations with your special someone... dainty and fun to decorate and play around with.

Tip 1: lessen the colouring if you want a less intense colour
Tip 2: if you don't like ice creams, pink whipped cream will taste great too! 

Ingredients:
185 grams unsalted butter
170 grams caster sugar
3 eggs
125 grams self-raising flour
30 grams plain flour
125 ml milk
1/2 teaspoon pink food colouring
1/4 cup fresh minced strawberries (more if you want to, just make sure the batter is not too thin)

Serving touches:
Scoops of strawberry ice cream
Syruped strawberries (click here for recipe)

Directions:
Preheat the oven to 350 F.

Line your cup cake pan with cases.

Cream the butter and sugar in a bowl. Add eggs one at a time beating carefully after each addition.

Sift the flours together and fold alternately with milk. Add the fresh minced strawberries.

Divide the batter equally. Add colouring in one.

Scoop both mixture into each cases up to 3/4 of each cases. Using a toothpick, swirl the mixture to create a marble effect.

Bake for 15 minutes or until a toothpick or skewer comes out clean when inserted in the cupcake.

Cool cupcakes in a wire rack.

Assembling:
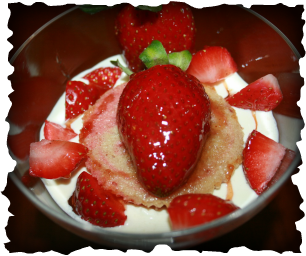
At the bottom of your serving glass, place a tablespoon of syruped strawberries. Scoop your strawberry ice cream on it. Place your strawberry swirl cupcake on top and garnish more syruped strawberries on the side for a more pronounced flavour. Add almond slivers if you want.

Enjoy and have fun!
0 Comments

Syruped Fresh Strawberries

2/18/2012

0 Comments

 
Picture
Fresh strawberries soaked in spiced syrup goodness... can be a dessert on its own, on top of an ice cream, next to a pancake or even a spread on your toast (minced version), so many ways to enjoy it.

Crunchy bite of an explosion of sweet and tangy flavour in your mouth, you will not want to miss.

Tip 1: Don't soak your strawberries too long, you want it to be coated enough, flavoured enough but not soggy.
Tip 2: You don't have to buy the most expensive strawberries in the market, just as long as its ripe enough. The syrup and spices will heighten the flavour on its own.
Tip 3: Experiment.... enjoy

Ingredients:
1 cup sugar
1 cup water
1/2 teaspoon ground cinnamon
1/4 teaspoon ground nutmeg
1 tablespoon vanilla extract
2 pints strawberries, hulled and sliced

Directions:
In a saucepan, bring the water and sugar to a boil and have it boiling for 10 minutes until the mixture becomes syrupy. Add the nutmeg and cinnamon and remove from heat. Stir in vanilla and allow to cool for a few minutes.

Soak the strawberries in the mixture, fish it out and have fun with it!


Enjoy fellow foodies!

0 Comments

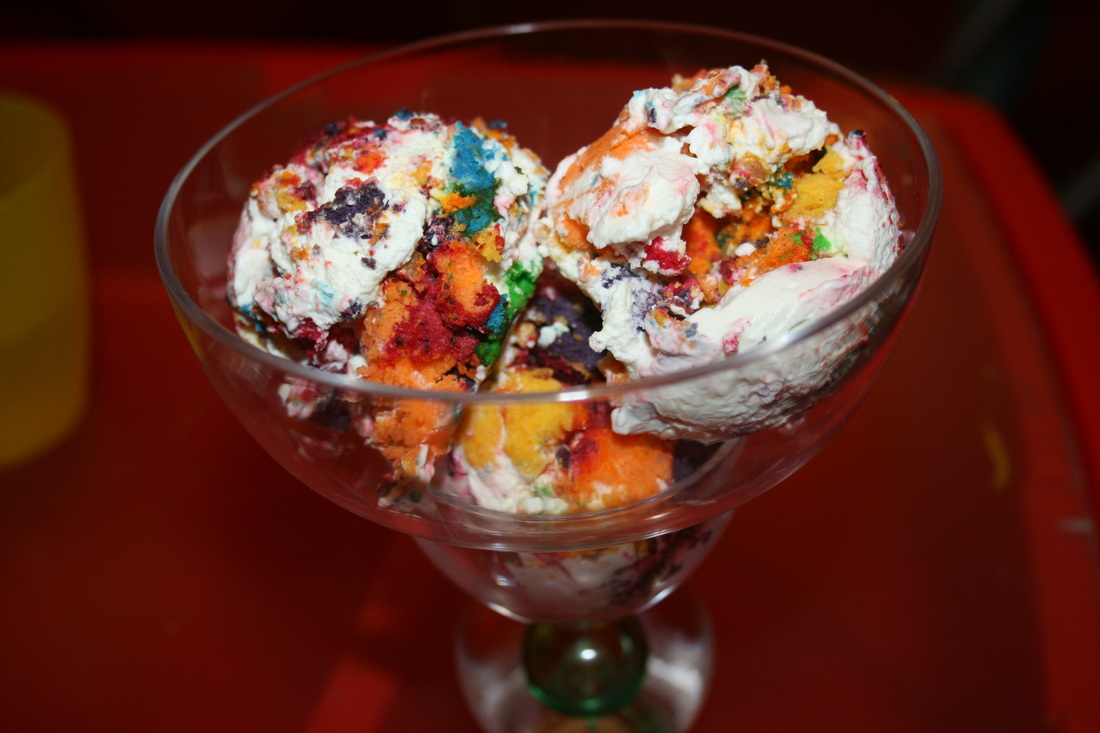
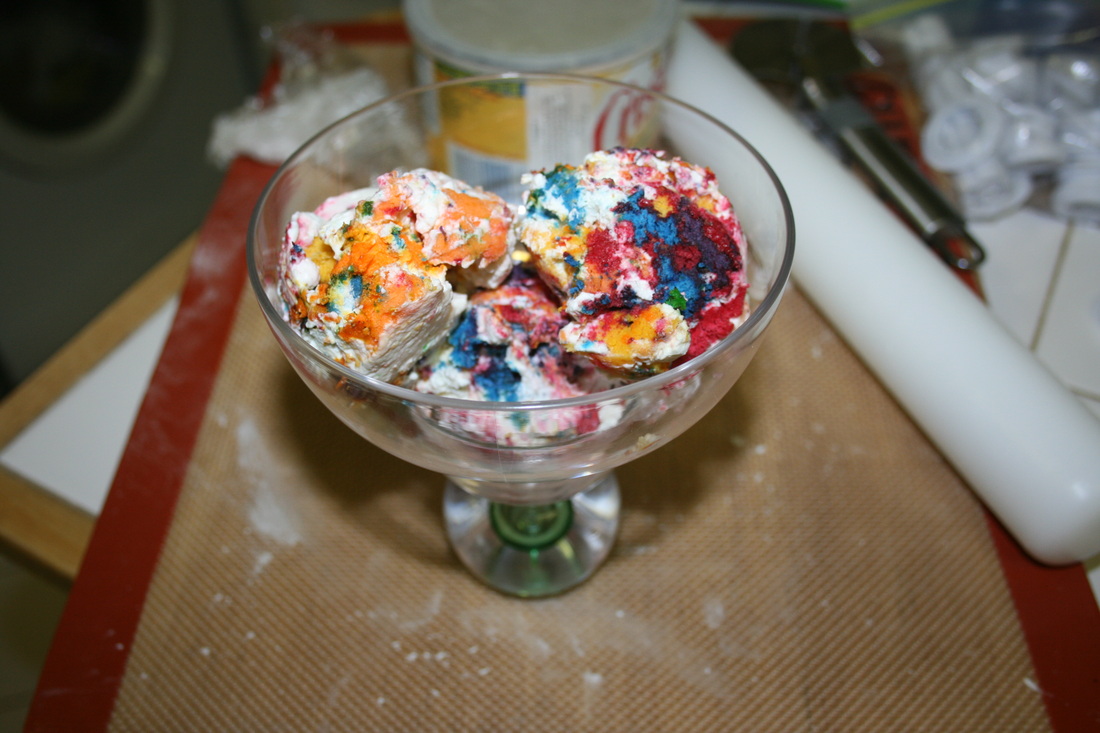
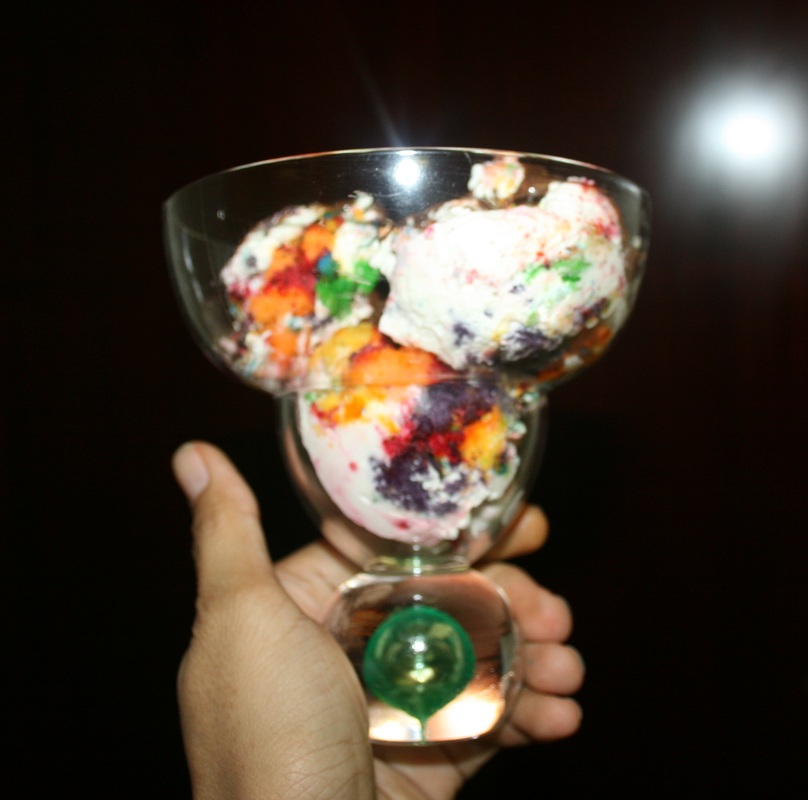
Niña's Jewel Dessert

9/1/2011

0 Comments

 
Picture
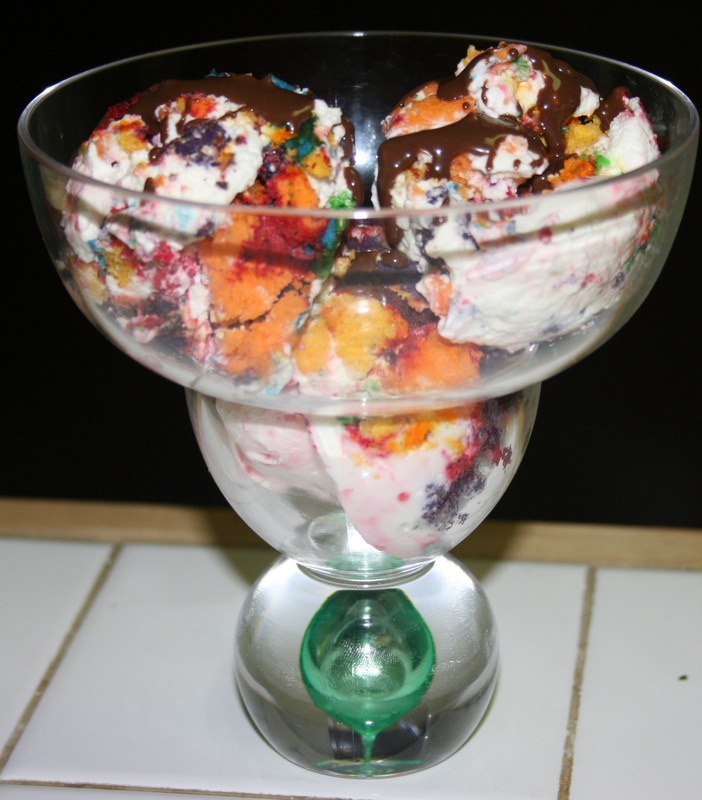
Dessert I came up with because I don't like throwing away food .... it tastes as vibrant as it looks... take my word for it! It's creamy, it's cold, it's cakey... add fresh slices of fruit and a sprig of mint and I say you'll have a party pleaser!

I think my persistence and bravery towards my biggest fear growing up (which is anything and everything to do with the kitchen) is being rewarded... I'd love to think that my cooking and baking instinct is slowly inching out of the novice scale... though miles and miles away from being an expert... there is hope that one day... I'll be...

Today I discovered a jewel... a treasure island must be in the horizon...
0 Comments

Hawaiian Birthday Cake... Aloha!

8/28/2011

0 Comments

 
Picture
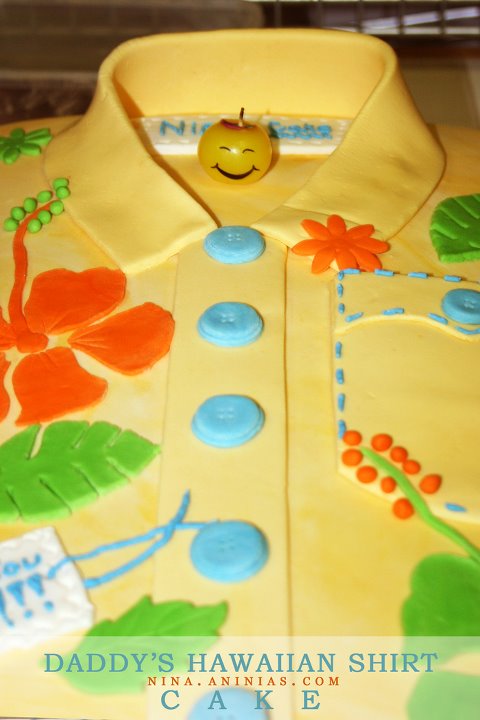
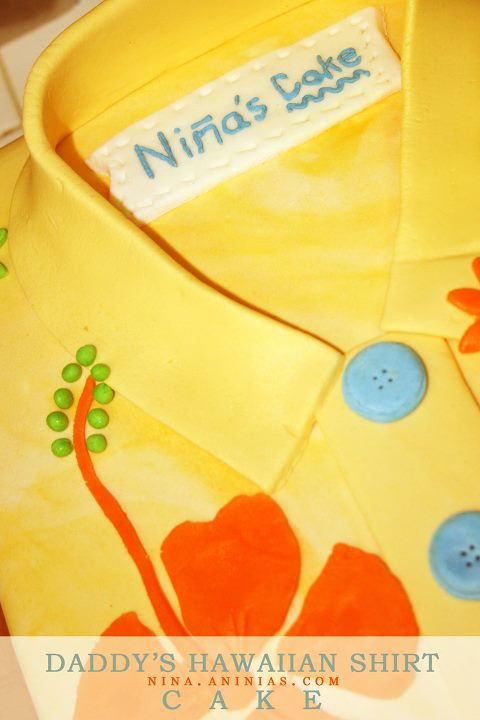
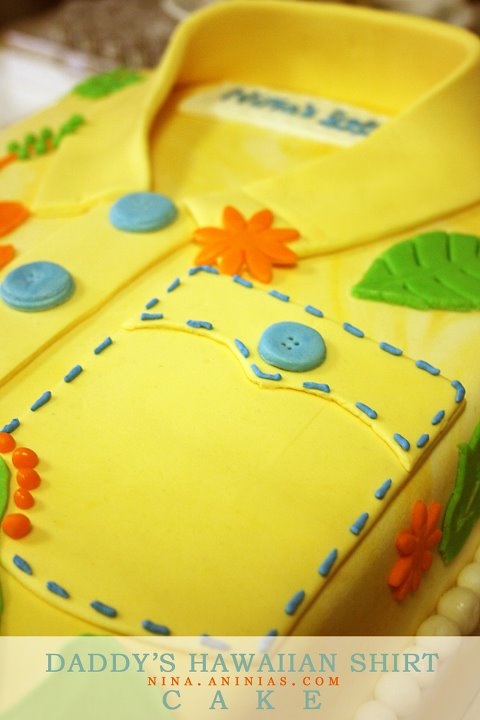
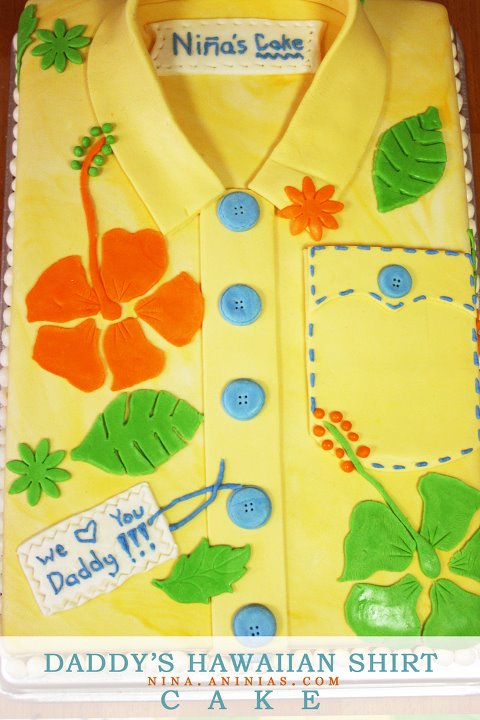
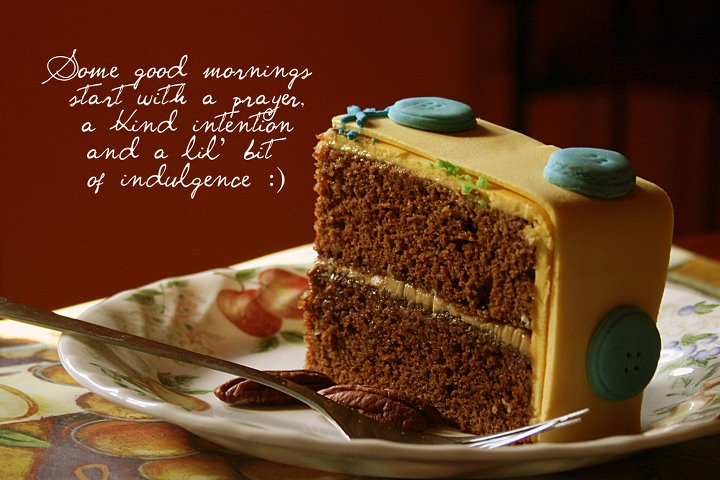
Hawaiian Shirt Birthday Cake for my hubby. Moist Rich Chocolate Cake with coffee buttercream and slivers and slivers of almond.

Recipes used:
Moist Rich Chocolate Cake
Coffee Buttercream
Rolled Fondant Icing
0 Comments

Churros

8/11/2011

0 Comments

 
Picture
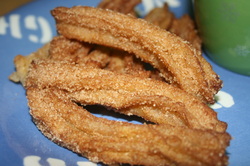
I've always been intrigued of how Churros are made, especially how Churros taste. I know it's the Latin version of doughnut, but for me, there's really no other way of getting introduced to a dish but to make them and taste them right after it's made.

Ingredients:
Dough
1 cup water
1 1/2 tablespoons sugar
1 teaspoon salt
1 tablespoon vegetable oil
1 cup all purpose flour
1 egg

4 cups oil for deep frying

Coat
1 cup white sugar
1 teaspoon ground cinnamon

Makes 24 sticks of 4-inch churros

Procedures:
Mix the coating in a medium mixing bowl or zip loc bag and set aside.

In a medium saucepan, heat your oil for deep frying until it reaches almost 380 degrees F.

While your oil is heating up, mix your dough in another medium saucepan on a medium high heat. Add, water, sugar, salt and vegetable oil, stir and let it reach the rolling boil stage.

Turn off the heat, add your flour and vigorously mix until a ball is formed. Rest for five minutes and re-mix with one whole egg.

Place the dough mix in a pastry bag with a 2D star tip for easy piping.

Once the oil is hot enough, start piping out 4-inch long churros strip directly into the oil. Don't overcrowd your pan to ensure you maintain the temperature for deep frying. If you use 2D tip, you only need 2 minutes per stick, otherwise you'll need to do a trial and error for thicker sticks.

Drain your churros on a kitchen towel and transfer to your coating mixture. Toss until its fully coated.

Serve your churros with hot chocolate for dipping or sipping and enjoy!

Happy Eating! 

  
0 Comments

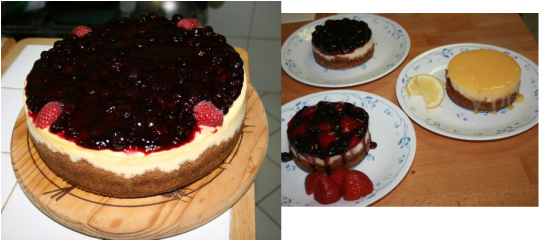
Cheesecake Galore!

8/3/2011

3 Comments

 
Picture
I thought I will keep this recipe for myself but what's the joy in that?

So, I'm gloriously sharing it to all.

Ingredients:
Crust:
2 1/3 cups Graham Cracker Crumbs
1/2 cup
1/4 cup sugar

Fillings:
900 grams cream cheese
1 1/2 cups sugar
1/4 cup all purpose flour
5 large eggs (or 7 small-to-medium ones)
460 grams sour cream
1/4 cup milk
1 tablespoon vanilla extract

Toppings:
1 cup fresh blueberries
1/4 cup sugar
1 cup ready-made blueberry toppings
1 1/2 teaspoons cornstarch diluted in 2 tablespoons cold water

Makes one 10-inch cheesecakes or 
five 4-inch crust and 10 4-inch cheesecake fillings (so you might want to double your crust for mini pans). 

Procedure:

Crust:
Preheat oven to 375 degrees F. Prepare your springform pan by wrapping the outer part with aluminum foil.

Using a food processor, mix all ingredients until it's well combined and moist. Press crumb mixture onto the bottom of the pan and on the sides, 2 inches for 10-inch cake and an inch will be enough for a 4-inch cake.

Bake until it starts to brown, 8-10 minutes. Set your crust aside and let cool.

Filling
Beat cream cheese and sugar in your mixing bowl (either by stand alone mixer or hand mixer). Beat in flour, then add one egg at a time. Add the sour cream, milk and vanilla.

Pour the filling into the crust or ladle if you are making mini-cheesecakes.

Place the pan(s) in a large roasting pan. Pour hot water into the roasting pan until it reaches an inch or so of the springform pans' side. 

Bake cheesecake until it's just set in the center, golden brown, 1 hour for 10-inch cake, 15-20 minutes for 4-inch mini-cakes.

Refrigerate for 6 hours before adding toppings.

Toppings:
In medium  high heat, heat the fresh blueberries, starch and sugar until it is completely dissolved. Boil until the mixture thickens. Stir in 1 cup ready-made bluerry toppings and heat for a few seconds. Cool the mixture before spreading it on top of your cheesecake.

Refrigerate your cheesecake with toppings for 2 hours if you want your toppings to run a little bit on the side when you release it from the pan. If you want it to be fully set, then refrigerate it longer until toppings are fully set.

You can add whichever toppings you like, I tried it with Blueberries, Strawberries and even Lemon Icing... go nuts ... be experimental and have fun!

Happy Baking!!!

3 Comments

Rolled Fondant Icing

7/31/2011

0 Comments

 
Picture
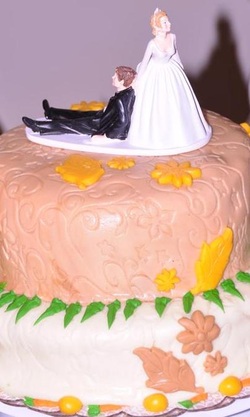
My mom and dad's wedding cake on their 40th wedding anniversary when they renewed their vows...
Wow. Never ever thought I'll be writing about Fondant anytime soon. Not the chocolate fondant where it's gooey on the inside which I also love.

I'm talking about rolled fondant that you use to cover cakes for special occassions. The fondant that intimidated me for soooo long, I think a lot of people for that matter. I can't even begin to explain my relief when I looked at my first ever cake, covered in glorious fondant.

Having the stand mixer made my baking life easier. Making a fondant? Stand mixer is truly heaven-sent.

Tip 1: When you reach the stage that you have to add the remaining 4 cups.
If you have a stand mixer, then use it, speed no. 2, using the hook attachment.
Tip 2: To roll out fondant, your pin must be silicon made. Fondant will stick to wooden pin.
Tip 3: To know if your fondant is ready to be rolled by moulding a small shaped stone, drop it on your work surface. It should spread slightly but must retain its shaped.
Tip 4: Sprinkle your work surface with confectioner's sugar to avoid getting your fondant stuck on your surface. If you are in a humid location, like the middle east for example, then use half cornstarch, half sugar. If you use only sugar, it will become more sticky because sugar attracts moisture from the air.
Tip 5: After a couple of rools, turn your fondant a quarter turn at a time to avoid it from getting stuck on the surface.
Tip 6: You should only cover cakes which are firm. Fondant is heavy and any cake that's not strong enough will be easily weighed down by fondant. I made a mistake of covering a carrot cake with a soft bodied cream cheese frosting on my second try, and let's just say, it didn't keep its shape well.
Tip 7: Because fondant is practically solid sugar, most people don't like the taste of it and peel it off the cake, so make sure your cake inside is full of flavour.


Ingredients:
1 tablespoon plus 2 teaspoons unflavored gelatin
1/4 cup cold water
1/2 cup glucose
2 tablespoons vegetable shortening
1 tablespoon glycerin
8 cups sifted confectioner's sugar
icing colour and flavouring, as desired
Extra confectioner's sugar to find your right consistency

Can cover 10 inch x 4 inch high cake. (appox 36 oz)

Procedure:
Mix gelatin and cold water, let it stand for 3-5 minutes, until the gelatin is well soaked. Using a double boiler, heat the gelatin mixture until it's dissolved. Add glucose and mix well. Add shortening and wait until it's almost completely melted. Add glycerin (flavouring and colour, if adding any). Cool the mixture until lukewarm.

Grease the side of your mixing bowl with shortening. Place 4 cups confectioners' sugar and make a well in the middle. Pour the gelatin mixture into the well. Start mixing from the middle with your wooden spoon until all sugar all sugar are well combined.

Add the remaining 4 cups of sugar, a cup at a time. Mixing well on every addition. Knead until the stickiness disappears and mixture becomes pliable. When it starts clearing the sides of your bowl, transfer the mixture on a smooth work surface, either on a granite counter top or a silicon mat for further kneading. 

Knead your fondant with additional sugar if needed until your fondant becomes smooth and pliable.

Use your fondant immediately or keep it in an airtight container in a cool and dry place. Do not refrigerate! If you're ready to use it, knead it again until soft.

Roll your fondant about 1/4 inch thin. Transfer fondant to your previously crumb coated cake and smooth it until your happy with the end result. Add your finishing touches, either other moulded fondant or royal icing designs.

Enjoy your well deserved pat on the back!
0 Comments

Moist Chocolate Cake or Cupcakes

7/20/2011

1 Comment

 
Seems like a lot of my friends love chocolate cakes and cupcakes and so I'm sharing this recipe I recently discovered.

With this recipe I used my Coffee Buttercream (click for recipe) to ice the goodies.

Tip 1: If you don't have a double boiler, you can use a glass bowl like Pyrex that will be placed on top of a pan of simmering water. The bowl must not touch the water but will be steamed by the hot air it sealed at the bottom.
Tip 2: If you're using a stand alone mixer, like Kitchen Aid, use the paddle to mix your batter. If not, normal beater will do. 
Tip 3: Depending on your

Ingredients:
2 1/2 cups all purpose flour
1 teaspoon baking soda
1/2 teaspoon salt
170 grams semi-sweet chocolate
3/4 cup or 1 1/2 sticks or 170 grams softened butter
1 1/2 cups granulated sugar
3 eggs
2 teaspoons vanilla extract
1 1/2 cups milk (room temperature)

Makes 24 cupcakes or 1 decent height 8-inch cake

Preheat oven to 350 F.

Cake: Grease and flour your pan or spray your pan with cake release if you have one.
Cupcakes: Line your pan with cupcake liners.

Flour mixture: In a medium bowl, combine flour, baking soda and salt.

Choc mixture: In a double boiler, melt chocolate and butter. Stir your chocolate until it is completely melted.

In a large mixer bowl, combine your chocolate mixture with sugar. Beat with electric mixer until it's well blended.

Add eggs one at a time, add vanilla and mix well. Add flour mixture alternately with milk; beat until well blended and smooth. 

Pour batter into prepared pans. 

Bake your cake for at least 60 minutes. Cool 10 minutes in pan on rack. Gently loosen sides with spatula and remove. Cool completely before decorating.

For cupcakes, bake for 25 minutes. Cool on racks and start devouring!

To up the ante of your cake: With a cake leveler or a serrated knife, slice your cake horizontal to make 2 or three levels. In between, spread your buttercream icing and fresh slices of strawberry.

To up the ante of your cupcake: Swirl icing on top and top with half slice of strawberry for sexier presentation.

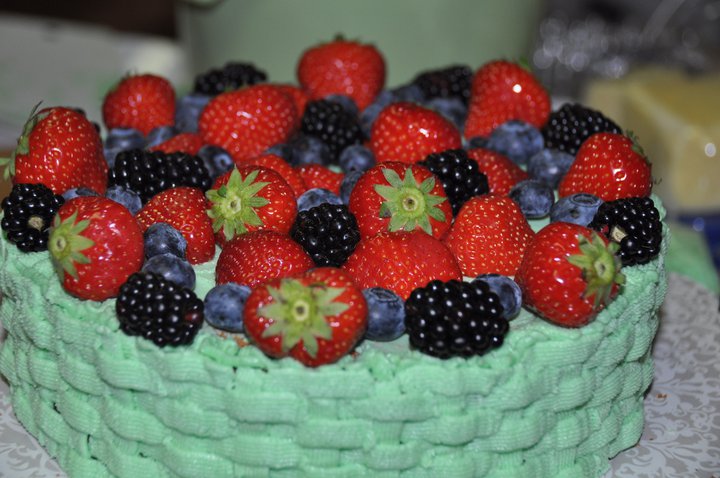
To up the ante of the ante of your cake :P make a buttercream icing of medium consistency, add few drops of food colouring, ice your cake basketweave design using tip 47. Top with fresh berries and you have a jaw-droppingly-awesome cake!

Enjoy your rich, moist and really yummy choc goodness!

Cake lasts 3-4 days in room temperature :)
1 Comment

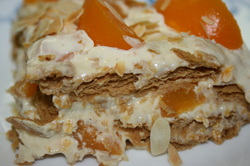
Peaches and Cream Pudding

5/23/2011

0 Comments

 
Picture
I used to know nothing about cooking, most especially baking. Growing up, we haven't even used the oven in our house, not even once. Okay, that's a lie. I think we did use it once, basically our neighbor did, she ran out of gas so had to try to salvage her cake... so yes, it was used once.

In college, my crowd wass a bit different. My friends in the Uni and even my pals in the dormitory know a thing or two about the kitchen. Unlike me, they're pretty much well prepared for the kitchen. There's always discussion about the best way to cook, bake, prepare something. I'll happily listen, better yet taste, but I wasn't really interested. 

Since we're not allowed to cook in the dorm, one pal of mine thought us this no-bake pudding. If I'm not mistaken, her name is Inez.

Anywho, I was soooo happy and proud of my girly learning that I immediately made one for my dad when I went home one weekend. I practically shoved it to his face and I couldn't for the love of me understood why my dad's all weird about the whole thing.

After he finished the pudding I served him, it dawn on me, he doesn't eat dairy, ever! Poor old man of mine, loves me sooo much that he'd rather have tummy discomfort than break my heart!

I still make this pudding because it's one of the easy way of satisfying our sweet tooth, I just make sure I don't serve it to my dad.

Ingredients:
480 grams even slices of peaches
4 tbsp peaches syrup (from the peach can)
4 tbsp condensed milk
4 tbsp icing sugar
3 x 160 grams Nestle Cream
8 to 14 graham crackers (depending on size of tray and number of layers)
Toasted Almond slivers for garnish
Serves 6 generous portion, or 12 small ones


Procedure:
Smash 4 halves of peaches and mixed it with peaches' syrup, condensed milk, icing sugar and nestle ceam. 

Adjust it to your taste. If you want more or less sweet in it, adjust your sugar.

Refrigerate for 3 hours to thicken the cream.

Assemble your pudding by, spreading a thin layer of cream on the bottom of your tray.

Arrange a layer of graham crackers. Pour a thick layer of cream mixture over crackers and top with slices of peaches. Arrange another layer of graham crackers and do the same topping process.

Make sure you leave enough cream and peaches for your top layer to ensure a smooth finish.

Wrap the top with cling film and refrigerate overnight.

There you have it, super easy Peaches and Cream Pudding. Sprinkle toasted almonds on top before cutting or serving for crunchier texture.

Happy Eating!
0 Comments

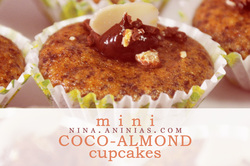
Mini Coco-Almond Cupcakes

2/25/2011

2 Comments

 
Picture
Eversince I went back to cooking and baking, my kids expectation about dinner, weekend meals and desserts changed.

Nowadays, my oldest son starts asking "what's for dinner" the minute I enter the house. If I ask him what does he feel like eating, he'll retort with "surprise me mommy" ala the animated movie Ratatouille.

So, to keep everyone happy, including me... I am always on the everlookout for new recipes.

Tip 1: If you don't want to make the ganache, use a store bought Betty Crocker Chocolate Frosting.
Tip 2: If you don't like orange, find other flavoured infused-chocolate
Tip 3: If you want a bigger sized cupcakes, scoop out a small top in the middle and fill with the ganache for a more decadent taste

Ingredients:
100 grams dark chocolate, chopped
1/2 cup ground almonds
3/4 cup self-raising flour
4 eggs, separated
1/2 cup caster (superfine) sugar
2 tbsps warm milk
orange-infused chocolate flakes

Chocolate Ganache:
100 grams dark chocolate, chopped
100 grams unsalted butter

Makes approx 55-60 mini cupcakes

Procedures:
Preheat the oven to 350F.

Process chopped chocolates in a processor until finely ground. Add the almonds and flour, process until just combined.

Beat the egg yolks and sugar with electric beaters for 2-3 minutes until thick and pale. Stir chocolate mixture, then the milk.

On a separate bowl, beat the egg whites until soft peaks form. Gently fold the whites into the imxture with a metal spoon until just combined.

Divide the mixture into the muffin cases, filling just 3/4 of the cases.

Bake for 10-12 minutes, or until a skewer comes out clean when inserted into the centre. Transfer onto a wire rack to cool.

To make the ganache:
Place the chocolate and butter in a small heatproof bowl over a saucepan of simmering water, making sure the bowl doesn't touch the water. Stir until smooth and combined. Refrigerate for 20 minutes, stirring occassionally until thickened.

Happy Eating!
2 Comments
<<Previous
Forward>>

    Fave Recipes

    I'm No Chef but I love food like it's no one's business.

    I didn't know anything about cooking... frying an egg used to be a nightmare.. until I was forced to learn more... I had my first born... that's when my gastronomic journey started...

    Join me in my food quest.
    Laugh at my embarrassing moments.
    Share my triumphs.

    And if you're brave enough ... cook with me (ooooh scary!), virtually that is, and have the most enjoyable time!

    Welcome aboard
    fellow foodies!

    Print Friendly and PDF

    Categories

    All
    Ac Spin
    Appetizer
    Baking
    Bbq
    Beef
    Bread
    Breakfast
    Butter
    Chicken
    Dairy
    Dessert
    Drink
    Entree
    Fave
    Fondant
    Gobbledtooquicklyphotosnexttime
    Halloween
    Icing And Frosting
    Lamb
    Main Course
    Marinade
    Nibbles
    Occasions
    Pasta
    Pastry
    Pork
    Poultry
    Rice
    Salad
    Sandwich
    Sauce
    Seafood
    Side Dish
    Slow Cooker
    Smoothie
    Snacks
    Soup
    Spaghetti Challenge
    Stew
    Stock
    Tapas
    Vegetables
    Workinprogress
    Zespiri Kiwifruit

    Archives

    February 2016
    January 2016
    January 2013
    November 2012
    October 2012
    September 2012
    August 2012
    July 2012
    June 2012
    May 2012
    April 2012
    March 2012
    February 2012
    September 2011
    August 2011
    July 2011
    June 2011
    May 2011
    April 2011
    February 2011
    January 2011
    December 2010
    November 2010
    October 2010
    September 2010
    August 2010

    RSS Feed

Powered by Create your own unique website with customizable templates.