Niña
​nin-ya
  • About Me
    • Contact Me
    • Tourettes
    • Geeeetar Playin'
  • My Life
  • Travel Bug-a-boo
  • Fave Recipes
    • Photo Gallery
  • Picture the Taste
  • Bright Ideas
  • Reviews
  • About Me
    • Contact Me
    • Tourettes
    • Geeeetar Playin'
  • My Life
  • Travel Bug-a-boo
  • Fave Recipes
    • Photo Gallery
  • Picture the Taste
  • Bright Ideas
  • Reviews
Niña
​nin-ya

NIÑA ​ANINIAS

SHOP. COOK. EAT.
REPEAT.

Strawberry Whipped Cream Frosting

7/29/2012

0 Comments

 
Picture
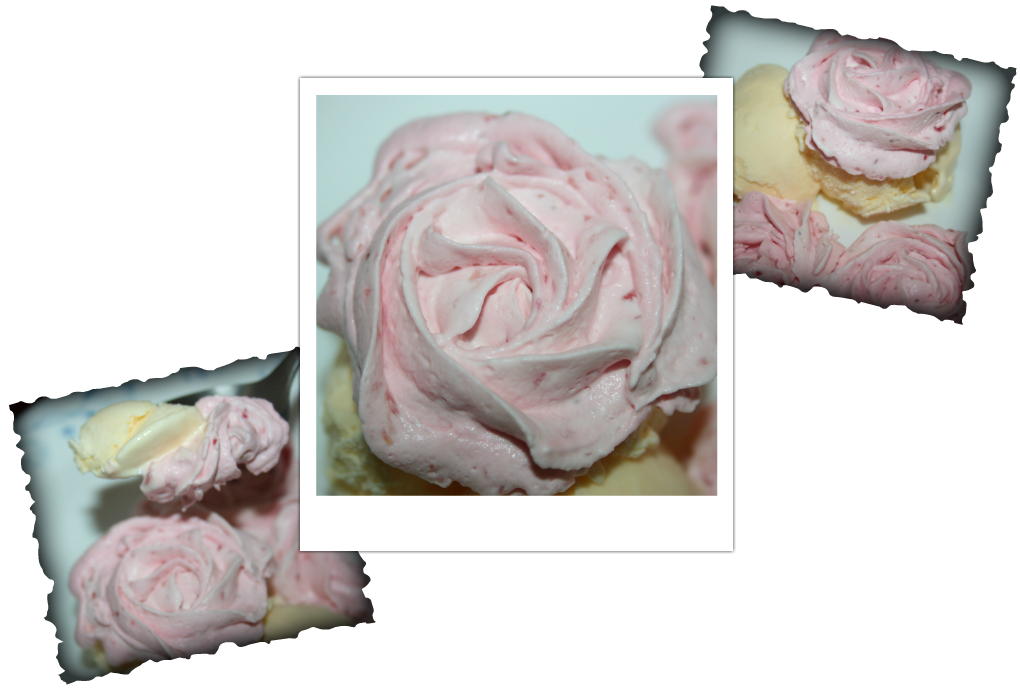
So, I'm now a big fun of 2D Icing Tip and Roses! Since I'm a huge fan of whipping cream and strawberries too, why not combine them all for more fun?

One fine day, which is today, hubby is at work and my kids are at their cousins for another day or so and I'm seriously in need of something productive to do other than watching Olympics 2012 segment and reporting it impulsively on Twitter. I thought of being creative.
 
My cousin-in law asked me for a Strawberry Whipped Cream Frosting and I thought why not? So I made this super duper easy whipped cream to test.

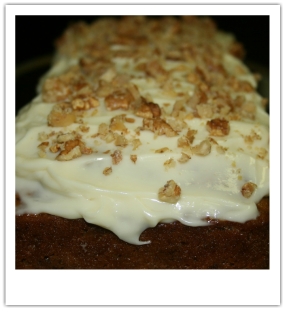
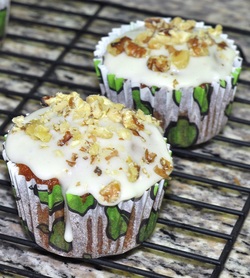
Tip 1: I ate this with vanilla ice cream and it was amazing. You can use this to frost cupcakes or cakes.
Tip 2: you can use more pureed strawberries but know that the more puree you use, the less stable your cream will be.
Tip 3: you can use gelatin as a stabilizing agent if you wish too but taste will definitely vary

Ingredients:
1 cup heavy whipping cream
1/3 cup icing sugar
3 - 4 tablespoons freshly pureed strawberries (look at slideshow on how to puree)
a tiny tinge of red food colouring (optional),

Procedure:
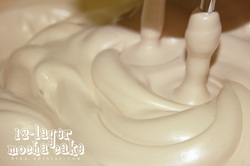
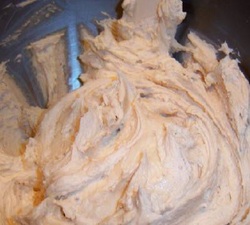
Whip heavy whipping cream until it resembles those ready-to-spray whipped cream.  

Add sugar and whip some more. Add pureed strawberries and food colouring. Finish whipping to the consistency you like.

Be careful not to overwhip it at this stage because it will start to split and gone will be your pretty cream.

*I used the cream straight away and notice it to be warm and so couldn't create the rose shape, which means it will not hold any shape.

*I chilled it for half an hour and pipe out a rose and it came out beautifully. Of course, it being a whipped cream without stabilizer, it means, it will not hold its shape as long as a normal icing or buttercream would.

*If you don't mind serving chilled cake then frost your cake and chill them in the fridge until serving time.
0 Comments

Cream Cheese Icing - 2

3/10/2012

0 Comments

 
Picture
This is my recent discovery and I'm very happy with it, is an understatement.

I found a recipe for banana cake that has cream cheese frosting on it. It's very simple but tastes really good. Just a proof that it doesn't have to be complicated to be delicious.

Ingredients:
1/2 cup butter, softened
226 grams or 8 oz cream cheese, softened
1 teaspoon vanilla
1 cup icing sugar

Directions:
Cream butter and cream cheese until smooth.

Beat in 1 teaspoon vanilla.

Add icing sugar and beat in low until well combined. Then on high speed until smooth.

Spread on your cupcakes or cakes and enjoy the creamy cheesy goodness!

-AcousticChef - cookin' one tune at a time!
0 Comments

Cream Cheese Icing - 1

3/10/2012

0 Comments

 
Picture
I thought it's befitting for me to create a recipe just for cream cheese icing or frosting.

Cream Cheese Frosting is tricky for me because it develops-as-you-go kind of thing for me. There are times when my cream cheese is not stable enough that adding more sugar seems like the best option to stabilize it. The problem is it becomes sickly sweet. There are times when it just happens perfect. 

One of my reliable cream cheese recipe is the one that I use in my carrot cupcake and cakes.

The number of sugar you want to add depends on how sweet do you want your icing to be? So you have to consider the base cake, is it sweet enough, then lessen the amount of sugar in the icing. Is it a cake that needs to be complimented further by a sweet frosting, then, be my guest, follow the recipe or add more if you wish.

Again, it is finding the right consistency and taste that YOU prefer. At the end of the day, you're the one eating (for some, licking) it.

Ingredients:
1 ounce white chocolate
4-ounce cream cheese, softened
1/2 teaspoon vanilla extract
1/4 teaspoon orange extract
2 cups confectioner's sugar
1 tablespoon heavy cream

Directions:
In a double boiler, melt white chocolate over low heat. Stir until smooth, and
allow to cool to room temperature.

In the first bowl, beat together cream cheese and butter until smooth. Mix in white
chocolate, vanilla, and orange extract. Gradually beat in the confectioners'
sugar until the mixture is fluffy. Mix in heavy cream.

Spread it on your cake!

-AcousticChef - cookin' one tune at a time!
0 Comments

Rolled Fondant Icing

7/31/2011

0 Comments

 
Picture
My mom and dad's wedding cake on their 40th wedding anniversary when they renewed their vows...
Wow. Never ever thought I'll be writing about Fondant anytime soon. Not the chocolate fondant where it's gooey on the inside which I also love.

I'm talking about rolled fondant that you use to cover cakes for special occassions. The fondant that intimidated me for soooo long, I think a lot of people for that matter. I can't even begin to explain my relief when I looked at my first ever cake, covered in glorious fondant.

Having the stand mixer made my baking life easier. Making a fondant? Stand mixer is truly heaven-sent.

Tip 1: When you reach the stage that you have to add the remaining 4 cups.
If you have a stand mixer, then use it, speed no. 2, using the hook attachment.
Tip 2: To roll out fondant, your pin must be silicon made. Fondant will stick to wooden pin.
Tip 3: To know if your fondant is ready to be rolled by moulding a small shaped stone, drop it on your work surface. It should spread slightly but must retain its shaped.
Tip 4: Sprinkle your work surface with confectioner's sugar to avoid getting your fondant stuck on your surface. If you are in a humid location, like the middle east for example, then use half cornstarch, half sugar. If you use only sugar, it will become more sticky because sugar attracts moisture from the air.
Tip 5: After a couple of rools, turn your fondant a quarter turn at a time to avoid it from getting stuck on the surface.
Tip 6: You should only cover cakes which are firm. Fondant is heavy and any cake that's not strong enough will be easily weighed down by fondant. I made a mistake of covering a carrot cake with a soft bodied cream cheese frosting on my second try, and let's just say, it didn't keep its shape well.
Tip 7: Because fondant is practically solid sugar, most people don't like the taste of it and peel it off the cake, so make sure your cake inside is full of flavour.


Ingredients:
1 tablespoon plus 2 teaspoons unflavored gelatin
1/4 cup cold water
1/2 cup glucose
2 tablespoons vegetable shortening
1 tablespoon glycerin
8 cups sifted confectioner's sugar
icing colour and flavouring, as desired
Extra confectioner's sugar to find your right consistency

Can cover 10 inch x 4 inch high cake. (appox 36 oz)

Procedure:
Mix gelatin and cold water, let it stand for 3-5 minutes, until the gelatin is well soaked. Using a double boiler, heat the gelatin mixture until it's dissolved. Add glucose and mix well. Add shortening and wait until it's almost completely melted. Add glycerin (flavouring and colour, if adding any). Cool the mixture until lukewarm.

Grease the side of your mixing bowl with shortening. Place 4 cups confectioners' sugar and make a well in the middle. Pour the gelatin mixture into the well. Start mixing from the middle with your wooden spoon until all sugar all sugar are well combined.

Add the remaining 4 cups of sugar, a cup at a time. Mixing well on every addition. Knead until the stickiness disappears and mixture becomes pliable. When it starts clearing the sides of your bowl, transfer the mixture on a smooth work surface, either on a granite counter top or a silicon mat for further kneading. 

Knead your fondant with additional sugar if needed until your fondant becomes smooth and pliable.

Use your fondant immediately or keep it in an airtight container in a cool and dry place. Do not refrigerate! If you're ready to use it, knead it again until soft.

Roll your fondant about 1/4 inch thin. Transfer fondant to your previously crumb coated cake and smooth it until your happy with the end result. Add your finishing touches, either other moulded fondant or royal icing designs.

Enjoy your well deserved pat on the back!
0 Comments

Coffee Buttercream

12/20/2010

0 Comments

 
Picture
FV43-07-1210

This buttercream can be used for different pastries... it's yummy that you will want to put it on everything!

Recipe Credit:
Gourmet 2008

Coffee Buttercream
Ingredients:

2 cups sugar, divided
3/4 cup water
6 large egg whites at room temperature 30 minutes
2 tablspoons plus 1 teaspoon instant-espresso powder
1 tablspoon pure vanilla extract
1/2 teaspoon cream of tartar
1/4 teaspoon salt
6 sticks (1 1/2 pounds) unsalted butter, cut into tablespoon pieces and softened

Equipment: a candy thermometer; a stand mixer fitted with whisk attachment (I used a handheld and almost sprained my hand, but it was worth the near hospitalization)

Preparation:

Bring 1 3/4 cups sugar and water to a boil in a 3-quart heavy saucepan over medium heat, stirring until sugar has dissolved, then wash down any sugar crystals from side of pan with a pastry brush dipped in cold water. Boil, without stirring, until it registers 220 to 225°F, 15 to 20 minutes.

At this point, while continuing to boil syrup, beat whites with espresso powder, vanilla, cream of tartar, and salt in mixer at medium speed until they just hold soft peaks. Add remaining 1/4 cup sugar, 1 tablespoon at a time, beating, and beat until whites just hold stiff peaks.

When syrup reaches soft-ball stage (238 to 242°F), immediately pour syrup in a slow stream down side of bowl into whites (avoid beaters) while beating at high speed. Beat until completely cool, 25 to 30 minutes. With mixer at medium speed, add butter 1 tablespoon at a time, beating well after each addition (see cooks’ note, below) and until buttercream is smooth. (Mixture may look curdled before all butter is added but will come together at end.)

Cooks’ notes:
If buttercream looks soupy after some butter is added, meringue is too warm: Chill bottom of bowl in an ice bath for a few seconds before continuing to beat in remaining butter.

Buttercreams can be made 1 week ahead and chilled or 1 month ahead and frozen. Bring to room temperature (do not use a microwave), about 2 hours, and beat with an electric mixer until spreadable.

The egg whites in this recipe are not fully cooked
Enjoyed this recipe? Subscribe to Fave Recipes for updates!

Enter your email address:

Delivered by FeedBurner

0 Comments

Mocha Buttercream Icing

12/7/2010

0 Comments

 
Picture
FV38-02-1210

I love coffee and this is the second coffee inspired concoction that I made and tried.

Tip 1: 4 cups of confectioner sugar if you want it thick, 3 cups if you want it thinner

Ingredients:
1/2 cup solid vegetable shortening (CRISCO can be bought from your Supermarket, next to the Indian Ghee)
1/2 cup butter softened
1/4 cup cocoa powder or 1 oz square of unsweetened chocolate, melted
3 tablespoon instant coffee/ espresso powder / strong brewed coffee (diluted in water)
1 teaspoon vanilla extract (vanilla from the pods)
4 cups confectioner's sugar or icing sugar
2 tablespoons milk

Makes about 3 cups 


Cream shortening and butter with electric mixer until light and fluffy.

Add the next three ingredients and mix well. Gradually add sugar, one cup at a time by beating at medium speed. Scrape sides and bottom of bowl often. When all sugar has been mixed in, icing will appear dry. Add milk; beat at medium speed until light and fluffy.

If you want a thinner icing, add one tablespoon of milk at a time to reach the consistency you like.

Keep icing covered with a damp cloth until ready to use. For best results, keep icing in refrigerator in an airtight container. Can be stored 2 weeks, just re-whip before using.
Enjoyed this recipe? Subscribe to Fave Recipes for updates!

Enter your email address:

Delivered by FeedBurner

0 Comments

    Fave Recipes

    I'm No Chef but I love food like it's no one's business.

    I didn't know anything about cooking... frying an egg used to be a nightmare.. until I was forced to learn more... I had my first born... that's when my gastronomic journey started...

    Join me in my food quest.
    Laugh at my embarrassing moments.
    Share my triumphs.

    And if you're brave enough ... cook with me (ooooh scary!), virtually that is, and have the most enjoyable time!

    Welcome aboard
    fellow foodies!

    Print Friendly and PDF

    Categories

    All
    Ac Spin
    Appetizer
    Baking
    Bbq
    Beef
    Bread
    Breakfast
    Butter
    Chicken
    Dairy
    Dessert
    Drink
    Entree
    Fave
    Fondant
    Gobbledtooquicklyphotosnexttime
    Halloween
    Icing And Frosting
    Lamb
    Main Course
    Marinade
    Nibbles
    Occasions
    Pasta
    Pastry
    Pork
    Poultry
    Rice
    Salad
    Sandwich
    Sauce
    Seafood
    Side Dish
    Slow Cooker
    Smoothie
    Snacks
    Soup
    Spaghetti Challenge
    Stew
    Stock
    Tapas
    Vegetables
    Workinprogress
    Zespiri Kiwifruit

    Archives

    February 2016
    January 2016
    January 2013
    November 2012
    October 2012
    September 2012
    August 2012
    July 2012
    June 2012
    May 2012
    April 2012
    March 2012
    February 2012
    September 2011
    August 2011
    July 2011
    June 2011
    May 2011
    April 2011
    February 2011
    January 2011
    December 2010
    November 2010
    October 2010
    September 2010
    August 2010

    RSS Feed

Powered by Create your own unique website with customizable templates.