Niña
​nin-ya
  • About Me
    • Contact Me
    • Tourettes
    • Geeeetar Playin'
  • My Life
  • Travel Bug-a-boo
  • Fave Recipes
    • Photo Gallery
  • Picture the Taste
  • Bright Ideas
  • Reviews
  • About Me
    • Contact Me
    • Tourettes
    • Geeeetar Playin'
  • My Life
  • Travel Bug-a-boo
  • Fave Recipes
    • Photo Gallery
  • Picture the Taste
  • Bright Ideas
  • Reviews
Niña
​nin-ya

NIÑA ​ANINIAS

SHOP. COOK. EAT.
REPEAT.

Pan de Sal !!!

8/17/2011

4 Comments

 
Picture
Credits: Thanks Ate Mi for sharing this amazing recipe...

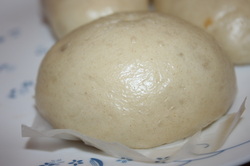
Pan de Sal is like dinner rolls but I'm biased so I'd say it's fluffier and tastier than your usual dinner rolls.

I grew up with Pan de Sal. I ate it almost every single time, definitely not as dinner rolls, mostly, at breakfast, afternoon snack, or just when I'm bored and wants to have a nibble.

We eat it different ways. Plain, with jams, with savoury stuffing in it, as an accompaniment to stir fry noodles, with bacon, egg or hotdogs, to eat left over food that has sauce to soak the bread with ... this bread is sooo versatile that the next time I make one, I'm literally going to stuff it.

Traditionally, it's baked in a stone oven... the proper horno. Pan de Sal baked from conventional oven tastes great but traditional oven is pleasantly unique. But, for the time being, my humble oven will do... hope it won't complain of over fatigue. Seems like this is going to be a family favourite... my youngest is already hooked on it.

It took me at least a year to muster the courage to bake pan de sal... no regrets... just happy I didn't jump the gun with some lame recipe... this one really works!

Tip 1: Be patient, your dough will come together
Tip 2: Make sure your yeast gets properly proofed. Your milk should not be too hot nor too cold. If you can't stick your finger in it, it means it's too hot. It should be blood temperature. 
Tip 3: Add a cup or more flour to help form the dough. You want your dough pliable... but not wet. You're going to go by touch, it can't be dry too.
Tip 4: Your pan de sal doesn't have to be all uniform.... it's home made! you want it to be as rustic as a home-made should look like... if you want it uniform... might as well buy it from the bakeshops.

Ingredients:
yeast mixture
1 cup lukewarm milk
1 tbsp sugar
1 tbsp active dry yeast

dry ingredients
5 cups bread flour
1 1/2 tsp salt
1 cup sugar

milk mixture
1 cup milk
1/2 stick butter or 60 grams, cut into small pieces
extra 1/2 cup milk 
1 egg

extra 1 - 1 1/2 cup bread flour

bread crumbs

Makes 20 pan de sals

Procedures:
Add 1 tbsp yeast and 1 tbsp sugar to the lukewarm milk. Stir and let it sit for 15 minutes. It should have a beer-foam appearance on top after the wait, if it doesn't then the yeast did not activate and you must re-do the mixture.

In a microwavable bowl, combine milk and butter pieces together. Heat for 1 1/2 minutes. Mix and make sure all the butter is melted. Add the remaining half cup milk and 1 egg, then beat a little.

Add your yeast mixture to the milk mixture, stir a little until just combined.

Add the liquid mixture to the dry ingredients.

Using a wooden spatula, start folding until dough starts to form. At some point, you'll be ditching the spatula and will start mixing with your hand for about 8 minutes or at least until the dough starts clearing the sides of your bowl by gradually adding additional 1 cup to 1 1/2 cup extra bread flour.

Transfer your dough to a lightly floured surface and knead the dough further. When it no longer clings to your fingers and becomes elastic, form a clean ball and return to your bowl. Cover with damp cheesecloth or towel and rest for one hour.

Transfer the dough again to a lightly floured surface and knead a little more to knock out the air. Rest for another 30 minutes (you can skip this middle resting if you want). Divide into 3 portions.

Work on each portion by flattening it to 1/2 inch thick and 11 inches wide rectangle.

Roll the wide side towards you, tucking the seams with your palms until you have a semi log.

Cut to 1 inch to 1 1/2 inches portion, making 6-7 individual rolls per big portion.

Roll your individual portions onto bread crumbs and place on your baking sheet with the cut sides on top and bottom.

Place them half inch apart so when it bakes, it will rise high enough and will be fluffier than if it's too far apart. Rest for another 1 hour to let the dough expand a little bit more.

Bake in a pre-heated oven on 350 degrees for 15 minutes or until your preferred colour, pale, golden brown, brown.

Fresh from the oven, open one and see how soft and fluffy your creation is! Enjoy your home made pan de sal that will beat any commercially made ones...!

Happy eating!
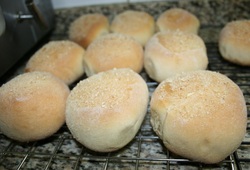
My first attempt on my beloved pan de sal... pretty much a disaster... as they say, practice makes perfect, so I'm practicing!

My second attempt, soooo much better... yipee!
4 Comments

Churros

8/11/2011

0 Comments

 
Picture
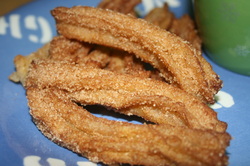
I've always been intrigued of how Churros are made, especially how Churros taste. I know it's the Latin version of doughnut, but for me, there's really no other way of getting introduced to a dish but to make them and taste them right after it's made.

Ingredients:
Dough
1 cup water
1 1/2 tablespoons sugar
1 teaspoon salt
1 tablespoon vegetable oil
1 cup all purpose flour
1 egg

4 cups oil for deep frying

Coat
1 cup white sugar
1 teaspoon ground cinnamon

Makes 24 sticks of 4-inch churros

Procedures:
Mix the coating in a medium mixing bowl or zip loc bag and set aside.

In a medium saucepan, heat your oil for deep frying until it reaches almost 380 degrees F.

While your oil is heating up, mix your dough in another medium saucepan on a medium high heat. Add, water, sugar, salt and vegetable oil, stir and let it reach the rolling boil stage.

Turn off the heat, add your flour and vigorously mix until a ball is formed. Rest for five minutes and re-mix with one whole egg.

Place the dough mix in a pastry bag with a 2D star tip for easy piping.

Once the oil is hot enough, start piping out 4-inch long churros strip directly into the oil. Don't overcrowd your pan to ensure you maintain the temperature for deep frying. If you use 2D tip, you only need 2 minutes per stick, otherwise you'll need to do a trial and error for thicker sticks.

Drain your churros on a kitchen towel and transfer to your coating mixture. Toss until its fully coated.

Serve your churros with hot chocolate for dipping or sipping and enjoy!

Happy Eating! 

  
0 Comments

Cheesecake Galore!

8/3/2011

3 Comments

 
Picture
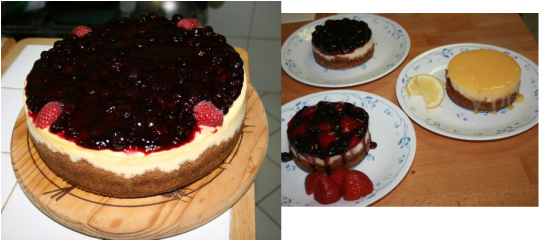
I thought I will keep this recipe for myself but what's the joy in that?

So, I'm gloriously sharing it to all.

Ingredients:
Crust:
2 1/3 cups Graham Cracker Crumbs
1/2 cup
1/4 cup sugar

Fillings:
900 grams cream cheese
1 1/2 cups sugar
1/4 cup all purpose flour
5 large eggs (or 7 small-to-medium ones)
460 grams sour cream
1/4 cup milk
1 tablespoon vanilla extract

Toppings:
1 cup fresh blueberries
1/4 cup sugar
1 cup ready-made blueberry toppings
1 1/2 teaspoons cornstarch diluted in 2 tablespoons cold water

Makes one 10-inch cheesecakes or 
five 4-inch crust and 10 4-inch cheesecake fillings (so you might want to double your crust for mini pans). 

Procedure:

Crust:
Preheat oven to 375 degrees F. Prepare your springform pan by wrapping the outer part with aluminum foil.

Using a food processor, mix all ingredients until it's well combined and moist. Press crumb mixture onto the bottom of the pan and on the sides, 2 inches for 10-inch cake and an inch will be enough for a 4-inch cake.

Bake until it starts to brown, 8-10 minutes. Set your crust aside and let cool.

Filling
Beat cream cheese and sugar in your mixing bowl (either by stand alone mixer or hand mixer). Beat in flour, then add one egg at a time. Add the sour cream, milk and vanilla.

Pour the filling into the crust or ladle if you are making mini-cheesecakes.

Place the pan(s) in a large roasting pan. Pour hot water into the roasting pan until it reaches an inch or so of the springform pans' side. 

Bake cheesecake until it's just set in the center, golden brown, 1 hour for 10-inch cake, 15-20 minutes for 4-inch mini-cakes.

Refrigerate for 6 hours before adding toppings.

Toppings:
In medium  high heat, heat the fresh blueberries, starch and sugar until it is completely dissolved. Boil until the mixture thickens. Stir in 1 cup ready-made bluerry toppings and heat for a few seconds. Cool the mixture before spreading it on top of your cheesecake.

Refrigerate your cheesecake with toppings for 2 hours if you want your toppings to run a little bit on the side when you release it from the pan. If you want it to be fully set, then refrigerate it longer until toppings are fully set.

You can add whichever toppings you like, I tried it with Blueberries, Strawberries and even Lemon Icing... go nuts ... be experimental and have fun!

Happy Baking!!!

3 Comments

Hot Bun - Char Siu Bao / Siopao I

8/1/2011

0 Comments

 
Picture
Siopao is from the Chinese influence in my country. It's pretty much the same as Hong Kong hot buns. Obviously, we have to tweak it to our palate, which is also influenced by the Spaniards, thus the name, Sio-pao Asado :)

I always love siopao and buy it whenever I have the chance. So when I heard my cousins and sis-in-law proudly made one, I got inspired to try it myself.

It wasn't easy, I did made lots of booboos but I now know where I made my mistakes.

Tip 1: Make sure the meat you use is lean (this is my booboo). First, the fat will make your mixture oily. Second, when the fat disintegrates, there will not be enough meat to soak up the sauce, hence the end result will be on the salty side (another booboo).
Tip 2: 5 cups of all purpose flour is the starting point. You must add some more until you reach the right texture. You'll know when it is no longer sticky and it holds its shape. This is important so the crimps will stay as is until you steam your siopao. This is my other booboo, I was too impatient to wait for the right texture. So, when I crimped the sides, it merged instead of holding shape. The end result of my siopao became a smooth one instead of having the twisted rydges on top.
Tip 3: You can have your meat, pork, beef or chicken... can even use shrimp (though I haven't tried shrimp yet)
Tip 4: Make sure your yeast proof properly. Warm water means blood temperature. Not too hot and not too cold. If you can't put your finger in the water, then it's too hot.
Tip 5: Rest your dough in the oven (make sure it's not on). Place a hot water in a separate bowl next to it. This will help the dough rise faster.

Ingredients:
Dough:
2 cups warm water
2 1/2 tbsp sugar (to be added to the yeast)
2 1/4 tsp dry yeast
5 cups all purpose flour
1/2 cup sugar (to be added to the flour)
1 1/4 tbsp baking powder
6 tbsp lard

Filling:
910 grams meat, chopped into small pieces
3 tbsp lard
2 tbsp garlic, minced
1 large onion, minced
2 tbsp cornstarch
3 tbsp soy sauce
4 tbsp sugar
2.5 tbsp oyster sauce
1 tbsp hoisin sauce

Sauce:
1 beef broth cube
2 tbsp corn starch diluted in a 4 tblsps of cold water
1/4 cup diced onions
2 cloves diced garlic
Fresh ground black pepper
4 tbsps brown sugar
2 tbsps soy sauce
1 tbsp Worcestershire sauce
1 teaspoon salt

Filling Procedure:
Heat the shortening in a pan. Saute the garlic and onions. Add the meat and cook until the colour turns light brown. 

Add the soy sauce, oyster sauce, hoisin sauce and sugar. Mix well and simmer for 30 minutes. Put in the corn starch diluted in cold water.

Continue cooking until the mixture becomes thick. Set aside to cool. 

Dough Procedure:
Proof your yeast by, adding yeast and sugar to your warm water in a bowl. Mix well. Rest for 10 to 15 minutes. The yeast mixture must bubble on top resembling a foam on a beer.

In another mixing bowl, put in the flour, baking powder, lard, sugar and the yeast mixture.

Knead the combined mixture until the texture of the dough becomes fine and less sticky. Cover your bowl with a wet towel and let it rest for at least an hour, to rise.

Knead the dough again then cut it into individual slices. Makes 20 individual slices.

Sauce Procedure:
Place 2 cups of water in a saucepan. Boil and add the beef cube, stir until fully dissolved.

Add onions, garlic, soy sauce, Worcestershire sauce, brown sugar, salt, ground black pepper and simmer for 10 minutes. Make sure to trap the steam by covering the saucepan. Add extra water if needed.

Add the constarch mixture, cook and stir until sauce becomes thick. Strain the liquid to get rid of the onion and other bits.

Transfer your sauce to a serving container.

Assemble and cook your Siopao:
Flatten the dough until a round shape is formed, first with your hand, then with a rolling pin.

Put the asado filling in the middle of the dough and wrap by pulling and crimping the sides together. Gather on top and twist it around.

Place the siopao on individually cut wax paper and cook them in a steamer for 15 minutes.

Serve hot with your home made sauce and enjoy!
0 Comments

Rolled Fondant Icing

7/31/2011

0 Comments

 
Picture
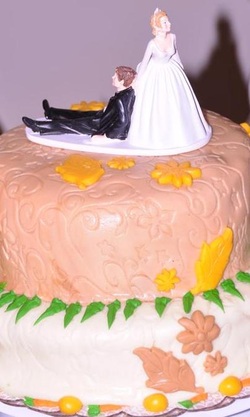
My mom and dad's wedding cake on their 40th wedding anniversary when they renewed their vows...
Wow. Never ever thought I'll be writing about Fondant anytime soon. Not the chocolate fondant where it's gooey on the inside which I also love.

I'm talking about rolled fondant that you use to cover cakes for special occassions. The fondant that intimidated me for soooo long, I think a lot of people for that matter. I can't even begin to explain my relief when I looked at my first ever cake, covered in glorious fondant.

Having the stand mixer made my baking life easier. Making a fondant? Stand mixer is truly heaven-sent.

Tip 1: When you reach the stage that you have to add the remaining 4 cups.
If you have a stand mixer, then use it, speed no. 2, using the hook attachment.
Tip 2: To roll out fondant, your pin must be silicon made. Fondant will stick to wooden pin.
Tip 3: To know if your fondant is ready to be rolled by moulding a small shaped stone, drop it on your work surface. It should spread slightly but must retain its shaped.
Tip 4: Sprinkle your work surface with confectioner's sugar to avoid getting your fondant stuck on your surface. If you are in a humid location, like the middle east for example, then use half cornstarch, half sugar. If you use only sugar, it will become more sticky because sugar attracts moisture from the air.
Tip 5: After a couple of rools, turn your fondant a quarter turn at a time to avoid it from getting stuck on the surface.
Tip 6: You should only cover cakes which are firm. Fondant is heavy and any cake that's not strong enough will be easily weighed down by fondant. I made a mistake of covering a carrot cake with a soft bodied cream cheese frosting on my second try, and let's just say, it didn't keep its shape well.
Tip 7: Because fondant is practically solid sugar, most people don't like the taste of it and peel it off the cake, so make sure your cake inside is full of flavour.


Ingredients:
1 tablespoon plus 2 teaspoons unflavored gelatin
1/4 cup cold water
1/2 cup glucose
2 tablespoons vegetable shortening
1 tablespoon glycerin
8 cups sifted confectioner's sugar
icing colour and flavouring, as desired
Extra confectioner's sugar to find your right consistency

Can cover 10 inch x 4 inch high cake. (appox 36 oz)

Procedure:
Mix gelatin and cold water, let it stand for 3-5 minutes, until the gelatin is well soaked. Using a double boiler, heat the gelatin mixture until it's dissolved. Add glucose and mix well. Add shortening and wait until it's almost completely melted. Add glycerin (flavouring and colour, if adding any). Cool the mixture until lukewarm.

Grease the side of your mixing bowl with shortening. Place 4 cups confectioners' sugar and make a well in the middle. Pour the gelatin mixture into the well. Start mixing from the middle with your wooden spoon until all sugar all sugar are well combined.

Add the remaining 4 cups of sugar, a cup at a time. Mixing well on every addition. Knead until the stickiness disappears and mixture becomes pliable. When it starts clearing the sides of your bowl, transfer the mixture on a smooth work surface, either on a granite counter top or a silicon mat for further kneading. 

Knead your fondant with additional sugar if needed until your fondant becomes smooth and pliable.

Use your fondant immediately or keep it in an airtight container in a cool and dry place. Do not refrigerate! If you're ready to use it, knead it again until soft.

Roll your fondant about 1/4 inch thin. Transfer fondant to your previously crumb coated cake and smooth it until your happy with the end result. Add your finishing touches, either other moulded fondant or royal icing designs.

Enjoy your well deserved pat on the back!
0 Comments

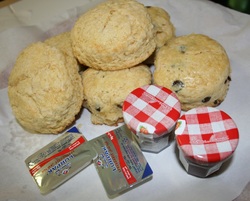
Super Easy and Delicious Scones (Cheddar Cheese, Chocolate Chips and Raisins)

5/24/2011

0 Comments

 
Picture
We went to Hong Kong for a well deserved vacation last year and one of my list of to-do's was a Hi-tea at The Peninsula Kowloon ... it's a must for anyone who takes a vacay in Hong Kong.

The Peninsula is such a landmark, not to mention, gorgeous gorgeous gorgeous. Imagine having hi-tea with a serenade of the classic melodies by an amazing classic string performers.

I fell in love with everything that day... everything on our table is just amazing and they don't take hi-tea lightly, it was all served in real silver cups and saucers, the whole nine yards is in silver! So, I had a sudden urge of gluttony... most especially the scones.

Since then, every time I think about it, I literally drool. Then I found this super easy recipe... it is true, it doesn't have to be complicated to make glorious food.

Tip 1: Don't work out the dough too much, just press them together until they're well connected
Tip 2: If you want your scones shiny and pretty, brush the top with beaten egg white and sprinkle with castor sugar before baking. If you don't like it too sweet, then omit the sugar.
Tip 3: Don't bake too many, bake just enough because scones are best served warm.
Tip 4: Bake them side by side, this helps the scones to rise 

Ingredients:
280 grams cake flour
1 tbsp baking powder
3/4 tbsp salt
3/4 tbsp cream of tartar
65 grams sugar
125 grams butter
75 grams seedless raisins or grated cheese or chocolate chips
1 extra large egg, separated
100 ml milk
3 tablespoon caster sugar
Serves 7

Procedure:
Sift first 5 ingredients. Using your finger, rub butter until the mixture resembles breadcrumbs. Add raisins or grated cheese or chocolate chips.

In a separate bowl, whisk egg yolk and milk. Make a well in the centre of the flour mixture and pour the egg and milk mixture in it. Mix to form a soft dough.

Turn dough onto a lightly floured surface and press out to 2cm thick. Cut with a 6cm scone cutter.

Place scones on greased baking tray. Brush the top with beaten and foamy egg white.

Bake at 350F for 15-20 minutes until golden brown.

Enjoy your freshly made scones with butter and jam.
0 Comments

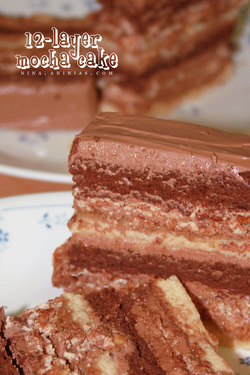
Twelve-Layer Mocha Buttercream Cake

12/19/2010

1 Comment

 
Picture
FV41-05-1210

Recipe Credit:
Ruth Cousineau
Gourmet 2008

My sister asked me to teach her how to bake a mocha cake and though I have no idea how to ever make one, I said yes. So my saga started...... and although I was supposed to teach her, I ended up doing everything without her and she just gets to eat the fruit of my labour... trickster she is, eh?

Tip 1: Patience, a very important virtue that you will soooo need if you ever embark on baking this cake
Tip 2: Baking is science, follow the recipe to the tee,,, do not, I repeat, DO NOT play with this at all (unless you are stubborn like me)
Tip 3: You must have 3 pans of the same size to make your life easy and save time.
Tip 4: You will need 9 egg yolks and 16 egg whites to make this recipe,,, which means, you're gonna need to find another recipe where your excess egg yolks can be used... mayonnaise perhaps or carbonara?

It's really pathetic, it took me three weeks to really decide to do this. For 3 weeks I was just looking and studying the recipe trying to find an excuse to not make it while at the same time trying to find a boost somewhere to make it.

I started at 10 and finished at 12. By the way, I meant 10 AM and finished midnight... don't be scared... I had lunch and took a 2-hour nap so let's say... hmmmm 12 hours in the making? So 12 for me.... which means it'll be four to six hours to normal people. I tell you one thing though, IT IS WORTH EVERY SINGLE MINUTE OF MY TIME and I'll be making this again Christmas 2010! Masochist anyone?


I hope the second time around, I won't take as much time as this one...

Serves 8 generous slices... 16 picky ones :)

Ingredients:
For cake layers:

4 large egg yolks at room temperature 30 minutes
2 tablespoons whole milk
1/2 teaspoon pure vanilla extract
3/4 cup sugar, divided
1/2 cup all-purpose flour
1/4 teaspoon salt
2 large egg whites at room temperature 30 minutes

For soufflé layers:

6 ounces fine-quality 60%-cacao bittersweet chocolate, finely chopped
1/4 cup water
5 large eggs, separated, at room temperature 30 minutes
1/4 teaspoon salt
1/2 cup sugar, divided
1 tablespoon unsweetened cocoa powder

For meringue layers:

2/3 cup hazelnuts (3 1/2 ounces)
3 large egg whites at room temperature 30 minutes
1/8 teaspoon salt
1/8 teaspoon cream of tartar
1/2 cup sugar

For syrup:

1/3 cup water
2 tablespoons sugar
1 teaspoon instant-espresso powder

For filling:
Coffee and mocha buttercreams (recipe follows)

Equipment: 3 (15-by 10-inch) 4-sided sheet pans (1/2 inch deep)

Make cake layers:
Preheat oven to 350°F with rack in middle. Butter 1 sheet pan and line bottom with parchment paper, then butter parchment. Dust with flour, knocking out excess.

Whisk together yolks, milk, vanilla, and 1/2 cup sugar in a large bowl until combined well, then whisk in flour and salt until smooth. (Batter will be thick.)

Beat whites with an electric mixer until they just hold soft peaks. Beat in remaining 1/4 cup sugar, 1 tablespoon at a time, and beat until whites just hold stiff peaks.

Fold one third of whites into batter to lighten, then fold in remainder gently but thoroughly.

Spread batter evenly in pan and rap against counter to release any air bubbles. Bake until cake is dry to the touch and pale golden, 10 to 11 minutes. (Leave oven on.) Cool completely in pan on a rack.

Halve cake crosswise, cutting through parchment, to form 2 (10-by 7 1/2-inch) layers.

Prepare soufflé layers while cake bakes:

Line second sheet pan with parchment paper.

Melt chocolate with water [i.e. double boiler], then cool to lukewarm.

Beat yolks, salt, and 1/4 cup sugar in a large bowl with an electric mixer at high speed until thick and pale, about 5 minutes with a stand mixer or 8 minutes with a handheld. Fold in melted chocolate.

Beat whites with cleaned beaters until they hold soft peaks. Beat in remaining 1/4 cup sugar, 1 tablespoon at a time, and beat until whites just hold stiff peaks, about 5 minutes.

Fold one third of whites into chocolate mixture to lighten, then fold in remainder gently but thoroughly. Spread batter evenly in lined sheet pan.

Bake soufflé layers:
Bake until puffed and a wooden pick inserted into center comes out with a few crumbs adhering, 25 to 30 minutes. Transfer pan to a rack, then cover top of soufflé with 2 layers of damp paper towels. Let stand 5 minutes. Remove towels and cool soufflé completely in pan (soufflé will deflate as it cools). Sift cocoa over soufflé, then loosen edges with a sharp knife.

Halve soufflécrosswise, cutting through parchment, to form 2 (10-by 7 1/2-inch) layers.

Make meringue layers:

Toast hazelnuts, then cool, wrapped in a kitchen towel, and rub off any loose skins.

Reduce oven to 250°F.

Finely chop nuts.

Beat whites with salt and cream of tartar using electric mixer until they just hold soft peaks. Beat in sugar, 1 tablespoon at a time, and beat until meringue is stiff but still glossy.

Line bottom of third sheet pan with parchment. Put small dabs of meringue under corners of parchment to secure to baking sheets.

Fold nuts into meringue and spread evenly in pan. Bake until set and pale golden, 25 to 30 minutes.

Halve meringue crosswise, cutting through parchment, to form 2 (10-by 7 1/2-inch) layers. Return to oven and bake until crisp, 45 minutes to 1 hour more. Cool in pan, then peel off parchment.

Make syrup and assemble cake:

Bring water, sugar, and espresso powder to a boil, stirring until sugar has dissolved. Cool.

Loosen edges of 1 cake layer with a knife and invert onto a flat platter. Carefully peel parchment from cake and brush with some of syrup. Spread with 1 1/4 cups mocha buttercream (if you really like buttercream, otherwise, just 1 cup or 3/4 will be enough).

Top with 1 meringue layer and spread with 1 1/4 cups coffee buttercream.

Carefully invert 1 soufflé layer onto buttercream and peel off parchment, then gently spread with 1 1/4 cups coffee buttercream.

Repeat layering, ending with coffee buttercream (there will be some left over). Chill at least 1 hour (after that, wrap in plastic wrap). Trim all around cake with a long sharp knife to neaten edges. Bring to room temperature (30 minutes) before serving... if you're anywhere in the middle east... otherwise, an hour ... you like to eat this chilled, not frozen but also not melting and falling apart.
Enjoyed this post? Subscribe to Fave Recipes for updates!

Enter your email address:

Delivered by FeedBurner

1 Comment

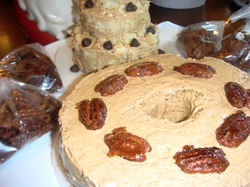
Mocha Chiffon Cake

12/10/2010

0 Comments

 
Picture
FV40-04-1210

I love this cake, that sums up everything!

Tips: Here's a guide of choosing a chiffon pan size.

1 egg recipe : 14 cm mould
2 eggs recipe : 17cm mould
4 eggs recipe : 21cm mould
6 eggs recipe : 23cm mould
8 eggs recipe : 25cm mould

Ingredients for Cake:
4 large egg yolks at room temperature for at least 30 minutes
2 tablespoons whole milk
1/2 teaspoon pure vanilla extract
3/4 cup sugar, divided into 1/2 and 1/4
1/2 cup all purpose flour or 1/2 cup and 1 tbsp cake flour
1/4 teaspoon salt
2 large egg whites at room temperature for at least 30 minutes

Ingredients for Coffee Syrup:

1/3 cup water
2 tablespoons sugar
1 teaspoon instant - espresso powder
(Boil together until sugar is fully dissolved. Cool on the side)

Preheat oven to 350 degrees F with rack in middle. Butter and line bottom with parchment paper, then butter parchment and dust with flour.

Combine yolks, milk, vanilla and 1/2 cup sugar well by whisking. Then whisk in flour and salt until smooth. (Batter will be thick)

Beat whites with an electric mixer until just soft peaks are formed. Beat in remaining 1/4 sugar, 1 tbsp at a time until whites hold stiff peaks.

Fold 1/3 of whites into batter just to lighten it up, then fold the remainder, gently but thoroughly.

Spread batter evenly in pan, rapping against the counter to release any air bubbles.

Bake until dry to the touch and pale golden, around 10-12 minutes.

Carefully invert the pan to the cooling rack and let your cake rest in the pan until cold.

Run your knife on sides and tube sides to release the cake.

Take off the parchment and brush with Coffee Syrup before spreading the buttercream icing all over.

Mocha Buttercream Icing
Enjoyed this recipe? Subscribe to Fave Recipes for updates!

Enter your email address:

Delivered by FeedBurner

0 Comments

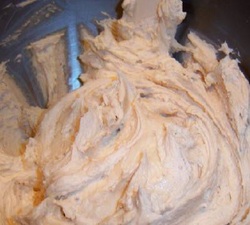
Mocha Buttercream Icing

12/7/2010

0 Comments

 
Picture
FV38-02-1210

I love coffee and this is the second coffee inspired concoction that I made and tried.

Tip 1: 4 cups of confectioner sugar if you want it thick, 3 cups if you want it thinner

Ingredients:
1/2 cup solid vegetable shortening (CRISCO can be bought from your Supermarket, next to the Indian Ghee)
1/2 cup butter softened
1/4 cup cocoa powder or 1 oz square of unsweetened chocolate, melted
3 tablespoon instant coffee/ espresso powder / strong brewed coffee (diluted in water)
1 teaspoon vanilla extract (vanilla from the pods)
4 cups confectioner's sugar or icing sugar
2 tablespoons milk

Makes about 3 cups 


Cream shortening and butter with electric mixer until light and fluffy.

Add the next three ingredients and mix well. Gradually add sugar, one cup at a time by beating at medium speed. Scrape sides and bottom of bowl often. When all sugar has been mixed in, icing will appear dry. Add milk; beat at medium speed until light and fluffy.

If you want a thinner icing, add one tablespoon of milk at a time to reach the consistency you like.

Keep icing covered with a damp cloth until ready to use. For best results, keep icing in refrigerator in an airtight container. Can be stored 2 weeks, just re-whip before using.
Enjoyed this recipe? Subscribe to Fave Recipes for updates!

Enter your email address:

Delivered by FeedBurner

0 Comments

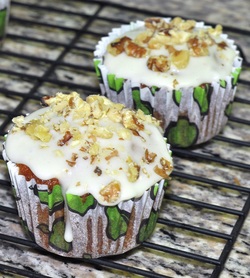
Carrot Cupcake with White Chocolate Cream Cheese Icing

11/12/2010

0 Comments

 
Picture
This is the first carrot cupcake I made and I'm very very pleased.

Tip 1: If you don't want your cupcake too sweet, then skip the icing part
Tip 2: If you do put frosting, taste a cupcake with barely-there frosting first before you go bananas and slather them all.
Tip 3: Icing ingredients makes A LOT! I'm not kidding. So, whatever is left, keep it in the fridge for next use.

INGREDIENTS
ICING - alternative frosting which I prefer, click here -->(Cream Cheese Frosting 2)

1 ounce white chocolate
4-ounce cream cheese, softened
1/2 teaspoon vanilla extract
1/4 teaspoon orange extract
2 cups confectioner's sugar
1 tablespoons heavy cream

CUPCAKE
2 eggs, lightly beaten
1 1/8 cups white sugar
1/3 cup brown sugar
1/2 cup vegetable oil
1 teaspoon vanilla extract
2 cups shredded carrots
1/2 cup crushed pineapple, I blitz it couple of times
1 1/2 cup all-purpose flour
1 1/4 teaspoon plus a dash of baking soda
1/2 teaspoon salt
3/4 teaspoon ground cinnamon
1 1/2 teaspoon ground nutmeg
1/4 teaspoon ground ginger
1 cup chopped walnuts or crushed by meat pounder :)

Makes 14 medium-sized muffins

This took me an hour.

Preheat oven to 350 degrees F. Lightly grease 12 muffin caps

For Cream Cheese Frosting:
In a double boiler, melt white chocolate over low heat. Stir until smooth, and allow to cool to room temperature.

In the first bowl, beat together the cream cheese and butter until smooth. Mix in white chocolate, vanilla, and orange extract. Gradually beat in the confectioners' sugar until the mixture is fluffy. Mix in heavy cream.

For Cupcakes:
Beat together eggs, white sugar and brown sugar in the second bowl. Add and mix-in oil and vanilla. Fold in carrots and pineapple. In the third bowl, mix flour, baking soda, salt, cinnamon, nutmeg, and ginger. Mix flour mixture into the carrot mixture until evenly moist. Fold in 1/2 cup walnuts. Transfer to the prepared muffin cups.

Bake 25 minutes in the preheated oven, or until a toothpick inserted in the center of the cupcake comes out clean. Cool completely on wire racks before topping with the icing and sprinkling with remaining walnuts.

Serve and impress! Guaranteed a yummy dessert!
0 Comments
<<Previous
Forward>>

    Fave Recipes

    I'm No Chef but I love food like it's no one's business.

    I didn't know anything about cooking... frying an egg used to be a nightmare.. until I was forced to learn more... I had my first born... that's when my gastronomic journey started...

    Join me in my food quest.
    Laugh at my embarrassing moments.
    Share my triumphs.

    And if you're brave enough ... cook with me (ooooh scary!), virtually that is, and have the most enjoyable time!

    Welcome aboard
    fellow foodies!

    Print Friendly and PDF

    Categories

    All
    Ac Spin
    Appetizer
    Baking
    Bbq
    Beef
    Bread
    Breakfast
    Butter
    Chicken
    Dairy
    Dessert
    Drink
    Entree
    Fave
    Fondant
    Gobbledtooquicklyphotosnexttime
    Halloween
    Icing And Frosting
    Lamb
    Main Course
    Marinade
    Nibbles
    Occasions
    Pasta
    Pastry
    Pork
    Poultry
    Rice
    Salad
    Sandwich
    Sauce
    Seafood
    Side Dish
    Slow Cooker
    Smoothie
    Snacks
    Soup
    Spaghetti Challenge
    Stew
    Stock
    Tapas
    Vegetables
    Workinprogress
    Zespiri Kiwifruit

    Archives

    February 2016
    January 2016
    January 2013
    November 2012
    October 2012
    September 2012
    August 2012
    July 2012
    June 2012
    May 2012
    April 2012
    March 2012
    February 2012
    September 2011
    August 2011
    July 2011
    June 2011
    May 2011
    April 2011
    February 2011
    January 2011
    December 2010
    November 2010
    October 2010
    September 2010
    August 2010

    RSS Feed

Powered by Create your own unique website with customizable templates.