Niña
​nin-ya
  • About Me
    • Contact Me
    • Tourettes
    • Geeeetar Playin'
  • My Life
  • Travel Bug-a-boo
  • Fave Recipes
    • Photo Gallery
  • Picture the Taste
  • Bright Ideas
  • Reviews
  • About Me
    • Contact Me
    • Tourettes
    • Geeeetar Playin'
  • My Life
  • Travel Bug-a-boo
  • Fave Recipes
    • Photo Gallery
  • Picture the Taste
  • Bright Ideas
  • Reviews
Niña
​nin-ya

NIÑA ​ANINIAS

SHOP. COOK. EAT.
REPEAT.

Peanut Butter and Chocolate Mallow Crispies

6/19/2012

0 Comments

 
Picture
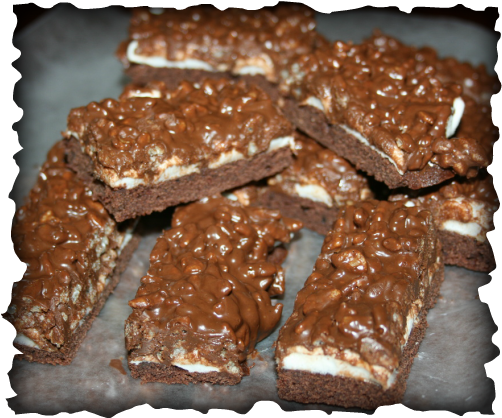
I have always wanted to make something out of rice crispies and mallows and this couldn't be any perfect. I still want to try some twists on this but this basic one is practically what I was looking for.

Tip 1: If you have a ready to use tempered chocolate, then use it for added crispiness
Tip 2: Adjust peanut butter according to your taste but keep in mind that this helps the chocolate to set so if you use considerably less peanut butter then the chocolate might be too syrupy,,, unless of course you're using tempered chocolate.
Tip 3: If you want the bars sweeter, then add additional 1/4 cup sugar to the ingredients

Ingredients:
1/2 cup unsalted butter, softened
1/2 cup sugar
2 large eggs
1 teaspoon vanilla
3/4 cup all purpose flour
2 tablespoons cocoa powder
1/4 teaspoon baking powder
1/4 teaspoon salt
2 cups mini marshmallows
1 cup semi-sweet chocolate chips
3/4 cup creamy peanut butter
1 1/2 cups rice krispies

Directions:
Preheat oven to 350F. Grease 9 x 13 inches pan, line the bottom with baking paper and set aside.

In a bowl, cream butter and sugar. Beat in eggs one at a time. Add vanilla and stir.

Add flour, cocoa powder, baking powder and salt.

Spread batter into prepared pan. Bake for exactly 15 minutes.

Evenly layer top with marshmallows. Return to oven and bake for another 3 minutes. Cool on cooling rack.

In the meantime, melt chocolate chips and peanut butter in a pan over low heat. Stir to melt the chips and combine peanut butter completely. Pour in rice krispies and spread the mixture over the marshmallow.

Rest for 10 minutes. Chill in the refrigerator for half an hour or until the chocolate is set. 

Cut into bars and serve.

0 Comments

Cake Pops

6/13/2012

0 Comments

 
Picture
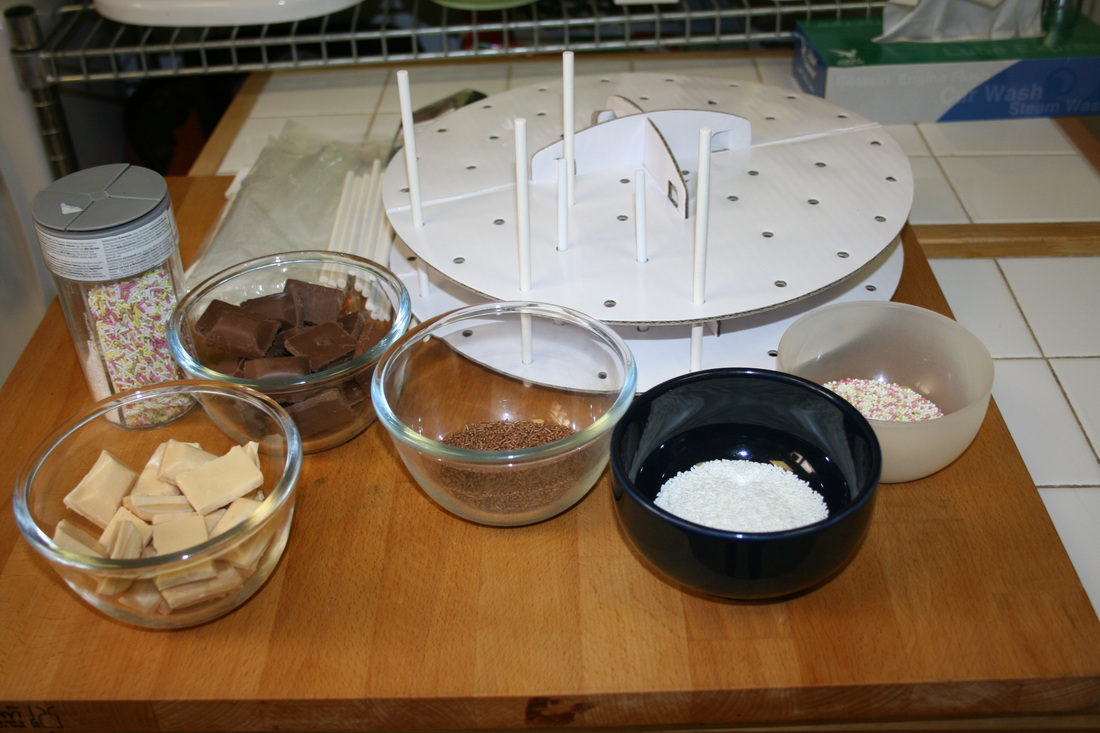
I was just gonna make this a Picture Recipe but decided against it. I have seen too many recipes and video how-tos that suggest using cake out of the box. I mean, yes it's not a bad idea but seriously? If you're not a child... out of the box cake is a let down of any adult's skills.

This foundation cake is not sweet at all, so perfect for decoration since we all know how sweet most icings are. This cake will complement your icing like burgers and french fries.

Ingredients:
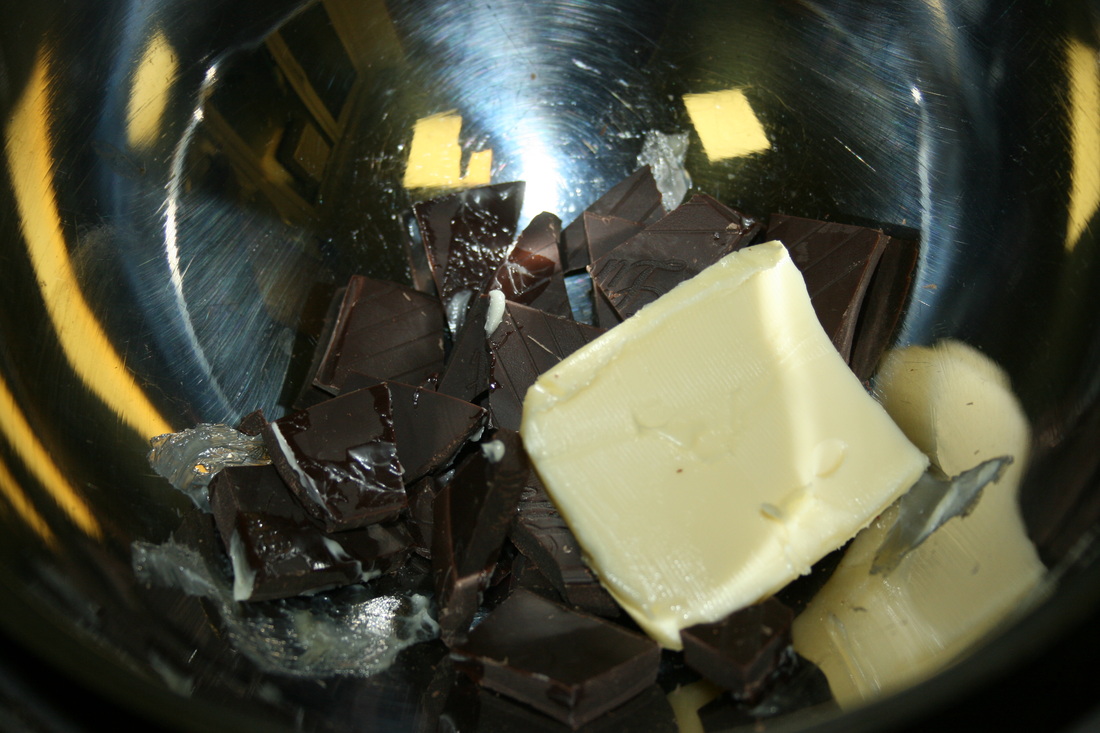
125 grams dark chocolate
125 grams butter
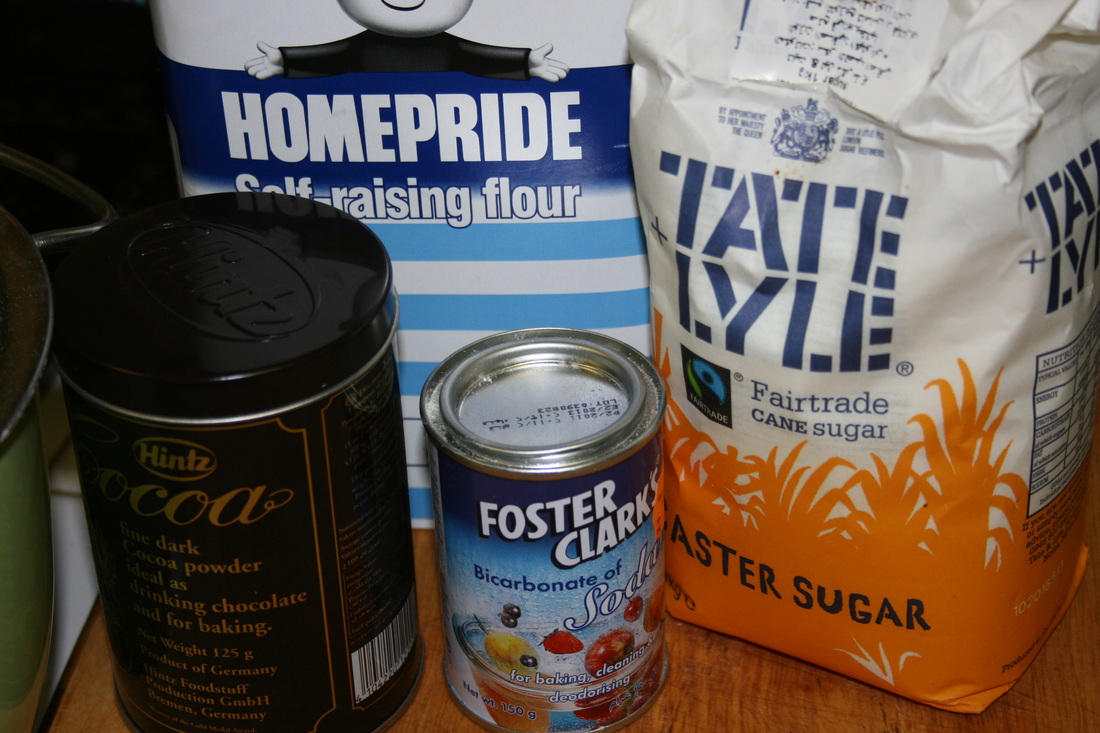
250 grams caster sugar
350 grams self-raising flour
1 tablespoon cocoa powder
1 teaspoon baking soda
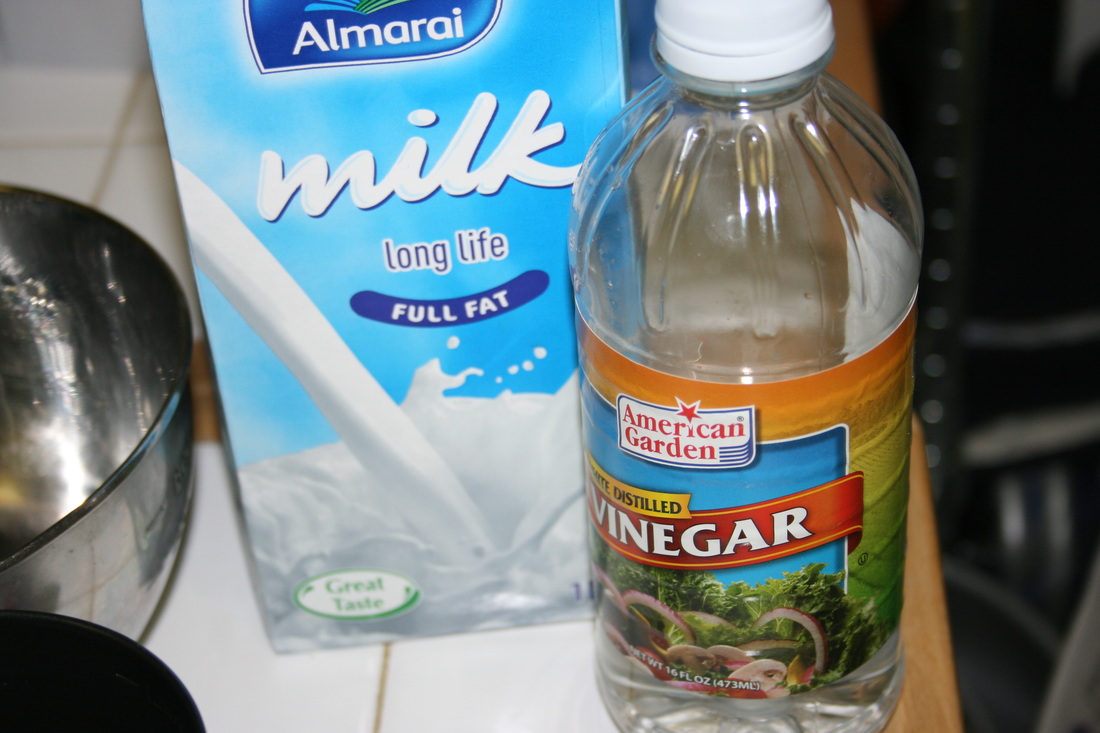
1 tablespoon white vinegar
250 ml milk
2 medium eggs

Directions To Bake:
Preheat the oven to 160C.

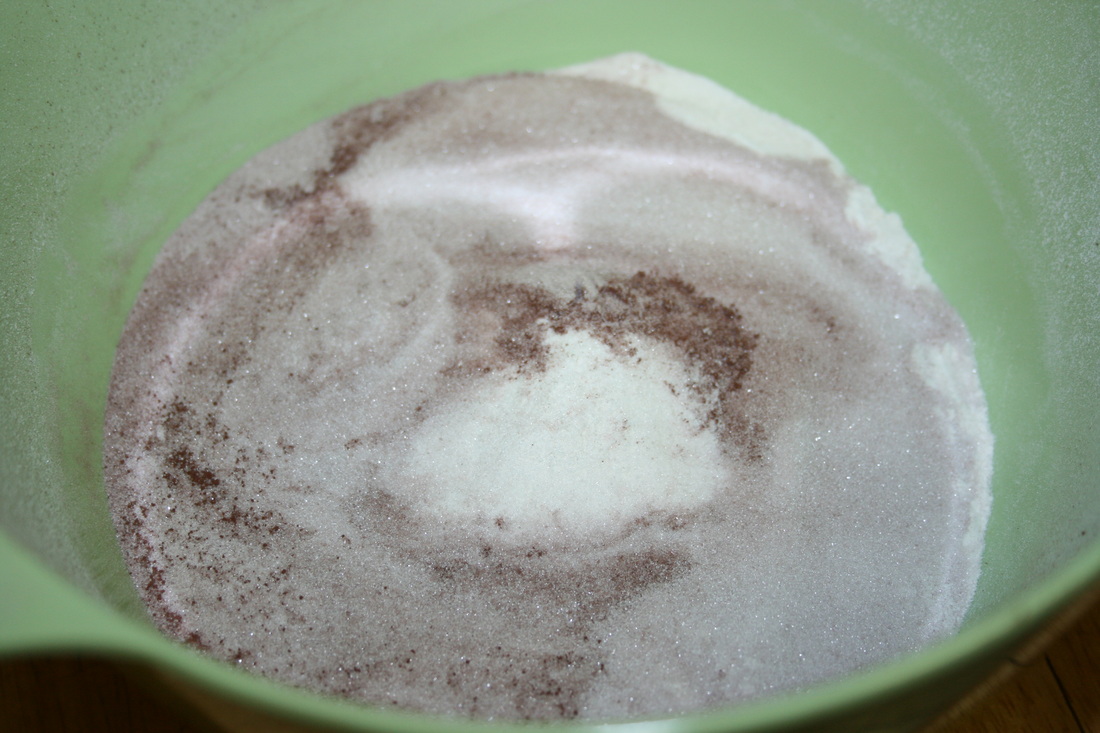
In a mixing bowl, sift, self-raising flour, sugar, cocoa powder, baking soda.

in a separate bowl, add vinegar into the milk, cultivate for 5 minutes. Add eggs and beat well.

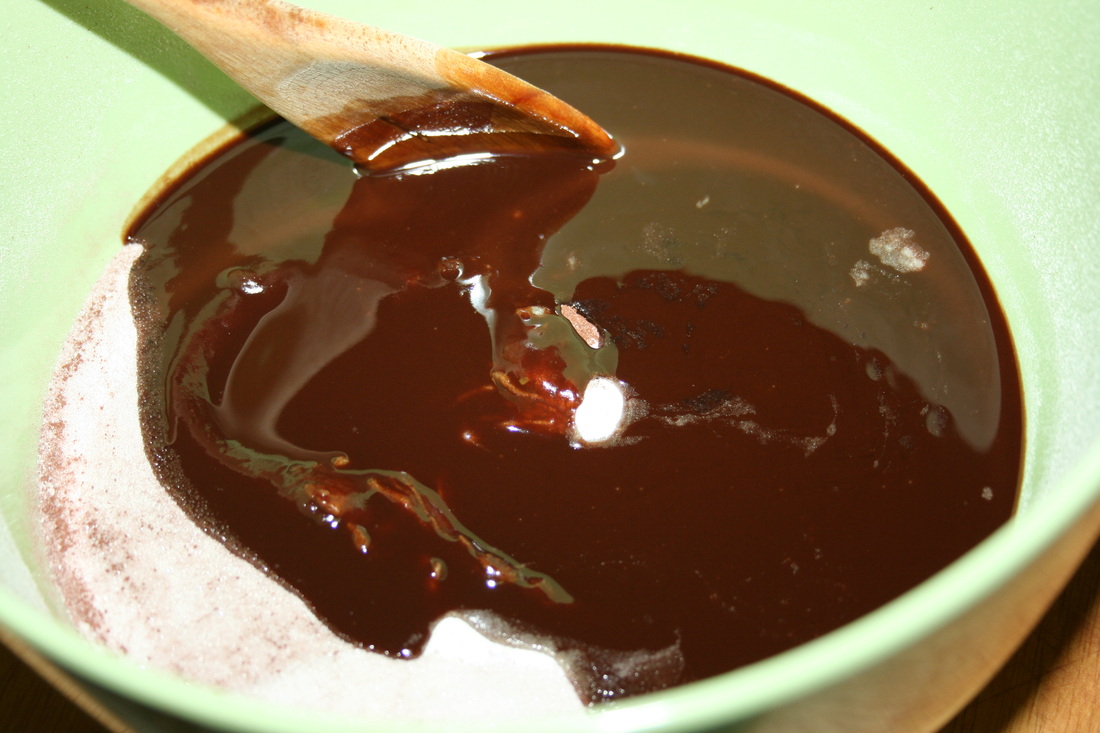
Break up the chocolate into a double boiler or a large bowl on top of a pan with simmering water. Help the melting process a little bit with a teaspoon butter. Once chocolate is melted, take it off the heat and add the rest of the butter to the chocolate. Stir until smooth. Cool for 5 minutes.

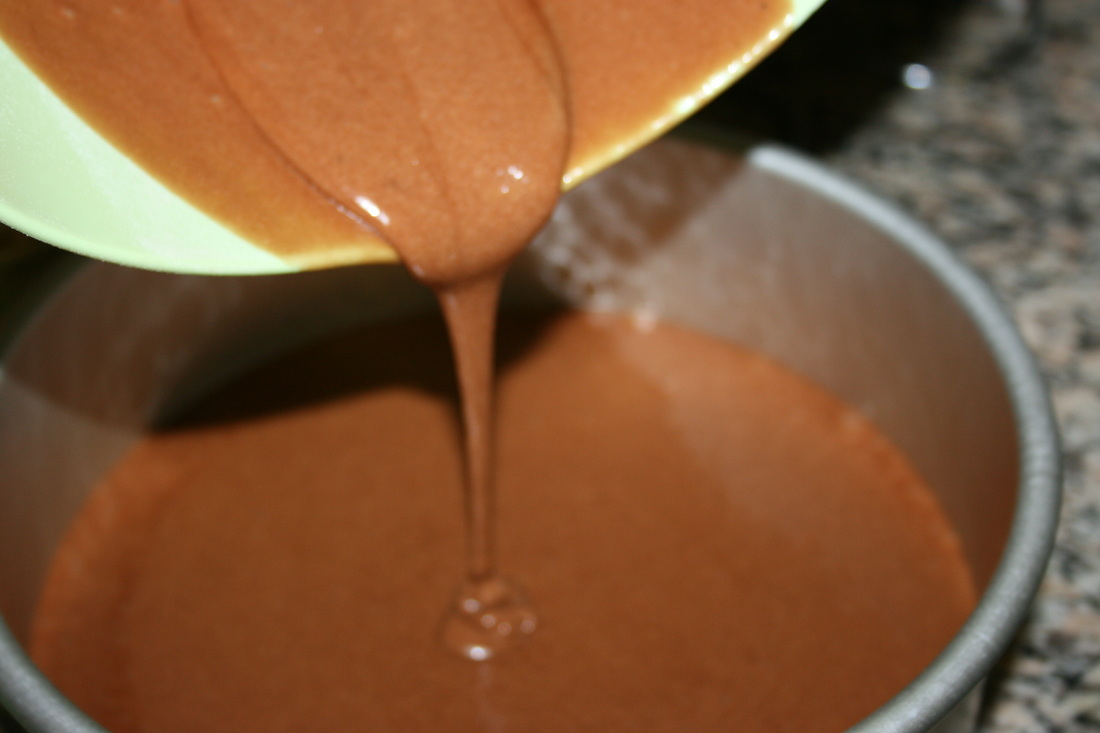
Add chocolate mixture into the dry sifted ingredients (flour, sugar, cocoa and baking soda). Add milk and vinegar concoction and beat until it's smooth.

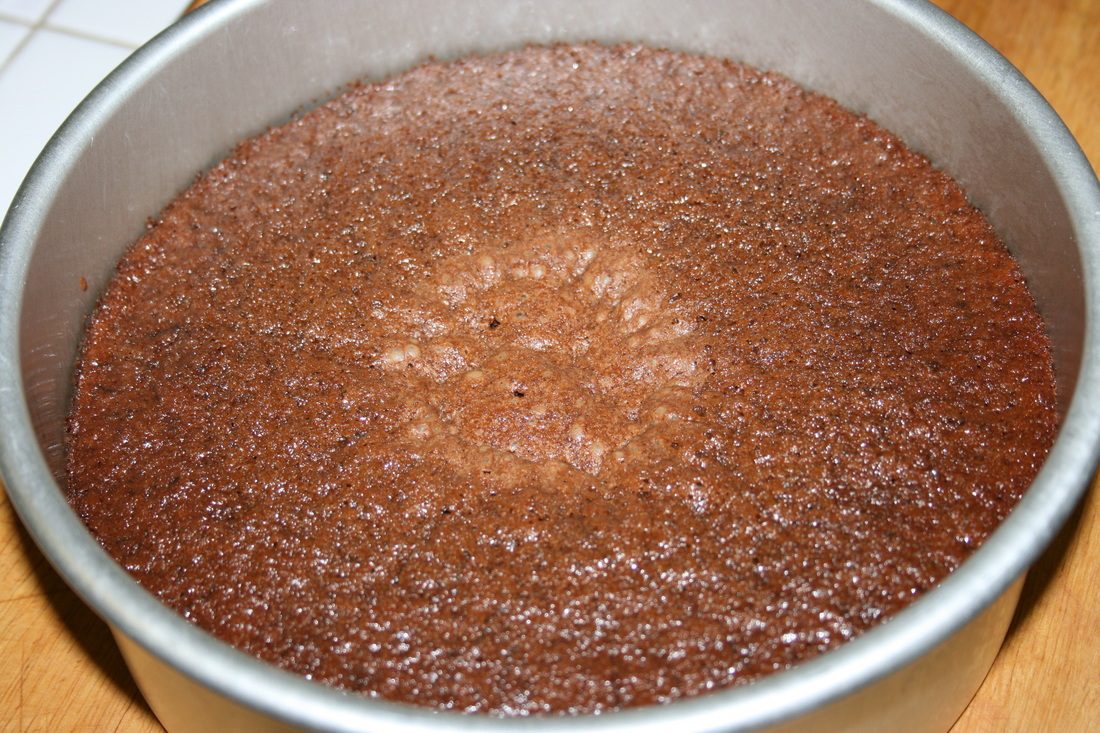
Divide the batter into the pan and bake for 1 hour and 15 minutes or until inserted skewer comes out clean. Start checking after 1 hour.

Cool in the pan for 10 minutes then turn out on a wire rack to cool completely.

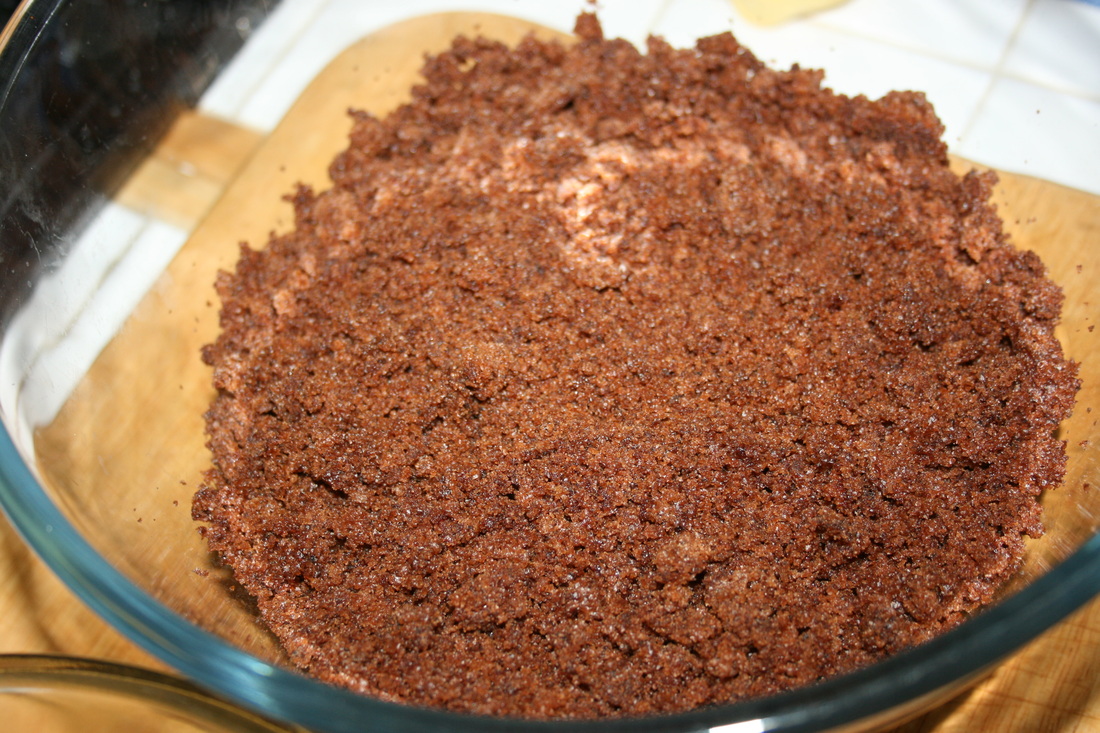
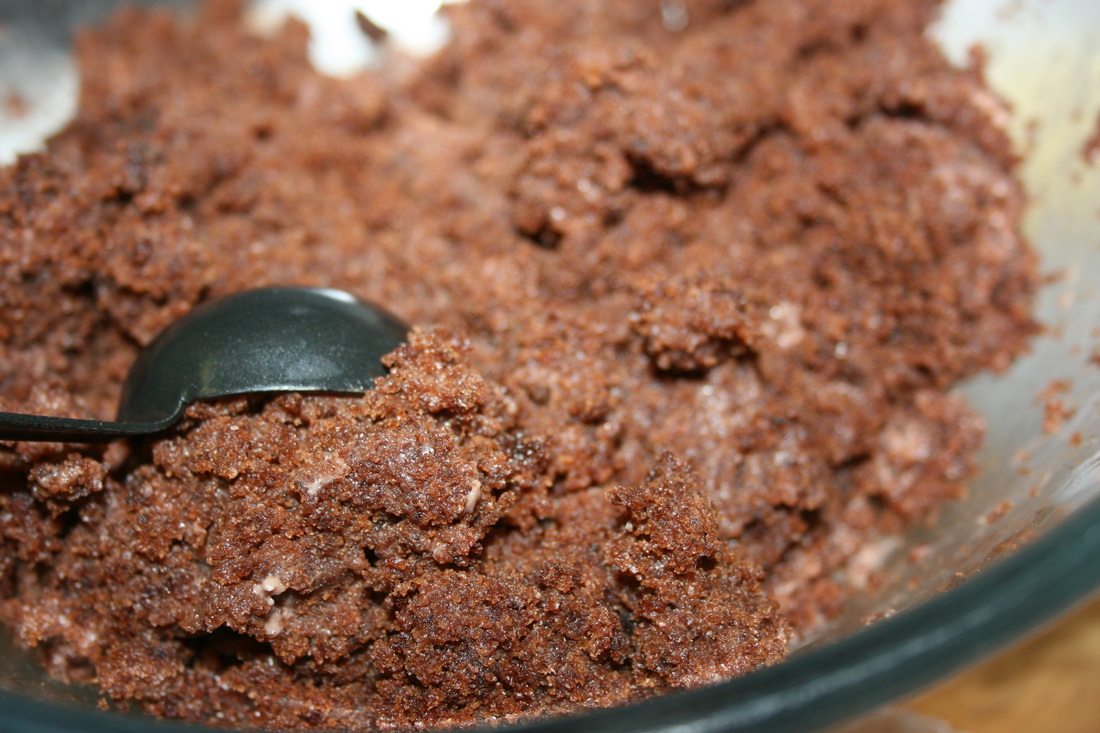
Cut it into 4 portions. Over a big bowl, rub 2 portions against each other to create small and even crumbs. If some big chunks come off your cake, just use your fingers to crumb them smaller.

To Mold:
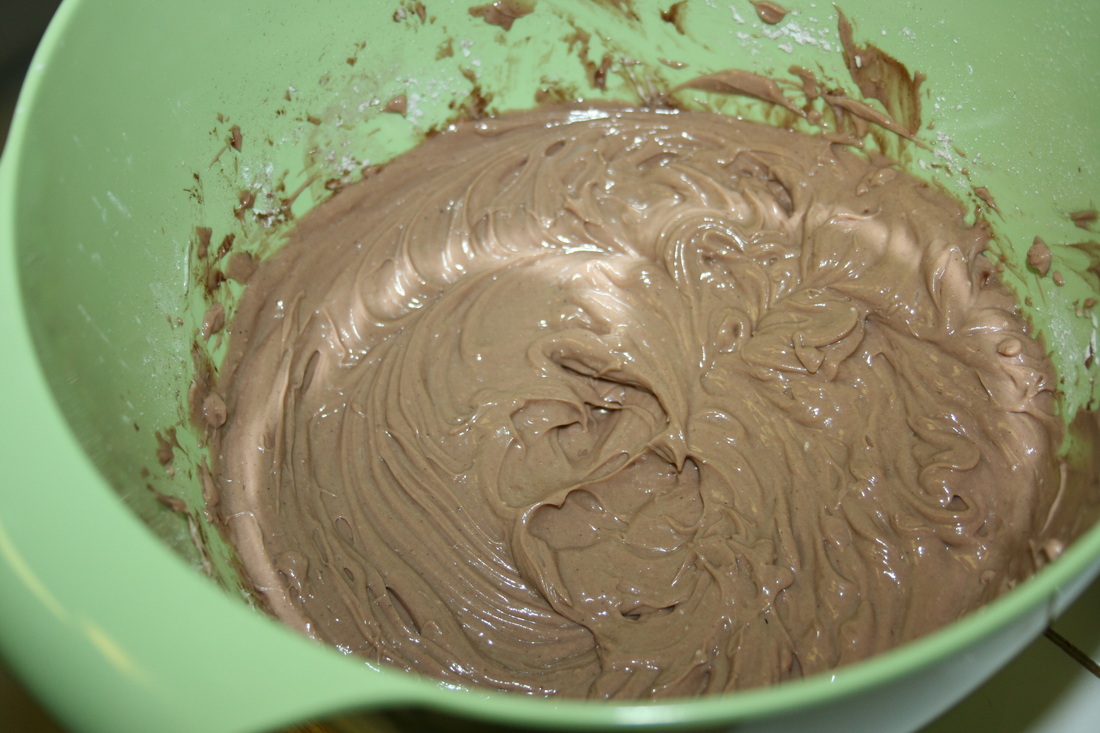
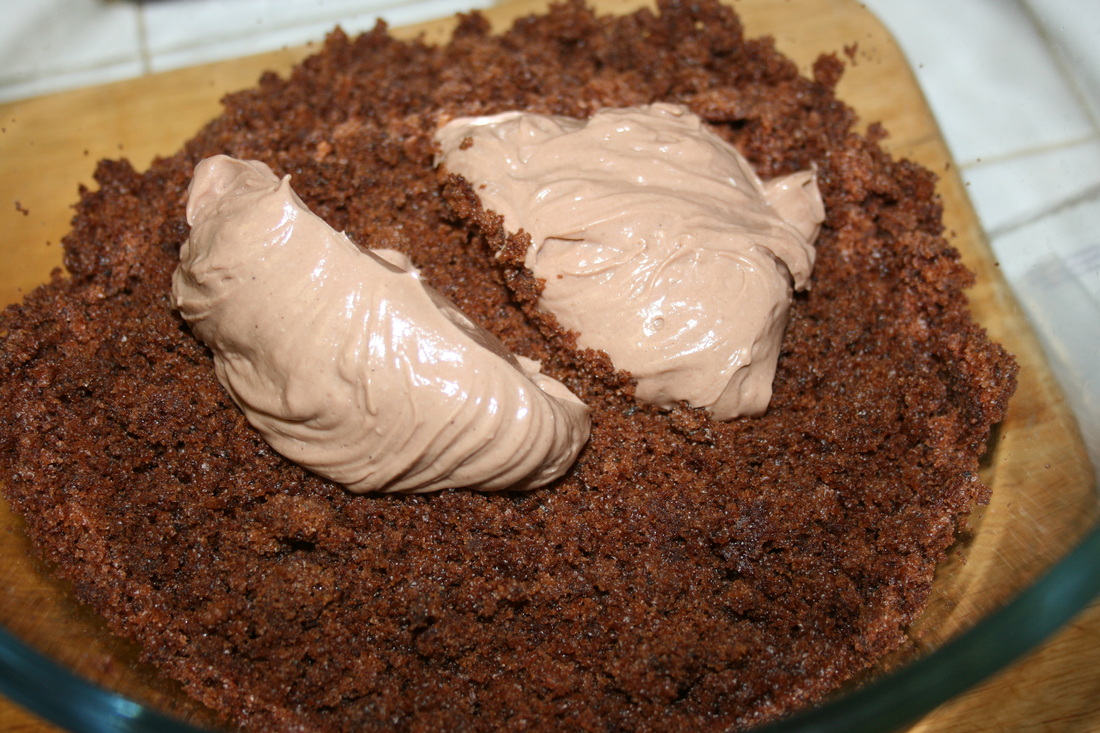
Using icing of your choice, add some blob of it to the crumbs until it starts binding. I'll leave the amount to your judgment because different icings have different consistencies. Let's just say not too saggy wet that it will fall apart and not to dry else it'll crack when you coat it... should be just the right consistency that you can form a ball. Mold one, if you're happy with it and you think it'll hold then that's it... if it's either way then modify until you get the right texture.

Use two tablesppons of cake crumbs to make a decent size cake balls. Roll it on your hands until the sides are smooth. Line a shallow cake pan with wax paper. Rest your cake balls on it. Put the pan in the fridge to toughen the balls a little bit. Some keeps them in freezers but I personally prefer just the fridge especially if I can coat it as soon as it hardens a bit.

To Coat:
Take the cake balls out of the fridge.

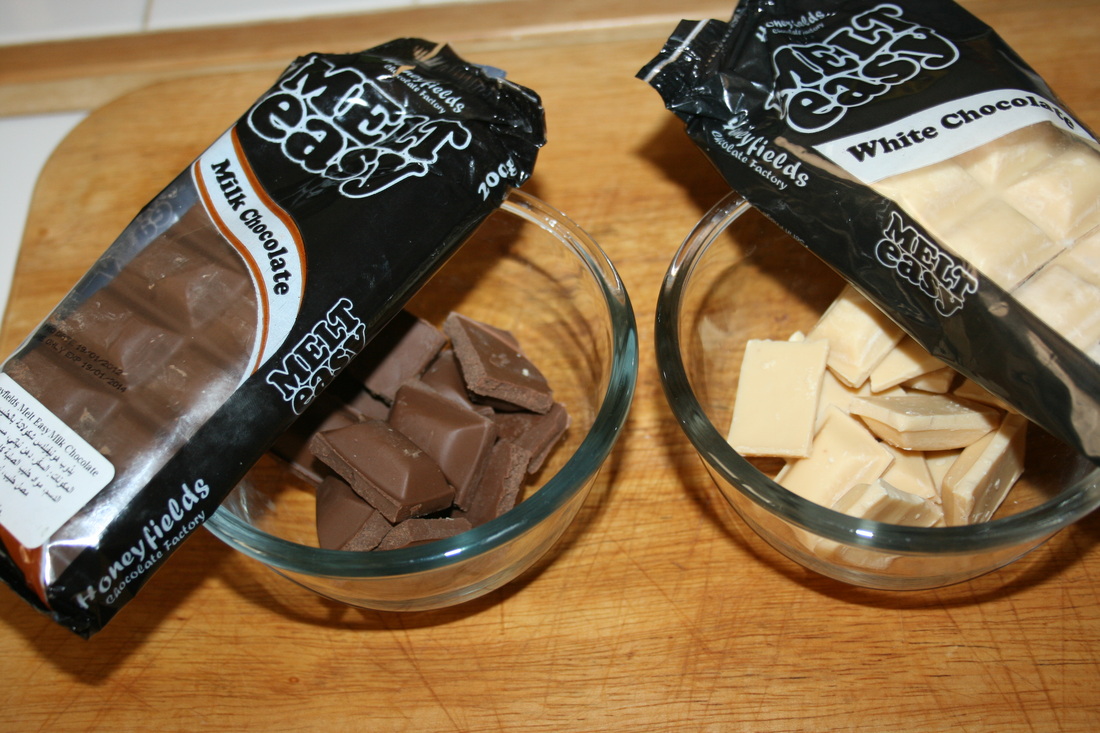
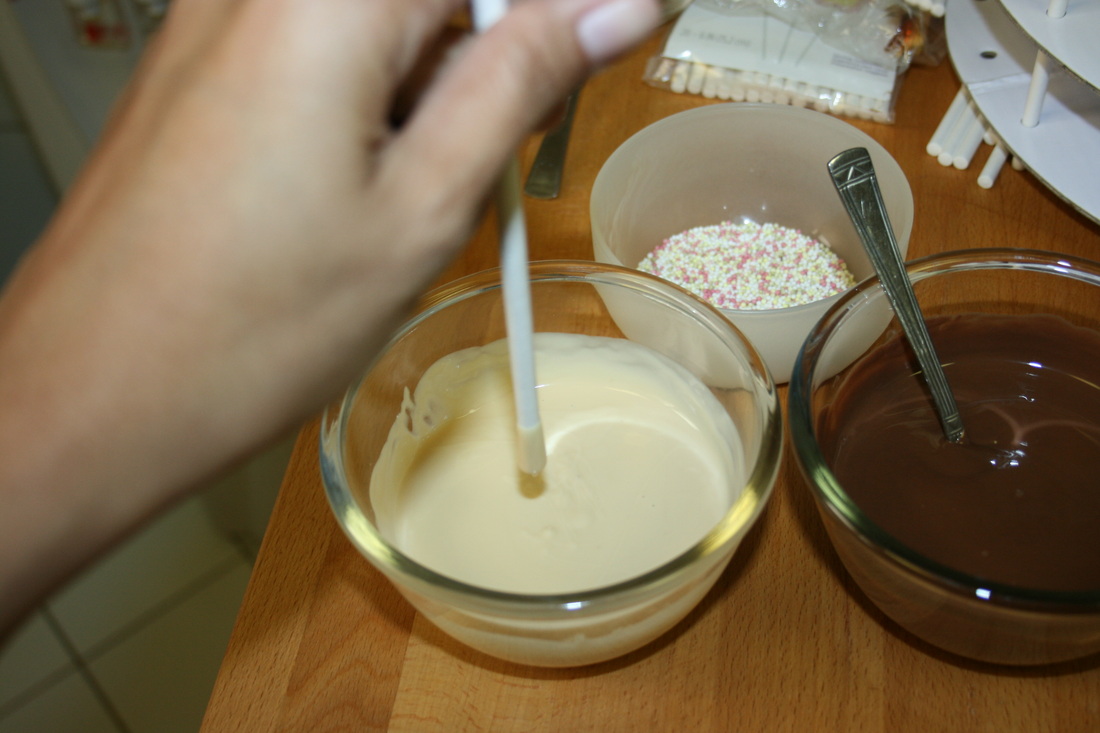
Place chocolate melts in a microwaveable dish and power it up for 1 - 2 minutes. Stir after a minute to make sure it is melting evenly.

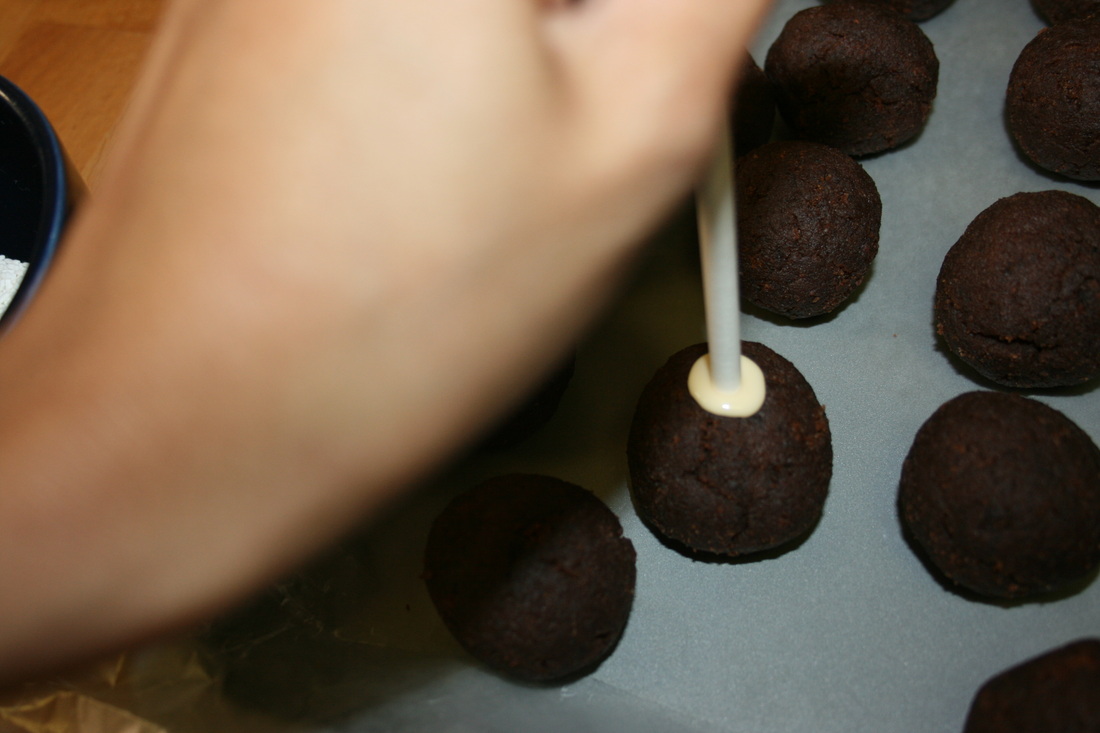
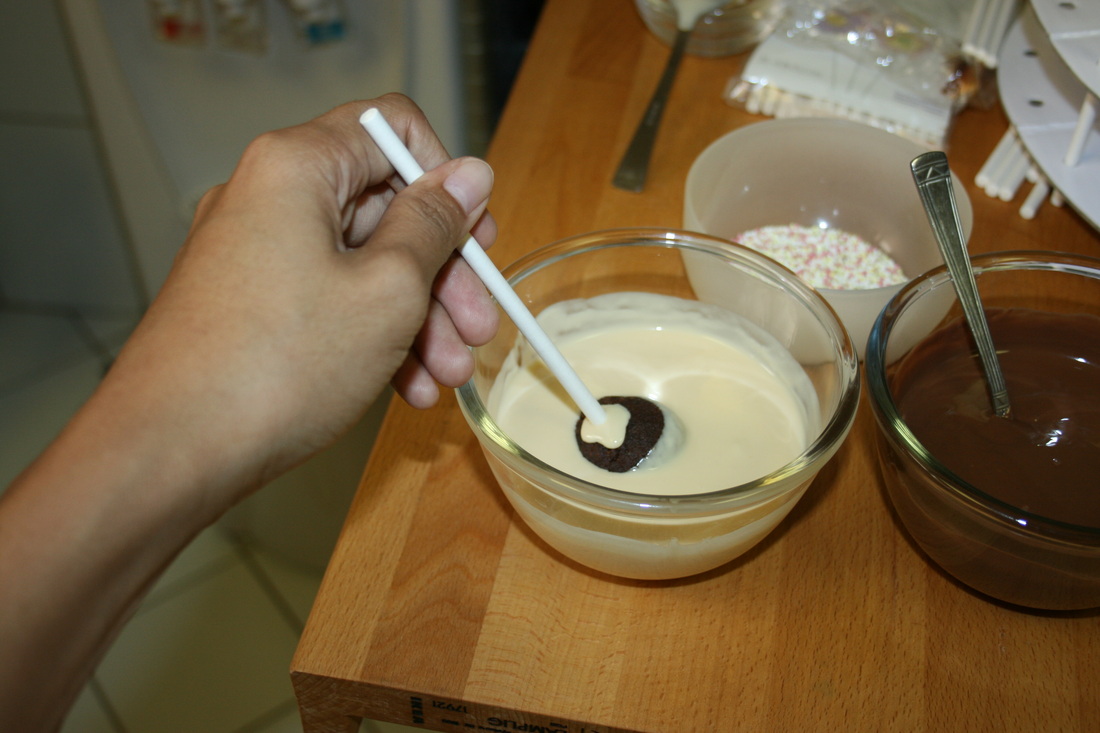
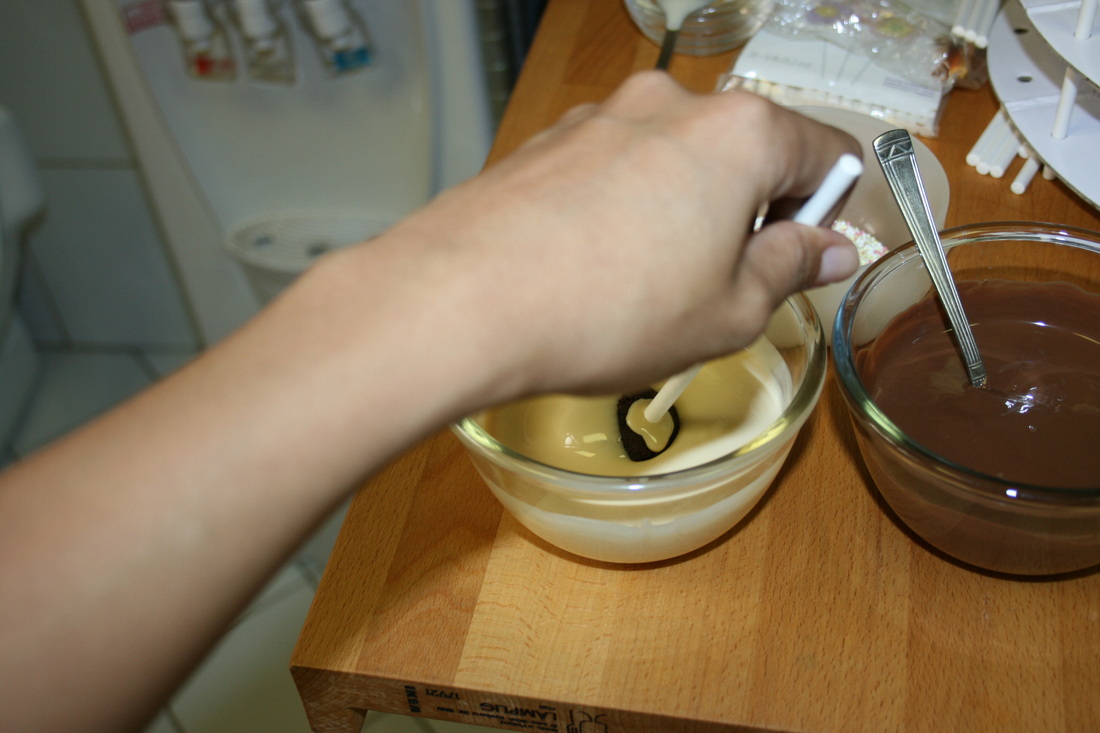
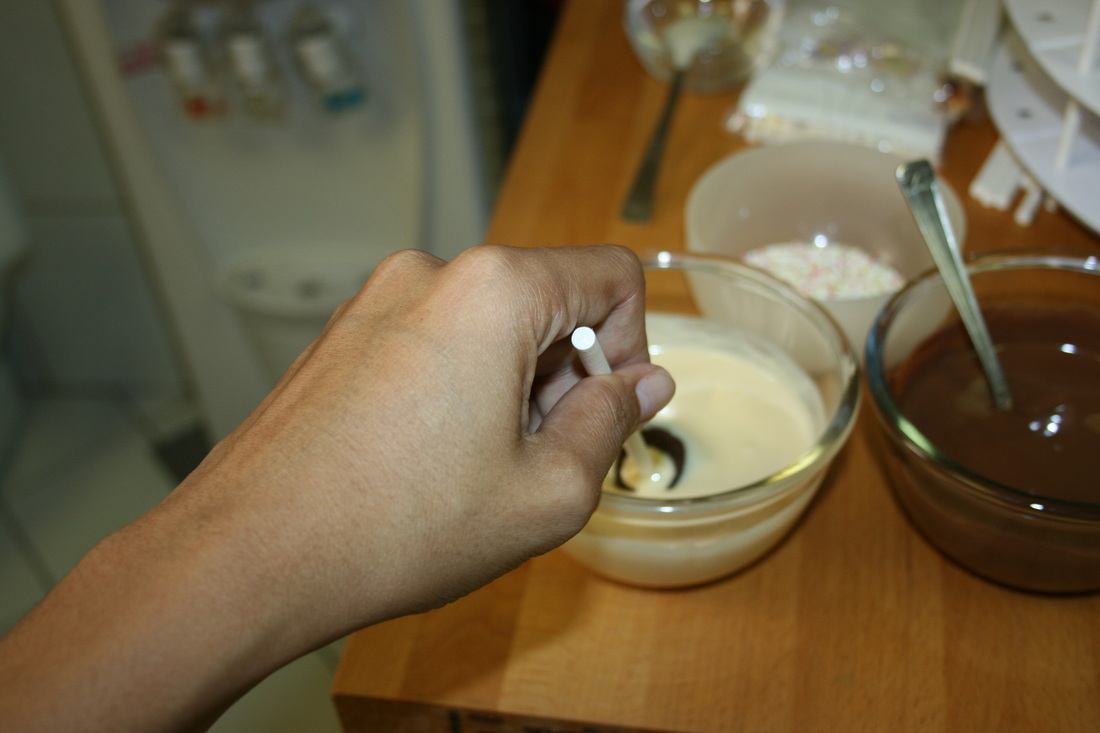
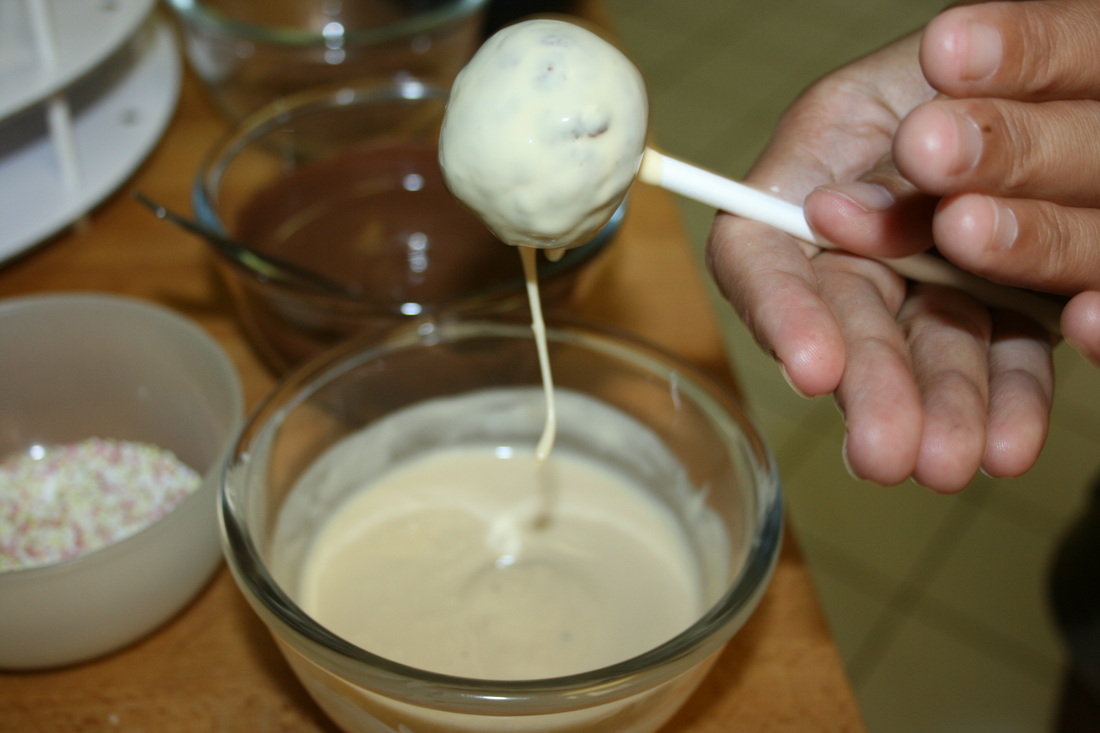
Dip your stick 2 inches into the melted chocolates. This will serve as a glue. Insert the dipped stick into the center of the ball, just before you hit the center of the ball. Pushing it farther will break the top of the ball and you dont want that

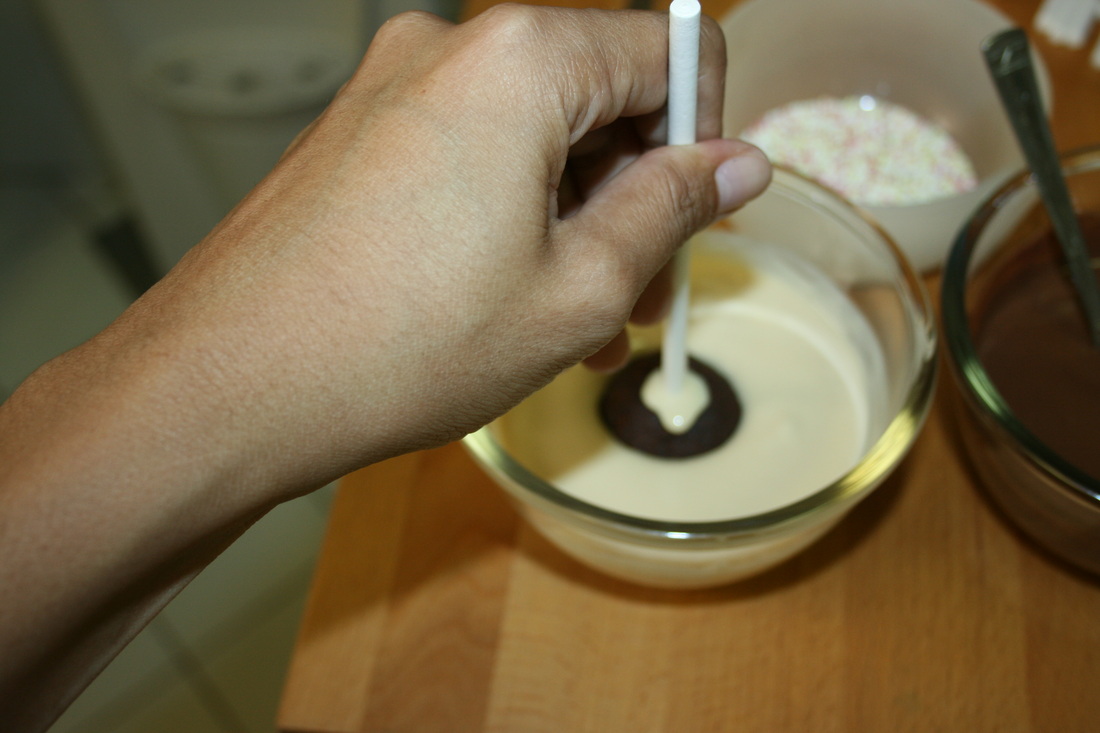
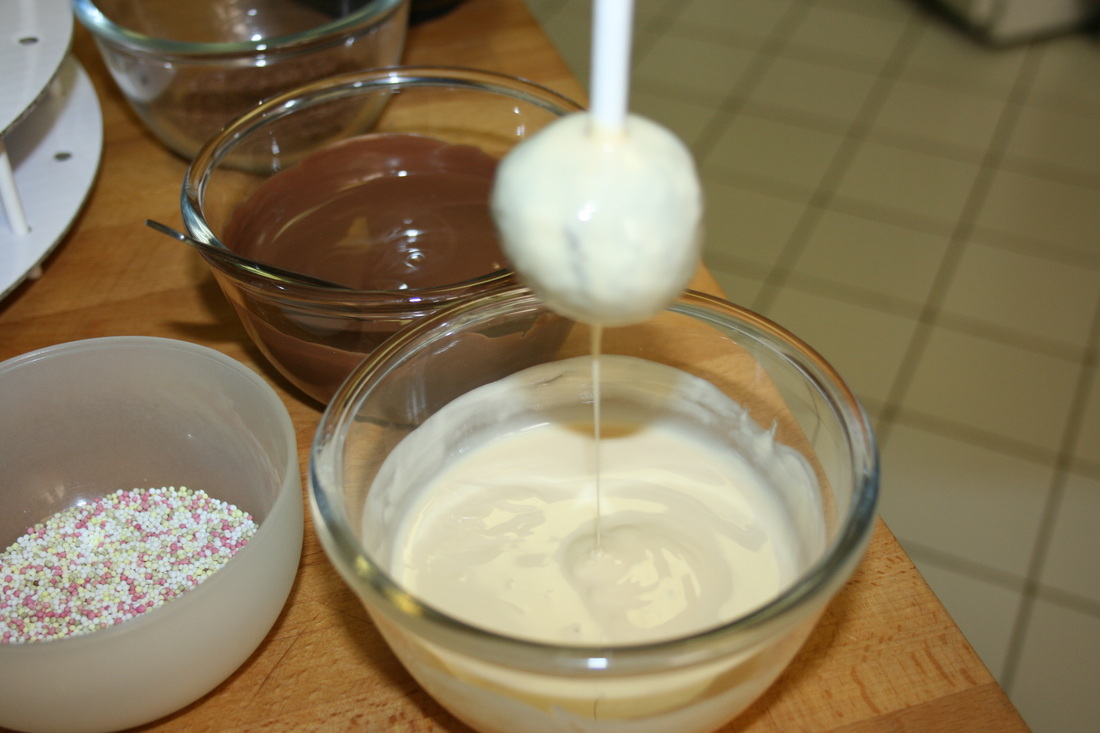
Holding the stick 180 degrees. Dip the ball ensuring it's fully covered with chocolate melts. Either by using a teaspoon to assist with the coating or by gently rocking the balls on each side. Don't stir the melt with the ball because it will loosen the stick in the center... you sould just rock it gently. Lift the ball straight, dripping excess chocolate melts on top. If you think the coating is still a bit thick on the sides, hold the stick approximately 80 degrees, while slowly rotating the stick, tap the holding palm of your hand with the other hand gently. The excess will drip on the sides. 

Before the melts hardens, you can decorate with confetti of sprinkles or a dripping of contrasting colours.

Perching the sticks on a styrofoam will keep it secure and dry. 
0 Comments

Stir-fried Noodles

6/12/2012

0 Comments

 
Picture
Stir-fried noodles or pancit is a staple for us back home. Not so much in my house but once in awhile it's nice to have it as part of a meal or have it as a snack with bread.

This noodles are especially perfect for glazed chicken wings which I recently discovered. YUM. So here it goes.

Tip 1: Any meat can be used, prawn, chicken, beef
Tip 2: Adjust the saltiness to your preference.
Tip 3: This amount is for big gatherings, if you're only cooking this for a simple meal, then cut the ingredients in half.

Ingredients:
50 grams rice noodles
1 large size onion, chopped
4 cloves garlic, minced
2 tablespoons olive oil
250 grams pork, sliced lengthwise, tossed in 1 tablespoon soy sauce
Salt and pepper to taste
3-4 tablespoons soya sauce
2 large carrot, sliced lengthwise
500 grams yellow Chinese Noodles
1 medium size cabbage, shredded
1 litre water

10 generous servings

Directions:
Soak rice noodles in warm water for 5 minutes. Drain and set aside.

In a large wok, saute onion and garlic in oil. Add pork bits. Salt and pepper to taste.

Add soya sauce and all vegetables to the wok. Cook for 2 minutes.

Add water. Bring to a boil for a minute.

Drain the vegetables & meat and set aside while returning the liquid to the pan.

Add both noodles to the pan. Mix well and cover. Let it simmer for 5 minutes.

Return vegetables and meat to noodles. Toss to mix well.

Photos next time!
0 Comments

Glazed Chicken Wings On Stir-Fried Noodles

6/9/2012

0 Comments

 
Picture
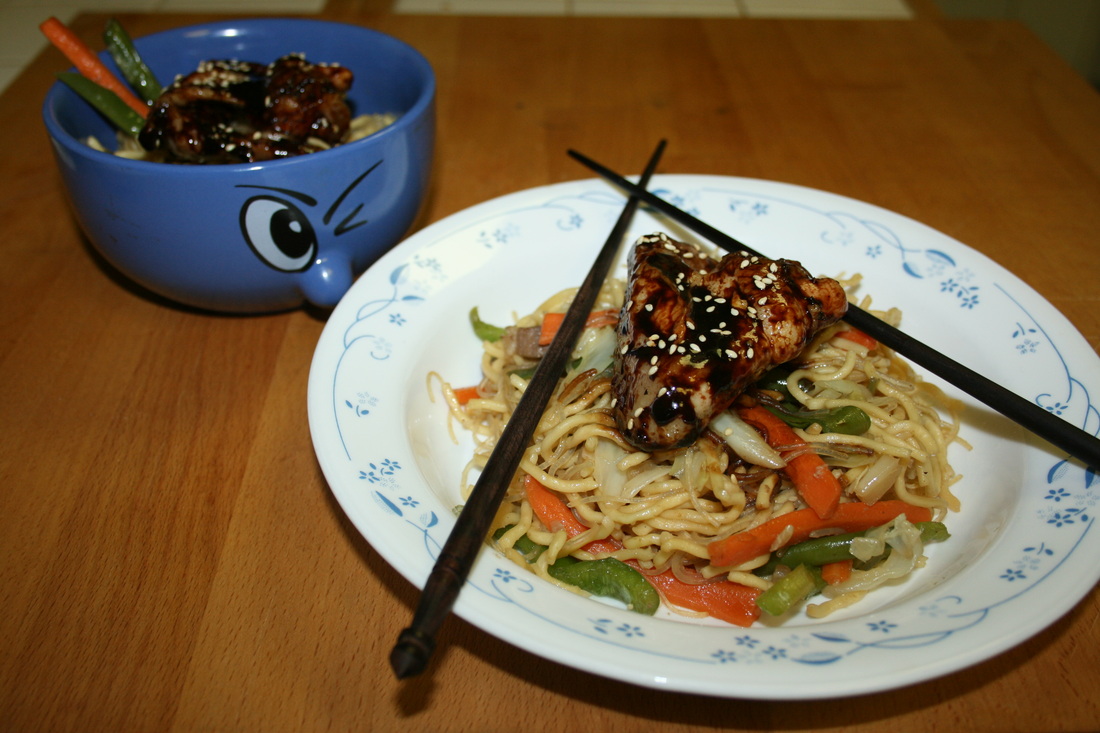
The star of this dish is the wings. You can eat it with rice, with noodles, with french fries, with whatever you want to eat it with.

There are so many great things about this dish. The awesome glaze has a taste that will please any age, it's so versatile, it's super easy that you can do other things while the wings are cooking and it is inexpensive. Dish doesn't have to be expensive to taste great.
When you're single you don't think much about how much money you spend but when you have a family, you prioritize. I think unless you're sweating money through your pores, you know exactly what I mean. Although I'm still working on this whole theory as of right now, food is my addiction... not bags, not clothes, not shoes... food. I have to constantly argue and debate with myself why I shouldn't buy that ingredient... most of the time... the evil foodie prevails... "it is worth it! when you bite on it, you know it's worth it".
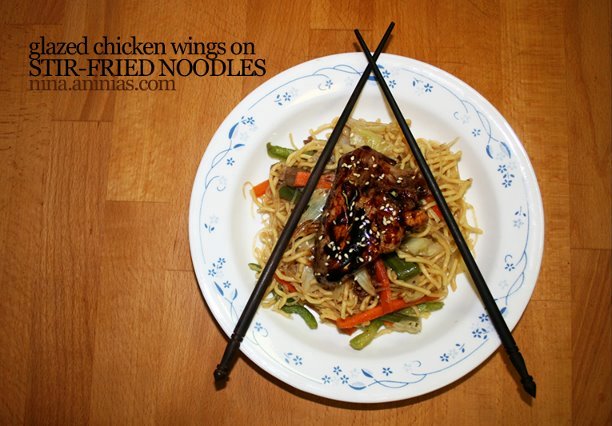

This dish.... entails no argument.

Ingredients:
2 kilos chicken wings
2 tablespoons olive oil
1/2 teaspoon salt
1/2 teaspoon black pepper
3/4 cup balsamic vinegar
1/4 cup soy sauce
2 teaspoons sugar
1 tablespoon butter
1 tablespoon toasted sesame seeds

Directions:

Line two shallow baking pans with aluminum foil. Put pans in the oven and preheat oven to 500F.

Make sure your wings are pat dry. Toss them in oil, salt and pepper and spread wings on preheated pans making sure there's no overlapping. 1 layer clean.

Roast WITHOUT TURNING! 30 minutes until golden and tender.

Whing wings are roasing. Simmer vinegar, soy sauce and sugar in a saucepan. Stir occassionally. Reduce to about 1/3 cup, approximately 12 minutes.

Remove from heat and add butter. Stir until melted.

Once wings are done, take if out off the oven and let it rest on the pan for a minute. Transfer to a clean bowl. Pour the glaze over and toss to coat well. Let is rest for some 3-5 minutes and then toss again. Sprinkle with toasted sesame seeds and serve on top of stir-fried noodles.

Will post stir-fried noodles recipe soon!
0 Comments

Victoria Sponge Cake

6/8/2012

1 Comment

 
Picture
Last week was the Diamond Jubilee Celebration for the Queen of England... oh no... I'm definitely not British now am I living anywhere close... but... The Queen of England is not just any Queen in this lifetime and it must be commemmorated in some way... and so I baked a cake that screams Brittania.

Divine way to use fresh berries I tell you. This is not really a kids' cake with all the tartness it offers... it's cake for the big boys and girls. Tart and Sweet, Creamy and Spongy... definitely healthier than most chocolate cakes I've made.

Every bite is a burst of flavour. It is freshness at its best... crisp and unadulterated.

Ingredients:
175 grams butter, softened
175 grams caster sugar
3 eggs, beaten
175 grams self-raising flour, sifted
1 cup whipping cream
1 tablespoon icing sugar

Procedures - Baking:
Heat the oven to 180C. Grease two 20cm baking tins and line with greaseproof paper.

Beat together butter and sugar until the mixture looks pale and fluffy. Gradually add in beaten eggs, beating well between each addition. Then, fold the flour.

Divide the mixture between the two tins and bake for 20 minutes or until firm to the touch. Cool in tins for two minutes, then remove and cool completely on a wire rack.

Procedures - Whipped Cream:
Beat whipping cream and icing sugar until fluffy but not stiff.

Procedures - Assembling:
Once the cakes are cool, spread the flat side of cake with freshly whipped cream. Top with slices of strawberries and whole blueberries.

Gently pressed down with the other layer of cake. Spread with some more whipped cream and finished off with berries of your choice. I love them all and so I put as many strawberries, blueberries, blackberries, and most especially, the yummiest of them all... raspberries.

Tried to copy Union Jack... it was close.. so I'm pretty happy with it.

Tuck in!

-AcousticChef, cookin one tune at a time
1 Comment

Stuffed-crust Deep-dish Pizza

5/5/2012

0 Comments

 
Picture
Who doesn't love pizza? It's one of Italian's best gifts to humanity... it's soooo comforting, it's so delicious that it can make any day so much better after a slice or two. Have it with an ice cold beer, have it with wine, soda or just plain water... either way, you know you'll enjoy the meal.

I've been eating pizza for as long as I can remember. The first one being Shakey's, then some local company, then as Shakey's popularity faded out.. it's time to turn to Pizza Hut for much needed comfort. Every now and again, I crave for gourmet pizza where unique toppings are the star.. guess it won't be the case now... I can make my own gourmet pizza!

I always thought making pizza will be easy ... didn't think it'll be super easy.

This dough is sooo good that I plan to use it in sausage rolls, garlic breads and other goody adventures.

The only tip is: have fun and be as creative as your taste buds wish you to be!

Dough Ingredients:
2 1/4 teaspoon active dry yeast
3/4 cup warm water (blood temperature, perfect to cultivate the yeast, too hot or cold and yeast will die)
1 teaspoon sugar
1/4 cup vegetable oil
2 1/2 cups all purpose flour
1 1/2 teaspoons salt
1 teaspoon olive oil
+sausage or cheese strips for stuffing if you like stuffed crust

Toppings
Bottled Pizza Sauce
----or make your own if you really want to, 1 1/2 cups ground tomatoes, 1 tsp dried oregano, 1 tsp dried basil, and 2 tblspns grated Romano cheese, combine all ingredients
Mozarella Cheese, sliced thinly
Pepperoni
Canned artichokes
Sauteed mushroom
Sauteed minced beef
Pineapple bits
Sliced olives
Parmegiano Regiano
Pepper flakes
add whatever you feel like eating...
++if you are adding leaves like rocket or spinach, add it on top when the pizza is done. The oven heat will wilt it and will destroy the colour and taste.

Dough Directions:
In your mixing bowl, combine the first 3 ingredients and stir for a minute. Add the vegetable oil, all purpose flour and salt. Using a wooden spoon, stir until ingredients starts to bind.

If you have a mixer, attach the paddle and use it on medium speed for a minute. Replace with a dough hook attachment and on medium speed, knead for another 3 minutes. Turn your dough out on a lightly floured surface and manually knead using the heel of your hands for another 2 minutes until pliable.

If you want to do it manually, knead the mixture for 8 minutes.

In a separate bowl, pour the olive oil. Turn your dough ball twice on oil until all surface is coated. Cover your bowl with cling wrap and let it rest for 2 hours. If you will use the dough the following day, do the mixture at night, keep the bowl overnight in the fridge, it will rise slower. Take it out one hour before cooking.

Shaping Directions: +now is the perfect time to preheat your oven to 475F.
If you want to make a deep dish pizza, don't punch the air out. Place the dough on the deep-dish pan, press and stretch the dough until it reaches the side of the pan. When cooked, the middle section of the pizza will be almost as thick as the sides.

If you want to make a biscuit-thin crust pizza, turn your dough onto a lightly floured surface. Press your fingers all over the dough (resembling a massage move). Flour your wooden rolling pin and roll out on all sides, turning the dough couple of degrees to get the even thinness. It also helps to stretch your dough by hand on every turn. Sprinkle a little bit of cornmeal on your cookie sheet or baking pan before transfering the dough. Roll your pin a bit more if there is enough space for the dough to stretch to make it super thin.

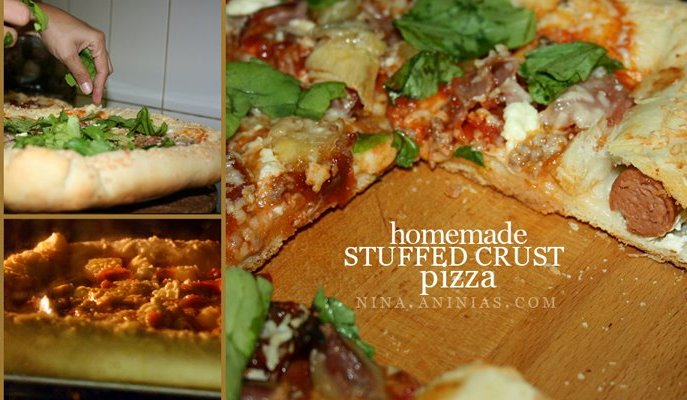
If you want a stuffed-crust, turn your dough onto a lightly floured surface. Press your fingers all over the dough (resembling a massage move). Flour your wooden rolling pin and roll out on all sides, turning the dough couple of degrees every time while also stretching the dough's sides whenever you turn it. Stop at your preferred thickness. Place your stuffing on the edge of the dough, sausage or cheese or whatever stuffing you prefer. Roll the edge inside to secure the stuffing and also create a wall. Sprinkle a little bit of cornmeal on your cookie sheet or baking pan before transfering the dough.

Assembling Directions:
Lay the mozarella slices on the dough, overlapping them to make sure you cover the surface. Spread the pizza sauce on top of the cheese. Lay on the toppings you want to munch, pepperoni, minced beef, etc. The final touch is to generously sprinkle parmegiano regiano on top. 

If you are making a stuffed-crust pizza, brush the edge with melted butter (add garlic on your butter before melting if you want it garlicky). Sprinkle parmegiano over the butter.

Cook it in pre-heated oven (475F) for 20 minutes.

Take your pizza out and rest for 3-4 minutes before slicing.

Enjoy!!!!

-AcousticChef, cookin' one tune at a time!
0 Comments

Go Bananas with Avocado Smoothie

4/6/2012

0 Comments

 
Picture
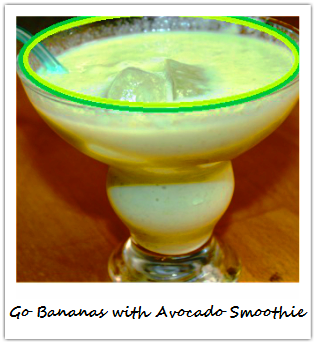
Here is the second smoothie that I made. Super easy to make, really tasty and it'll give you the energy you need if you're pulling an all nighter or if you have a busy day ahead of you.

Ingredients:
1 small avocado
1 small banana
1 tbsp white sugar
250 ml milk
3 ice cubes per serving glass

Directions:
To remove the stones and peel the skin, slice the midsection of the avocado, working around the stone. Turn the avocado around to make a clean two halves. Twist each half to separate them. Tap the exposed stone like an ax onto a wood. Twise your knive and the stones will get free. Now you're free to peel your avocado. Coarsely chop them and put it in the blender.

Peel your banana, coarsely chop and add it to the blender.

Pour milk and add the sugar.

Blitz it in the blender until smooth. 

Pour equally onto serving glass with ice. Enjoy!

I've attached a video of how to prepare avocados for cooks like me that must see how it's done to fully get the idea :)
0 Comments

Spaghetti All'Amatriciana

3/28/2012

0 Comments

 
Picture
It's solely Julia Roberts' movie Eat. Pray. Love. and her fantabulous way of eating that got me into researching for this recipe. I'm not quite impressed by the story and how the flow of it went about. It started slow, then great, then slow, then just became a little bit cheesy.

You can already guess which part ranked "great" for me. The dining part definitely made a huge impression... to my stomach!

I wasn't sure how it would taste. Movies are all about acting... so it was a risk. I hate wasting food and if the end result isn't as I expected, I'd be very disappointed! But, after cooking this... I understood... Julia wasn't acting ... it was rich, creamy and just a really beautiful dish.

I think everyone should cook it, eat it and find out for themselves how great of a dish this is. It's a typical Italian dish. It wasn't made to be complicated... it was made for you to taste each and every component of the dish and how each complements the others.

Tip 1: Use as many or as less cherry tomatoes. My husband loves how it bursts in his mouth, to think that he doesn't like tomatoes.
Tip 2: Add the basil towards the end of your cooking. Basil is one of the herbs that has lighter oil, which means if you add it earlier in the cooking, its flavour would be lost among the crowd.
Tip 3: I haven't used chicken or beef in this dish but I bet it would taste good too.
Tip 4: You can use guanciale or lardon instead of pancetta. It's just easier for me to find pancetta in the supermarket so that's why I prefer to use it.
Tip 5: Of course, if you want to use a different pasta, say a Bucatini, a spaghetti-like thicker version with holes in the middle, it's up to you. Pasta and sauces are partners. Thick sauces call for thick pastas, thin sauces call for delicate pastas.

Ingredients:
1 tablespoon Olive Oil
227 grams or 8 oz pancetta
2 large onions, diced 1/2 inch
4 cloves of garlic, minced
1 teaspoon crushed red pepper flakes
1/2 teaspoon sea salt
4-cans (227 grams or 8 oz) tomato sauce
15 cherry tomatoes optional
500 grams spaghetti
1/2 cup grated Parmigiano Reggiano plus extra for garnish
Fresh basil leaves, sliced

Directions:
Cook spaghetti in a large pot of well salted water. Cook it 2 minutes less than what the package states. Drain and set aside making sure you reserve 2 cups of pasta water for later use.

Heat the oil in a large saucepan. Add the pancetta and saute over low heat until it is brown and crispy, about 15-20 minutes. Remove pancetta and set aside.

Bring the pan to medium heat, add garlic, onions and pepper flakes. Season with salt. Cook the onions until it's transluscent, starting to turn golden and the aroma starts whafting through the air, about 10-15 minutes.

Add the sauce 2/3 of pancetta and bring to a boil. Reduce the heat and simmer the sauce for about 25 mins. Adjust the salt, as needed. Reserve 3 ladlefuls of the sauce for later use. In the last 5 minutes of simmering, add cherry tomatoes. If the sauce becomes too thick, add some pasta water until your desired consistency.

Add the drained pasta to the remaining pot of sauce. Add cheese, drizzle with olive oil and toss well to ensure the flavours are married well. If the coating is too thick, add more sauce. It should be a balanced coating.

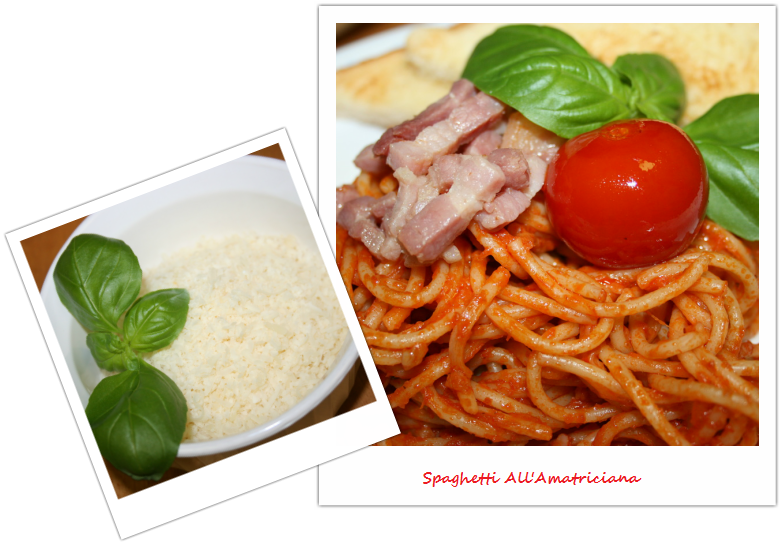
Serve on individual bowls, sprinkle additional parmegiano cheese, basil and divide the remaining pancetta on each bowl. Make sure each bowl has a cherry tomato or two. Cherry tomatoes will still be whole but once it's in your mouth, it bursts into a sweet flavour that works so well with the sauce and pasta.

Enjoy your Spaghetti All'Amatriciana, pasta in a creamy tomato and cheese sauce with a fresh flavour of basil and a good side of spcicy kick.

Related Post: Eat. Pray. Love. - Eat! Eat! Eat!

-AcousticChef, cookin' one tune at a time!
0 Comments

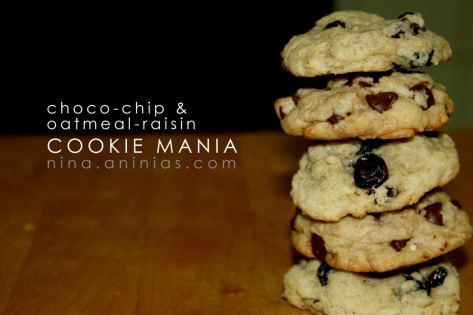
Cookie Mania - Going Back to Basics

3/24/2012

0 Comments

 
Picture
I'm mostly amazed at how easy it is for my kids to understand recipes. It took me more than two decades, hundreds of BBCfood and Food Network shows, dozens of recipe books, not to mention thousands of google research, almost to the point of hypnotherapy for any recipe to make sense. 

Since my 5-year old can't read long sentences yet, my 9-year old reads the instructions for him at the beginning. As expected Alex (the 9-year old) gets bored with the process which he considers tedious and disappears after a few minutes. He will only resurrect when food's done... he does the taste test... Alex has an amazing taste buds. So amazing that if I have to bring someone with me in one of my resto adventures, I'd bring him.

Going back to cookie mania, this is such a basic recipe that I have no second thoughts in leaving Jason (the 5-year old) to the "doing" part while I get busy with handling shutters. I have no doubts that Alex can cook or bake if he wants to ... Jason however is a natural in the kitchen. Always's been intrigued with kitchen tools, the proccess of preparing food seems so exciting to him more than anything.  

This is the first time I let him do anything from start to finish so this is Jason's coming of age in the kitchen. A milestone if you may.

Tip 1: 2 cups of flavour is up to you. It could be 2 cups of choc chips, or mixture of choc chips and nuts, oatmeal and raisins, whatever you fancy.
Tip 2: It's a "drop" cookie dough, not "rolled". So we didn't chill the dough at all, we just literally dropped the dough on the sheet, did not press it at all and let the heat melt the dough on its own. 
Tip 3: Don't doubt the timing. When you take out the cookie from the oven, it'll still be cooking for the next 2 or so minutes on the sheet. Transfer it on the cooling rack after 2-3 minutes of cooling from the sheet.

Ingredients:
1/2 cup butter, softened
1/2 cup shortening
1/4 cup white sugar
3/4 cup brown sugar
2 eggs
2 tspoons vanilla
2 1/4 cups unsifted flour
1 tspoon baking soda
1 tspoon salt
1 1/2 cups semi-sweet chocolate chips (or 2 cups mixed oatmeal and raisins or nuts)

Makes 2 dozens

Directions:
Pre-heat oven to 375F

Stir the flour, baking soda and salt, then set aside.

In a large mixing bowl, cream butter, shortening and sugar. Add eggs and vanilla.

Blend the dry mixture to the wet mixture.

Stir in the chocolate chips (or oatmeal and raisins or nuts) 

Drop by 1 1/2 tablespoon onto a parchment on a cookie sheet.

Bake for 9 to 11 minutes or until golden brown. 
0 Comments

Hot Buns - Char Siu Bao / Siopao II

3/21/2012

0 Comments

 
Picture
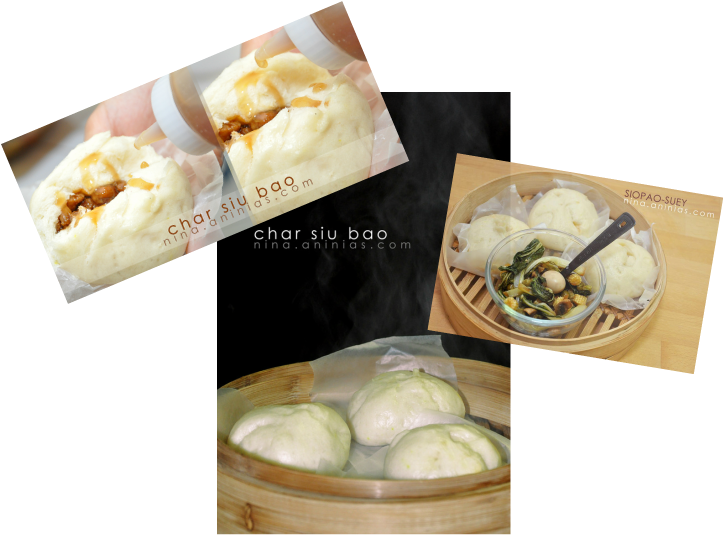
I made my first Hot Bun half a year ago and though I was proud of the recipe I discovered, I'm still on the lookout for a recipe that will make my face smile with just pure glee. I did, with this second version.

The first version was good, the flavour is reminscent of the hot buns I grew up with. However, this new one that I ventured into incorporated the old flavour while including other flavours that takes hot buns onto a different level. There is a depth of flavour that is more of a grown up version of the ones I used to enjoy.

I think the most important reason why I enjoyed making this second version more than the previous one is because I matured as a baker. Also, this recipe broke the complication down to simple and almost to point of being commonsensical. Those light bulb moments when you're doing something and your finally understood the reason behind why you're doing certain things in a particular way and realized that recipes are basic guidelines, you really don't have to follow it to the tee.

I'd like to think that this recipe is my coming-of-age recipe, because the following recipes I've taken on after this one, have somehow got deconstructed in my head. A method in reality that takes a lot of deep understanding of how the flavours should play about and complement each other even if the ingredients were prepared differently. I know I sounded uber geeky but it is what it is.
 
It will be an understatement to say that this recipe belongs to my fave list.

Tip 1: Don't be scared by the process... it's surprisingly easy! Start with the dough coz you actually leave it alone for 4 hours! While the dough is puffing up, you can easily do your sauce and filling with no pressure. You can actually make the filling and sauce the day before and keep it in the fridge! How convenient is that?
Tip 2: You can knead your dough with gloves... but where's the fun in it? I kneaded it with bare hands, of course I washed my hands really well first... then I slathered them with Crisco... yes, Minny Jackson's fave Crisco... fun! 
Tip 3: To help your dough in its rising stage, keep the dough in your oven (switched off!) with a bowl of hot water next to it. You'd be surprise how the bugger loves it.
Tip 4: If you don't have a lard, any oil will do.
Tip 5: Play around with the filling. It can be vegetarian, it can be chicken, beef, whatever you want it to be. The secret is the filling's seasoning, sauce and dough. 

To Make the Filling
Ingredients:
3 tblspoons lard or oil
2 tblspoons garlic, minced
1 medium size onion, minced

2 tblspoons dark soy sauce
2 tblspoons light soy sauce
4 tblspoons hoisin sauce
2 tblspoons honey
2 tblspoons dry sherry or xiao hsing wine
1 tspoon sesame oil
1/2 tspoon Chinese five spice (optional)
1 tspoon grated ginger
500 grams pork loin, cut into strips, about 1/2 inch wide by 1 1/2 inch long.
1 tblspoon cornstarch, diluted with 2 tblspoons COLD water

Directions:
Combine soy sauces, hoisin sauce, honey, wine, sesame oil, five spice, ginger, garlic in a small bowl. Set aside.

Heat the oil in a pan. Sautee galic and onion. Add pork bits, soy sauce mixture and simmer for 15-20 minutes.

Add the constarch mixture, cook and stir until sauce becomes the thick consistency you prefer.

To Make the Dough
Ingredients:
1/3 cup lukewarm water
1/3 cup flour
2 1/4 tspoons active dry yeast or 1 packet
2 tspoons sugar
1 cup flour
3/4 cup cake flour
1 tspoon baking powder
1/2 tspoon salt
2 tblspoons sugar
1 tblspoon oil
1/2 cup lukewarm water
1 tspoon baking powder

Directions:
Proof the yeast by combining water, flour, yeast and sugar (first 4 ingredients) in a large bowl and set aside for half an hour.

Mix in flours, baking powder, salt, sugar and oil. Continue mixing while slowly pouring water until it just forms a dough.

Knead the dough on a board until smooth, about 5 minutes.

Place the dough back into the bowl. Cover with plastic wrap and set aside for 4 hours.

Sprinkle the remaining baking powder on top and knead again.

Roll a log and divide into approximately 12 chunks or 50-60 grams each piece to be exact.

To Make the Sauce
1 beef broth cube
2 cups water
2 tbsp corn starch diluted in a 4 tblsps of cold water
1/4 cup diced onions
2 cloves diced garlic
Fresh ground black pepper
4 tbsps brown sugar
2 tbsps soy sauce
1 tbsp Worcestershire sauce
1 teaspoon salt

Directions:
Place 2 cups of water in a saucepan. Boil and add the beef cube, stir until fully dissolved.

Add onions, garlic, soy sauce, Worcestershire sauce, brown sugar, salt, ground black pepper and simmer for 10 minutes. Make sure to trap the steam by covering the saucepan. Add extra water if needed.

Add the constarch mixture, cook and stir until sauce becomes thick. Strain the liquid to get rid of the onion and other bits.

Transfer your sauce to a serving container or better yet a squishy bottle.

Assembling and Steaming Your Siu Bao:
Flatten the dough until a round shape is formed, first with your hand, then with a rolling pin.

Place 2 tbspoons filling in the middle of the dough and wrap by pulling and crimping the sides together. Gather on top and twist it around.

Place the siopao on individually cut wax paper and cook them in a steamer for 15 minutes.

You can make 12 hot buns with these recipe, prolly some left over filling and a bottle of sauce. Serve your Siu Bao hot with your home made sauce and enjoy!
 
-AcousticChef, cookin' one tune at a time!
0 Comments
<<Previous
Forward>>

    Fave Recipes

    I'm No Chef but I love food like it's no one's business.

    I didn't know anything about cooking... frying an egg used to be a nightmare.. until I was forced to learn more... I had my first born... that's when my gastronomic journey started...

    Join me in my food quest.
    Laugh at my embarrassing moments.
    Share my triumphs.

    And if you're brave enough ... cook with me (ooooh scary!), virtually that is, and have the most enjoyable time!

    Welcome aboard
    fellow foodies!

    Print Friendly and PDF

    Categories

    All
    Ac Spin
    Appetizer
    Baking
    Bbq
    Beef
    Bread
    Breakfast
    Butter
    Chicken
    Dairy
    Dessert
    Drink
    Entree
    Fave
    Fondant
    Gobbledtooquicklyphotosnexttime
    Halloween
    Icing And Frosting
    Lamb
    Main Course
    Marinade
    Nibbles
    Occasions
    Pasta
    Pastry
    Pork
    Poultry
    Rice
    Salad
    Sandwich
    Sauce
    Seafood
    Side Dish
    Slow Cooker
    Smoothie
    Snacks
    Soup
    Spaghetti Challenge
    Stew
    Stock
    Tapas
    Vegetables
    Workinprogress
    Zespiri Kiwifruit

    Archives

    February 2016
    January 2016
    January 2013
    November 2012
    October 2012
    September 2012
    August 2012
    July 2012
    June 2012
    May 2012
    April 2012
    March 2012
    February 2012
    September 2011
    August 2011
    July 2011
    June 2011
    May 2011
    April 2011
    February 2011
    January 2011
    December 2010
    November 2010
    October 2010
    September 2010
    August 2010

    RSS Feed

Powered by Create your own unique website with customizable templates.